May 3

Some of the things Kristin and I love, are pretty things with creative potential.

These are the type of bits and baubles that make us smile.


And, these are the kinds of things I found at Liz Oie’s studio where she was busy putting the finishing touches on Ree’s necklace.  There were all sorts of feathers, stones, gems, and antique pieces ready to be chosen, woven into chain or wire, re-purposed for adornment with someone else’s pleasure and happiness in mind.


Liz thinks about each woman who may wear a piece of her work as she fashions it.  She remembers a quote from Mr. Rogers that stuck with her about how it is what happens along your journey, that shapes who you are.  As Liz weaves the wire with a touch of her hand and adds the stones for each necklaces and thinks of the wearer she says, “When I am shaping my jewelry I am really adding to their journey…if I take the opportunity to notice and make it special.”

Her beautiful work is found in museum shows, Minneapolis fashion shows, New York City boutiques and on the necks of celebrities such as Julia Roberts.  Liz, a mother, wife and woman who has found a passion creating something beautiful and special for any woman says, “I love that I can make women feel good, get dressed up and feel special.  I like that I can bring some joy to their day.  When I make the Mother’s Tree of Life necklace, since every one, is one of a kind, I know that their necklace will be a unique and special representation of their family and nothing is more important, than family.”


We think Liz like her jewelry is truly a gem.  We were so pleased to have found such a special piece of jewelry to wear to remember our children we couldn’t help but share this artist’s work!  We are so happy to be able to have found her along our journey at LoveFeast Table.  Who wouldn’t want such a thoughtful artist creating a keepsake for the years?

The Mother’s Tree of Life necklace, featured yesterday on The Pioneer Woman, is made of the highest quality sterling silver available, adorned with beautiful natural gems and is sold in our LoveFeast Boutique for $199.  All orders in today will have the best chance of arriving on Mother’s Day.

*****

Thanks for visiting today!  We hope you follow along our journey of two friends who our on a creative journey themselves!  You can read more of what we have planned here with our new website and boutique that’s coming soon!  We are excited to be sharing our finds along the way!  Though there may be bumps along the way (like yesterday when our website was down most of the way) we know that it’s the journey not just the destination!!  We hope you come along with us on the dips and mountains!  We are so glad to share some time with you at our table ~ savoring a beautiful life!!  ~Chris Ann & Kristin

Share and Enjoy:
  • Facebook
  • TwitThis
  • StumbleUpon
  • Technorati
  • del.icio.us
  • Digg
  • Google Bookmarks
  • LinkedIn
  • Live
  • MySpace
  • Twitter
Dec 12
Coffee Kisses Cookies
Posted by ChrisAnn in Holiday Cookie Exchange, Our Guests, Recipe on Dec 12th, 2010 | Comment Bubble  5 Comments »

We are so happy to have Rosa sharing her recipe all the way from her beautiful Geneva countryside village situated in the French speaking part of Switzerland.   Her blog is filled with delicious eats as well as beautiful photography of nature.   Some of her loves include music, nature, cats, books and films which can all be found on her blog Rosa’s Yummy Yums.  We’re so glad to have her join us at our table! ~Chris Ann & Kristin

******

Coffee Kisses 3 bis

For me Christmas is synonymous with cookies, cocooning, good food and birthday bashes. Having been brought up in a non-religious family which believes were more Pagan-based than god-fearing this time of the year had a totally different significance for me than for the pious people…

“Noël” has always been about the celebration of Yule, the winter solstice which doesn’t involve Jesus or angels (those heathen traditions were absorbed by the Christians much later and their iconography was replaced by that of the men of God), but rather the reverence of the cycle of life (“Yule” meaning wheel in Germanic – wheel of life represented by the changing of seasons, the cycle of light and darkness, death and birth). It is then that we are reminded that it is the darkest period of the year, yet it also marks the rebirth of light. This reawakening of the sun who is the giver of warmth, life and light represents an important turning point symbolized by hope and joy, hence the festivities.

Snow Veyrier 1.3 bis LOVEFEASTTABLESnow flowers 1.1 bis LOVEFEASTTABLE

Unfortunately, my birthday has to fall exactly on Christmas day/Yule and I have to share it with Jesus, so that means presents only once a year and a day which isn’t entirely dedicated to me. Quite a tragedy for a kid. As you grow older it becomes less of a calamity, although it still sucks big time. Anyway, I nonetheless had a wonderful time even if we spent the holidays at home and had no big get-togethers as my grandparents lived in England, my Swiss grandparents were too old to come and as we had no contact with most of our relatives. I would lie if I told you that I didn’t feel a little lonely and was envious of others who had crowded parties, but it was all I ever had known. Rarely did we gather with our family and friends to enjoy a festive meal and exchange gifts. Loud cheers and laughter were quite a rare thing at home…

Once though, when I was about six we traveled to England to visit my grandparents who lived in a youth hostel in the Stratford-Upon-Avon area (birthplace of Shakespear), Warwickshire. They were the wardens at Hemmingford House, a splendid Georgian mansion which is set in over three acres of grounds in the tranquil and quaint village of Alveston. During the end of year celebrations, the hostel was not open to the public and I was free to wander through the beautifully tiled long corridors of the dormitories, ride my bike through the rural village, visit the multiple annexes and roam in the immense property garden that was populated by many wild rabbits as well as hedgehogs. The perfect place for a kid.

That very Christmas was magical and just like the ones you see in glossy English lifestyle magazines. Everything was covered with a thick coat of snow, the air was crisp, silence was omnipresent and the postcard-like countryside looked so secretive and peaceful. On the 24th we had a fantastic 100% homemade British meal (my grandmother is an extremely good cook/baker and a great source of inspiration) with turkey, sage and onion stuffing, creamy mashed potatoes, buttered Brussel sprouts, luscious gravy, lush trifle and tantalizingly moist & versatile fruit cake (the kind that was made months in advance, soaked with brandy and topped with marzipan). Then we attended Christmas mass at St. Helens church for the sheer beauty of the moment (choir & mystic atmosphere) and then went to bed.

That night, before saying night-night, I had put a few biscuits in a plate and filled a glass with sherry that I placed on the living room table next to the settee. This ritual made me very feverish. Like most kids of a certain age I believed that Santa would come in person to put the presents under the tree and sit down a for a short moment while enjoying my food gifts. Aaahhh, those times of innocence are so beautiful and priceless!

As I tried to find sleep, I remember hearing a big thud against the apartment door that led to the dorms and with much excitement thought to myself  “That must be Santa, he is here!!!” (a few years later I learnt that on this very evening both my father and grandfather were the ones who had “played” Santa LOL). You can imagine that after this episode it was very difficult to close my eyes, so after a few hours of lying awake I finally fell asleep from exhaustion. The next morning I was the first to get up. The prospect of seeing the imprint on the couch where Santa had sat while drinking his sherry and eating his cookies and the sheer idea of opening my presents was just unbearable and sent shivers down my spine. Once everybody had come out of bed and had washed, time had come to discover what was hiding behind the shiny paper wrappers. I always loved that delightful moment when you rip the paper of and uncover it’s content. What a dazzling feeling!

Magnificent memories that cannot be washed away with the years.

Rosa Lovefeastatble

Without a doubt, “Coffee Kisses” are the cookies that come to mind when thinking of England and my grandparents. As a child, every time I visited them I begged my grandmother to bake those irresistible cookies with me. She accepted very reluctantly as she hated having people “in her legs” while she was busy in the kitchen and was not to hot at the thought of baking with a messy and energy-ladden kid. Anyway, for my greatest pleasure I always won after a few hours of supplicating and haggling!

Coffee Kisses 1 bis

The recipe we used came from one of her old 60’s Be-Ro cookbooks (she nearly had the whole collection since the 50’s). Those little brochures are chock-a-block full of classic British pastry recipes that are all excellent. Some years ago, my grandparents sent me my very own copy. Really thoughtful of them. I am so glad to be the proud owner of that leaflet as it is very handy as I am constantly using it.

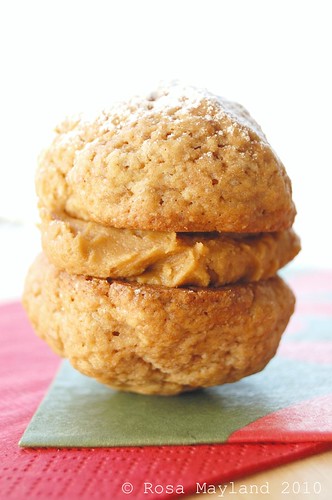
Even-though we never made those “Coffee Kisses” specifically for Christmas I now love to add them to my selection of baked goodies as they are just heavenly and so festive. They have such an exhilarating coffee aroma and are blissfully delicious. It is impossible not to fall in love with those whoopie pies-like sandwich cookies and be totally addicted to their crisp crust, softish interior and lipsmackingly buttercream filling. Little bites of heaven.

Coffee Kisses

Recipe adapted from Be-Ro.

Ingredients for the “Cookies”:
180g (6 oz or 12 Tbs) All-purpose flour
3/4 Tsp Baking powder
75g (5 Tbs) Castor sugar
1/4 Tsp Sea salt
75g (5 Tbs) Unsalted butter
1 Medium egg, lightly beaten
1/2 Tsp Pure Vanilla extract
2 1/2 Tsp Instant coffee
l Tbs Hot water
Ingredients for the “Coffee Buttercream”:
50g (2.7 oz) Unsalted butter
100g (3.5 oz) Icing/powder sugar, sieved
2 Tsp instant coffee
1 Tsp Hot water

Method for the “Cookies”:

1. Heat the oven to 180º C (350ºF).

2. Dissolve the instant coffee in the hot water and set aside.

3. Mix the flour, baking powder, sugar and salt together.

4. Rub in the margarine in order top obtain a sand-like consistency.

5. Mix the egg, vanilla extract and the coffee essence together and add to the flour mixture, mix well until it comes together.

6. Divide the pastry into balls the size of a walnut.

7. Place them on a baking sheet lined with sulfurized paper and bake for about 15 minutes.

8. Remove from the baking sheet and let cool on a rack.

Method for the “Coffee Buttercream”:

1. Meanwhile make the coffee buttercream by creaming the butter and gradually adding the  icing sugar. Mix until fluffy and light.

2.  Dissolve the instant coffee in the hot water and add to the butter/sugar mixture. Mix well.

3. Sandwich the cookie shells in pairs with the coffee buttercream and serve immediately (otherwise the cookies will get soft).

NOTE: I recommend that you use a stand mixer for making this recipe.

******

Thank you to Rosa from Rosa’s Yummy Yums for joining us at the table! ~Chris Ann & Kristin

button-cookie-exchangeBibi November 2010 1.1 bis_picnik

Share and Enjoy:
  • Facebook
  • TwitThis
  • StumbleUpon
  • Technorati
  • del.icio.us
  • Digg
  • Google Bookmarks
  • LinkedIn
  • Live
  • MySpace
  • Twitter
Dec 11

As soon as we got on twitter one of the first twitter “handles” to catch our eye was @lifesafeast.  We knew right away we had found a kindred spirit.  Our American friend, Jamie writes her blog from France where she lives with her husband and sons.  She is a Contributing Blogger for Huffington Post Food and a co-founder of the new From Plate to Page Workshops for food bloggers.  She nourishes her soul with food, baking, sharing and writing.  Those who visit her blog, Lifes A Feast will be filled with her stories and feast on her mouthwatering pictures. We are so happy to have her join us at the table! ~Chris Ann & Kristin

******

THE MEANING OF CHRISTMAS to a Jew

AND COOKIES FOR GIVING
IMGP4285

Tiny white fairy lights trailing across windowsills and tabletops, swags of gaily-colored bulbs shimmer in the night all across town lending a ghostly glow to the darkness, an air of something festive. The fresh scent of evergreen, the holiday music putting a bounce in your step, there is definitely a feeling of Christmas in the air. I love Christmas. Even as a small child, I felt the excitement mount as the decorations went up all over town, I sensed that special holiday energy in the air, an electric buzz of peace on earth and goodwill towards men.

Yet I don’t celebrate Christmas. Both of my parents were raised in orthodox Jewish households in large New York Jewish communities. They married and had a family and moved south to Florida, to a new land populated with a new people and they soon found themselves in very non-Jewish surroundings. And although they no longer observed the laws of the religion as strictly as their parents had done, we celebrated all of the Jewish holidays, went to Shabbat services on Friday nights and quite often on Saturday mornings as well, we went to religious school every Wednesday and Sunday, belonged to the youth group and were completely faithful to our religion.

So we were raised observing the Christmas holidays from afar, and sometimes pretty close up: school Christmas plays and Christmas carols, gaudy decorations and garlands of colored lights hanging from every tree and rooftop, Jolly Santas and rotund Snowmen popping up in every yard and shops and stores filled with Christmas candy, Christmas displays, Christmas gifts to delight and tempt any kid. Yes, I grew up surrounded by the Christmas magic, fascinated, drawn to this holiday that we didn’t celebrate like a moth to the flame. We celebrated Hanukkah. Eight days and eight nights of candlelight and potato latkes and gifts, Hanukkah was a fun, festive yet rather low-key affair in our home, so the gorgeous, elegant tree standing proudly in our neighbor’s front window was a wonder, a thing of beauty to this simple Florida girl, and my imagination ran high even as I recoiled at the thought of being obliged to celebrate at school. Every single year, our grade school put on a Christmas pageant and there I was, in the chorus, singing songs that I never believed in, having to watch my friends perform the story of Christmas up on that stage in the school cafeteria. Finally I could stand it no longer and I revolted. I complained about the injustice, the discrimination and I point blank refused to participate. The school powers-that-be responded by allowing my class to organize a Hanukkah play – with little old me as the star – which was then performed alongside the Christmas play.

christmas_pinup-1

Yet I still dreamed of Christmas. What joy and with what utter delight did I dash across the yard to the neighbor’s house to help decorate that magnificent Christmas tree as their own children grew up and moved out. Carefully placing each shimmering glass ball and tossing just the right amount of dazzling tinsel on the green boughs, stringing popcorn and cranberries and digging into plates piled high with elegant Christmas cookies became an event that I prayed for, waited for every single December. My brothers and I would wander the neighborhood streets after dark to catch a glimpse of the fabulous Christmas decorations, stroll among the Christmas luminaries casting an unearthly, romantic glow up and down cul de sacs, spying hidden Santas and laughing out loud at Ho Ho Ho’s piped in across entire streets. Trips to the grocery store with my mom would find me pulling her excitedly across the chilly expanse of groceries to the Christmas candy display where I would beg for boxes of chocolate-covered marshmallow Santas, white marshmallow Snowmen Peeps and red-and-white candy canes. She and I would end up going back together the day after the holiday and snapping up box after box of each and every delightful Christmas confection at half-price, our own guilty concession to this Christian holiday.

And gift giving. I have always adored giving gifts and I love giving edible gifts at this most joyous of holiday seasons. From a young age, I would sit and hand roll chocolate truffles and make cookies for my mom’s office holiday party. Older and on my own, I would continue to make truffles and other Christmas treats to give to loved ones. And I still do. The French are fascinated by American and Italian specialties, so every year finds me in my kitchen filling up tiny aluminum bread tins with chocolate-chip-banana, cranberry-orange-pecan and pumpkin-chocolate chip batter which get baked, carefully and festively wrapped and handed out to friends. I bake trays of cookies for JP to carry to the office where he places them proudly next to the coffee machine, adding a festive touch to the pre-holiday Christmas cheer. Stollen and Christmas Spice Cakes, redolent of warm, earthy cinnamon, nutmeg and ginger, kissed by the tang of orange, studded with jewel-like dried cranberries, blueberries and pistachios make for something joyous and festive indeed. The choice is endless yet simple, each and every treat infused with something so special and celebratory that no matter which holiday you celebrate (or don’t) these confections are sure to please, guaranteed to bring goodwill and seasonal joy to the hearts of even the biggest Scrooge!

IMGP4294

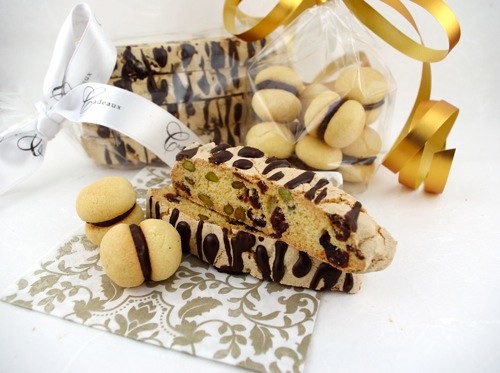
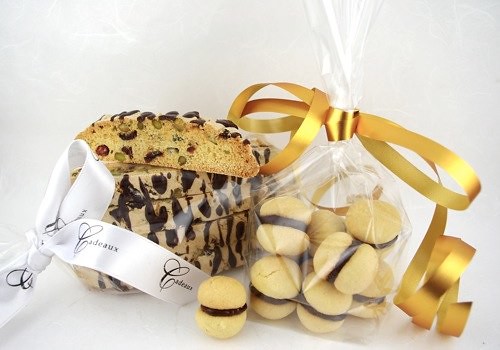
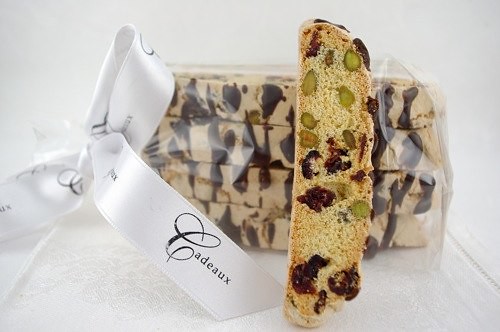
For my lovely Feast sisters of Love Feast Table, I selected two Italian cookies to share: Holiday Biscotti, studded with Christmassy red dried cranberries and green pistachios, spiced with a special blend of Christmas spices and drizzled with orange-infused chocolate ganache. And Baci di Dama (Ladies Kisses), tender, flavorful almond and hazelnut cookies sandwiched together with the same luscious chocolate ganache. Of all the Christmas’s I’ve loved the best, Italian Christmas’ in Milan were my absolute favorite. The night air was always thick with mist, which gave the season a frosty, angelic, romantic look and feel. We would stroll through town and stop at ramshackle street corner stands selling hot-off-the-coals roasted chestnuts, scooped up and poured into newspaper cones, warming our hands and tickling our noses with the fabulous, earthy scent of roasted chestnuts. The city was always gloriously decorated, pastry shops and bakeries filled with holiday Panettone and Pandoro, and the season always lasted joyously through the day of La Befana on January 6 with more gifts, chocolates and fun. So I offer you, my friends, these two Italian delicacies and wish each and every one of you a joyous, festive holiday season!

IMGP4300

ITALIAN CHRISTMAS BISCOTTI
Adapted from a recipe found on The Joy of Baking

2/3 cup (135 grams) sugar
2 large eggs
1 teaspoon vanilla extract
3/4 teaspoon baking powder
1/8 teaspoon salt
1 3/4 cups (245 grams) flour
1 teaspoon Christmas Spice Blend*
3/4 cup shelled, unsalted pistachios
1 cup dried cranberries (can be replaced with dried cherries)

* I used a mixed Christmas Spice from Germany called Pflaumenmus Gewürz (Plum Jam Spices), a gift from Meeta, a blend of cinnamon and nutmeg, star anise, ginger and cloves, a dash of lemon and orange zest. Feel free to use up to one teaspoon of ground cinnamon or a blend of cinnamon, nutmeg, ginger and clove. Not more than one teaspoon combined, half a teaspoon for just a delicate hint. You could also add the zest of half or one whole orange. These biscotti are delicious even without added spices.

Preheat the oven to 350°F (180°C) and place the oven rack in the center of the oven. I find lining the baking sheets with parchment paper makes life soooo much easier.

Beat the sugar and eggs together in a large mixing bowl with an electric mixer on high speed until thick, pale yellow and fluffy, about 3 minutes. Beat in the vanilla extract.

Blend together the flour, baking powder, salt and ground spices. Add to the egg mixture and blend or beat until combined. Fold in the pistachios and the cranberries.

Transfer the dough to the parchment-lined baking sheet. Form into on loaf or log, about 12 inches long, or two smaller loaves. I prefer two smaller loaves as the biscotti turn out shorter and easier to handle and eat – and the one larger loaf tends not to always cook through. Keep your hands lightly floured as the dough is quite sticky. If making two loaves, leave enough space around each for them to expand.

Bake for about 25 minutes, or until firm to the tough and lightly golden. Remove from the oven to a rack and let cool for about 10 minutes.

Now for what makes them biscotti – twice baked – transfer to a cutting board and slice the loaves on the diagonal – after slicing off the ends and eating them – making 3/4-inch (2 cm) slices. Line these slices up on your parchment-lined baking sheet and pop back into the oven. Bake for 10 minutes them flip all the cookies and bake for an additional 8 to 10 minutes until lightly browned. Remove from the oven and cool on racks, continuing the process if you couldn’t fit all the biscotti in the oven at once.

Drizzle the cooled biscotti with Chocolate Ganache (recipe follows) and allow to cool completely – even sticking the trays in the refrigerator – before storing or serving so the ganache doesn’t stick.

IMGP4256

Biscotti stored in metal cookie tins last forever!

IMGP4296

BACI DI DAMA (Ladies’ Kisses)
Adapted from a recipe in Patisserie of Italy by Jeni Wright

10 ½ Tbs (5 oz/150 g) unsalted butter, softened to room temperature
½ cup (100 g) sugar
1 egg yolk (large egg)
2 oz (50 g) ground blanched almonds
2 oz (50 g) ground hazelnuts
1 2/5 cup (6 oz/175 g) flour
1 tsp vanilla
Chocolate Ganache

Cream the softened butter together with the sugar until light and fluffy. Beat in the egg yolk and then both ground nuts. Beat in the flour and the vanilla until everything is well incorporated. Scrape the dough out onto a lightly floured surface and, working very quickly, knead the dough just until you have a smooth, homogenous ball of dough. This dough contains a high quantity of butter so the more it is worked (with warm hands) the softer and stickier it becomes. Wrap the ball of dough in plastic wrap and place in the refrigerator to chill for a few hours or overnight.

When the dough has been chilled and you are ready to make the cookies, preheat the oven to 325°F (170°C).

Remove the chilled, firm dough from the refrigerator and from the plastic and place on a lightly floured work surface. Cut into 4 pieces (which are easier to work with) and, working one piece at a time and as quickly as possible to keep the buttery dough from softening too much, press and roll out the dough into a ¾-inch (2 cm) thick snake, ends squared. Using a pastry cutter or sharp knife, slice the long log or snake into even ½-inch (1 cm) wide pieces or slightly larger. Again working very quickly, roll each piece into a ball, pressing together if the dough splits, and place on a cookie sheet, leaving a little space between each ball for rising.

Bake the trays of balls in the preheated oven for no longer than 20 minutes or until cooked through and slightly golden. Remove from the oven and allow to cool completely before sandwiching the cookie domes together with the ganache.

Fill a pastry bag with a tip (about ¼ to ½ -inch wide hole). Pair up matching (in size) cookie halves then pipe a dot of ganache on the bottom halves of all the pairs. Gently press the other cookie half onto the ganache. Place all the Baci di Dama on a tray or rack to allow the ganache to firm up.

These cookies get even better when stored in a metal tin overnight as the cookie goes from crumbly to perfectly tender.

CHOCOLATE GANACHE

Chop ¾ cup (100 g) dark chocolate ** and place in a medium-sized heatproof pyrex bowl.

Bring ½ cup (125 ml) heavy cream to a boil. Pour it over the chopped chocolate and allow to sit, stirring, until the chocolate is completely melted and the ganache is perfectly smooth.

** I usually use Lindt dessert 70% or Lindt Excellence 70%. I prefer making this ganache for these holiday cookies with one of the Lindt Excellence dark chocolates flavored with either orange, grilled almonds or mint which give them a truly holiday flavor.

Allow to sit at room temperature until it reaches the desired consistency: to drizzle over the biscotti, it should retain its pouring consistency yet be just thick enough that it doesn’t all run off of the cookies and puddle around them on the plate or tray.

For the Baci di Dama, the ganache needs to be quite thick and firm so it pipes out without running and you can sandwich the two domes of cookies halves together without making a runny mess. You can even store the cookie pieces in a tin while the ganache chills overnight in the fridge, simply taking the ganache out of the cold a bit before piping and sandwiching the two halves of the cookies together.

IMGP4278

******

We’d like to thank Jamie of Life’s A Feast for joining us at the table! ~Chris Ann & Kristin
button-cookie-exchange

Share and Enjoy:
  • Facebook
  • TwitThis
  • StumbleUpon
  • Technorati
  • del.icio.us
  • Digg
  • Google Bookmarks
  • LinkedIn
  • Live
  • MySpace
  • Twitter
Dec 10
Today we are happy to have Deeba who resides in India to share at our table!  Deeba shares her love of photography, recipe development, nature and travel on her blog Passionate About Baking.  Having Deeba share at our table reminds us that gathering at the table to savor a morsel whether in-real-life or “virtually”, truly brings us together.  ~Chris Ann & Kristin
******
“The most indispensable ingredient of all good home cooking: love, for those you are cooking for.”
Sophia Loren

Chocolate Chip & Strawberry Shortbread Streusel BarsThere’s something very joyful about this season, and it’s absolutely infectious. When the wonderful Chris Ann & Kristin from LoveFeast Table wrote to me asking if I would like to join their table for the LoveFeast Cookie Holiday Exchange for “Savoring the Holidays” I felt touched, and humbled too. It is an honour for me to join them at their beautiful table, amidst a bunch of fabulous food bloggers where we sit and swap tales, cookies and cheers this season. Sometimes I do wish it weren’t virtual…

Chocolate Chip & Strawberry Shortbread Streusel BarsFrom far away in India, where I blog, the Christmas spirit is sweeping our beautiful country in its own sweet way. This year has been especially nice as we flagged off the season with a Traditional Cake Mixing Ceremony at the Garden Hilton. A first for me, it just set me into a baking fever! My first love is to bake with fruit, which has held me captivated, and obsessed for a while now. Chocolate Chip & Strawberry Shortbread Streusel BarsIt takes me from season to season, from cherries to berries, plums and mangoes to apples and pears! It adds colour to my culinary palette and offers healthy desserts to my family. It also encourages the kids to try different fruits, and enjoy them. I am an experimental cook, though not very adventurous, but like to develop recipes. Oh yes, did I forget to add I love photography too? I’m much the ‘auto‘ clicker still, but I love it!Chocolate Chip & Strawberry Shortbread Streusel BarsFor this holiday season, I encourage you to get experimental. Enjoy bringing good food to the table, pay extra attention to garnishing and try to add variety to the menu each day! Dress up your food, present it well … and spread the cheer!

Chocolate Chip & Strawberry Shortbread Streusel BarsThe cookies I’ve brought to your table today have something for everyone. Who doesn’t like shortbread? I found these super yum bars at Ewa’s blog and made them within an hour of seeing them! They are fabulous for the season. Top a basic shortbread cookie base with strawberry compote, add some chocolate chips, a streusel topping, and you have a winner! They went rather quick from my table, but I saved some for you. We had the bars at home, and I made hearts for LoveFeast’s Holiday Cookie Exchange! Hope you enjoy them as much as we did! Thank you for having me over. Have a beautiful holiday season!

Chocolate Chip & Strawberry Shortbread Streusel BarsChocolate Chip & Strawberry Shortbread Streusel Bars
These are delicious bars, and very good for holiday feasting. They are festive, delicious and adaptable.
Adapted from Delishhh {the original recipe is from December 2007 Sunset Magazine but with several adjustments.}
Yield: 24 bars | Prep: 30 minutes | Cook Time: 45 Minutes
1 cup butter, chilled and cut into bits
1 2/3 cups flour
1 cup oats
1 cup vanilla sugar
1 egg
½ vanilla bean, scraped
Strawberry filling {recipe below}
1/2 cup chopped walnuts
1/2 cup chocolate chips
1/2 cup dried cranberries
Chocolate Chip & Strawberry Shortbread Streusel BarsStrawberry filling
3 cups frozen strawberries {or 2 ½ cups fresh cranberries}
2/3 cup sugar
3 tbsp water
Method:
{Prepare the strawberry filling first, so it can cool down as you make the shortbread}
In a medium sized saucepan, place all the ingredients. Then, over medium-high heat, cook the ingredients until boiling. Continue to boil the filling until it becomes thick and syrup, about 5 minutes. Remove from heat and let cool while you make the shortbread.
Shortbread
Preheat oven to 180C. Line a 9×13 inch pan with parchment paper.
In a food processor, mix flour, scraped vanilla bean, oats and sugar for 10 seconds. Add 1 cup butter; mix until mixture forms breadcrumbs. Set aside ½ cup of mixture. Add the egg and process till it begins to form a ball.
Press the shortbread mixture into the base of the pan. Spread with the strawberry filling. Sprinkle walnuts, dried cranberries and chocolate chips, then press into dough. Finally sprinkle the top evenly with the reserved breadcrumb cookie mixture.
Bake at 180C until topping is pale gold, about 45 minutes. Cool on rack and cut into 24 bars. Drizzle with melted dark chocolate if you like.
Chocolate Chip & Strawberry Shortbread Streusel Bars
I cut a few with my heart shaped cookie cutter, and gave each a hand made dark chocolate lace border! Dressed them up for you!
******
We’d like to thank Deeba from Passionate About Baking for joining us at the table! ~Chris Ann & Kristin
button-cookie-exchange
Share and Enjoy:
  • Facebook
  • TwitThis
  • StumbleUpon
  • Technorati
  • del.icio.us
  • Digg
  • Google Bookmarks
  • LinkedIn
  • Live
  • MySpace
  • Twitter
Dec 9
Nancuts~Nankatai Cookies
Posted by ChrisAnn in Holiday Cookie Exchange, Our Guests, Recipe on Dec 9th, 2010 | Comment Bubble  5 Comments »

Today we are welcoming Ria, from Ria’s Collection to our table!  This is Ria’s first snow and first Christmas in the U.S. so we are especially happy to have her join us!   Chris Ann met Ria at one of LoveFeast Table’s BlogLove, blogger networking events in Minneapolis.  Today Ria is going to share with us a cookie familiar to her memories of India!  You can find more delicious treats on her blog! ~Chris Ann & Kristin

******

Ihave never baked so much in so little time. Phew! That was a LOT of baking happening in my kitchen. I must say,my oven is still grateful. It hasn’t given up on me :-) But trust me, it feels so good to be near the oven during winter…keeps you warm and keeps your house warm, too! Plus, you get to eat your favourite baked goodies!

DSC_0191

Last month I met Chris Ann for a small blogger meet in Minneapolis. I have to say, she was a very graceful host! She brought us some yummy yummy homemade chocolate chip cookies! I remember her saying that she slaved over it…I don’t think so! ;-) Anyhow, it was delicious. During the meet, we were having a casual chat and she mentioned that she would like me to do a guest post for their ‘Cookie Exchange‘ event on the blog during the month of December. I agreed on the spot. Why wouldn’t I? :-)

But the challenge for me was that she asked me if I could bake some sort of an Indian cookie. Umm, now that’s interesting! Indian cookie? I had to think about it for a while because we Indians, really don’t have a ‘typical’ Indian baked goodie. But then again, there should be something that we can call it ‘Indian’…and yes! it was a cookie called ‘Nankatai’ or ‘Nancuts’ as we call at home. Indian cookies or ‘biscuits’ as we call it, is never soft like the ‘cookies’ that we get in US. It’s crisp, crunchy and even crumbly, at times. So this is the texture of this cookie/biscuit too. :-)

Nancuts is the simplest of all the cookies. It’s a very simple 3-ingredient recipe. You don’t need any fancy equipment to get it done. At any given point, you can bake these cookies in less than half an hour!Usually this cookie is baked plain or maybe with a hint of crushed/powdered cardamom. I thought of giving it a twist and added chocolate chips to the dough.

NANCUTS/NANKATAI

Recipe by Amma (my mom)

Yields- 20-22 cookies

Ingredients:

All purpose flour – 210 g

Unsalted butter/Margarine(room temp.) – 130-150 g

Sugar-85g, powdered

Chocolate chips- 50g (optional)

OR

Cardamom-2 pods,seeds powdered

Method:

  • Pre-heat the oven to 180C/350F . Line your cookie sheet with a parchment paper.
  • Mix the first 3 ingredients together. You may or may not need all the butter/margarine. So start with 130g and then proceed.You basically need a dough which can be formed into smooth balls.
  • Add the chocolate chips/cardamom powder and shape them into small balls.
  • Place them on a baking sheet with 1″ gap between them.
  • Bake for 18-20 mins or till the edges are lightly browned.
  • Cool on a cooling rack and store in an airtight container.

*This cookie has a good shelf life of almost a month!

Verdict: This is a very popular cookie in our household. It’s baked during birthdays, Christmas and for every other reason. It was a staple during my hostel days in college. A very simple recipe which everyone will love!

Jobin & I plus all the people with whom we have shared these cookies with…simply adore them!

Season’s Greetings!

******

We’d like to thank Ria, from Ria’s Collection for joining us at the table! ~Chris Ann & Kristin
button-cookie-exchange

Share and Enjoy:
  • Facebook
  • TwitThis
  • StumbleUpon
  • Technorati
  • del.icio.us
  • Digg
  • Google Bookmarks
  • LinkedIn
  • Live
  • MySpace
  • Twitter
Dec 8
Almond Lace Cookies
Posted by ChrisAnn in Holiday Cookie Exchange, Our Guests, Recipe on Dec 8th, 2010 | Comment Bubble  2 Comments »

Today we are so happy to welcome our long time friend Michelle to our table.  Michelle is a new blogger, with a desire to share her gluten free culinary adventures and the love of food with family and friends.  Her goal at Gluten Free Fix is to share easy to create, beautiful and delicious recipes.  Word on the street is that her baking is amazing!  We are delighted to have her join us at our table!  ~Chris Ann & Kristin
******

Before I begin,  I just wanted to share with you all how amazing Chris Ann and Kristin are.  I have known both of them for years and I truly admire them for being remarkable mothers, devoted wives, reliable friends, outstanding cooks, and creative gurus…. they pretty much rock….

2010-11-30_11.59.19

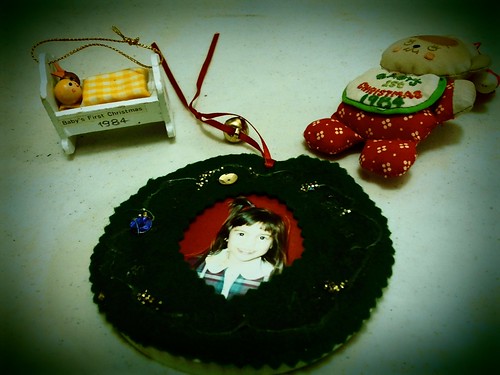
Back in December of 2004,  I was preparing for my first Christmas with my husband and I was able to start fresh and decorate anyway I wanted!  Being the youngest of 4 girls and with a mom that is slightly particular about decor, this was new territory for me. I was so excited and ready to blast Mariah Carey’s Holiday album until I realized, I had NO Christmas decorations.  So I went where any girl goes to get the goods. My favorite shop, Target.  I picked up some lovely red and gold metallic bulbs and some strands of white lights and ribbon and got busy.  After I dressed the tree, my husband looked at me and said “it looks like it came out of a catalogue”, but in his tone I could tell it was not a compliment.  And he was right, it was pretty, but boring and kind of sad.  I had to explain to him that our 4 week old daughter wasn’t quite able to make ornaments for the tree or help me make strands of cranberry and popcorn garland.  So with that, I decided to raid my mom’s ornament boxes and pick out a few of my childhood ornaments to “help” my tree.

2010-11-30_15.56.16

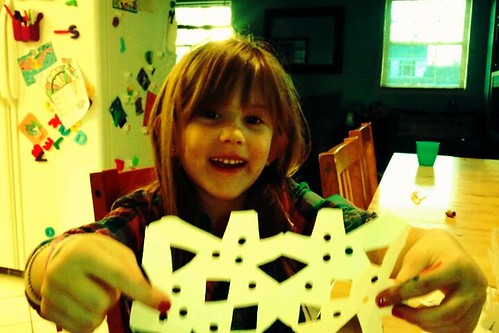
Meanwhile, after many years and after having 4 children, I have made it a point to craft and make decorations for our home and tree during the holidays.  Not only has it been extremely fun for them, but it is a great way to spend time together and create memories.  Our house is adorned with cut-out snowflakes, paper link chains and any other Christmas related craft you could think of.  It’s very warm, inviting, personalized and special, especially for my husband.

FxCam_1291065209629

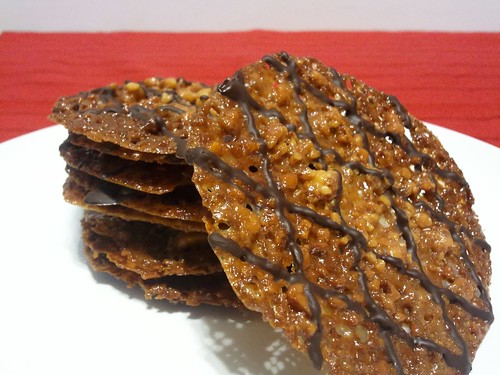
My absolute favorite cookies that my mom makes every year on her cookie tray, are Florentines.  These buttery, thin, crisp, toffee-like wafers, are sandwiched together with melted chocolate.  They are ridiculously amazing and addictive.  You soon will see. I have adapted this recipe to be gluten free, but don’t worry there are no weird flours or mixes involved.  Anyone can make these with ingredients right out of their  pantry.  Did I mention that my version only uses 3 ingredients?  Unlike other Florentine recipes, this one does not require cooking sugar, which can be a bit daunting for most cooks.  These are super quick and easy.

Almond Lace Cookies

Ingredients:

  • 1 stick of butter, melted
  • 1/2 cup of honey
  • 1 cup of whole almonds
  1. Preheat oven to 375.
  2. Line several sheet trays with silpats or parchment paper.
  3. In a food processor, chop the almonds.  You want some of the nuts to turn into a flour-like consistency, while keeping some no larger than a size of a pea.
  4. Add melted butter and honey, pulse in with almonds.
  5. Drop by teaspoonful onto prepared cookie sheets, several inches apart.  About 8 cookies per tray, as the batter will spread quite a bit.
  6. Bake for 6-8 minutes, until golden brown.  Be sure to watch them very closely at the end of baking time, they will turn dark very quickly.
  7. Remove from the oven and let cookies cool down before trying to remove.  Use a very thin spatula to release the cookies.  I use a small off set spatula.  They are very delicate, hence the name “lace” cookie.

This recipe yields 4 dozen cookies or 2 dozen sandwich cookies.  They can be made in advance and stored between pieces of parchment paper in the freezer.

2010-11-30_12.50.05

Here are a couple variations for use:

  • drizzle with melted chocolate
  • sandwich together 2 cookies with melted chocolate (these are more durable for cookie trays)
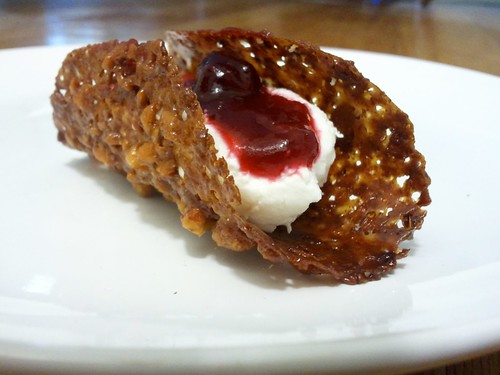
  • while cookies are still warm out of oven, they are very pliable and can be shaped into a bowl or cannoli shell by draping over small bowls or utensil handles.  Great for serving ice cream or berries and whipped cream.
  • serve them plain, just the way they are.

I love these because they are very versatile and make for a beautiful presentation.  They are worth the extra time and effort, people will appreciate it!  It will make a nice addition to any holiday cookie platter.

Thank you , Chris Ann and Kristin, for letting me,  such a newbie blogger take part in your virtual Holiday Cookie Exchange!  I hope to share a real lovefeast with you marvelous ladies soon!

******

Thank you Michelle from Gluten Free Fix for sharing your recipe at our table! ~Chris Ann & Kristin

button-cookie-exchange


Share and Enjoy:
  • Facebook
  • TwitThis
  • StumbleUpon
  • Technorati
  • del.icio.us
  • Digg
  • Google Bookmarks
  • LinkedIn
  • Live
  • MySpace
  • Twitter
Dec 7

Today’s guest blogger is actually from the home design & garden niche of blogging.  Today we welcome Kristen, from High Heels and a Hammer to our table!  We happen to personally know Kristen!  She was in Chris Ann’s wedding 20 years ago, as Maid-of-Honor!   We also know that besides swinging a hammer in cute shoes, her home is filled with memories and recipes to share! ~Chris Ann & Kristin

******

Happy Holidays!  I’m Kristen from High Heels and a Hammer and I am both thrilled and honored to have been asked by Chris Ann and Kristin to join them at their table.

It’s a true pleasure to have counted these delightful ladies as dear friends for years.  They are warm and welcoming and over the years we’ve had our share of adventures.  My favorite times are those spent gathered around the table, sharing our stories, and enriching our lives.  Thanks for inviting me to the table today.

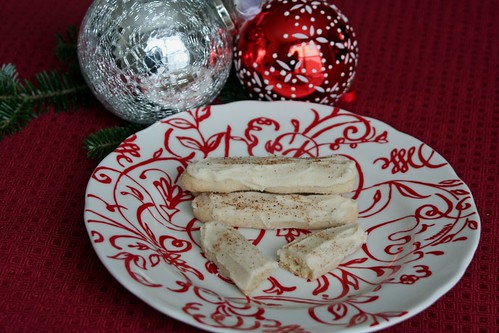
1Nutmeg stick

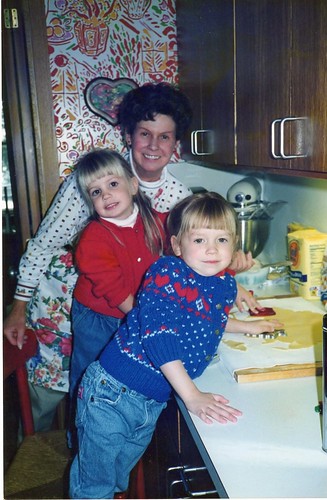
Growing up, my parents made sure our home was always filled with fun, laughter and a healthy dose of hospitality.  My mom was a fabulous cook and a great teacher.  The holidays were no exception.  I remember many days spent in the kitchen learning my mom’s most treasured holiday recipes.  Part of her legacy was making sure that all of her kids knew how to cook.  This legacy was passed down to her grandkids as well.

4Nutmeg stick

When it comes to cookies, my fondest memories include platters of a dozen or more kinds of cookies, all temptingly delicious.

Dozens of these cookies never made it to our platters.  Every year, we would package up several containers and deliver holiday goodness to friends and neighbors.  It was fun to see the delight on faces as they received our packaged plates.  I think that was part of the experience my mom was trying to teach us.  Reach out and share a part of who you are and people will respond.  And they did.  For weeks, it felt like as many treats were coming into our house as were going out.  And that wasn’t even counting the annual cookie exchange.

Every year my mom took part in a neighborhood cookie exchange.  And every year the same cookie was requested by all the neighbors.  Everyone loved my mom’s Nutmeg Sticks.

2Nutmeg stick

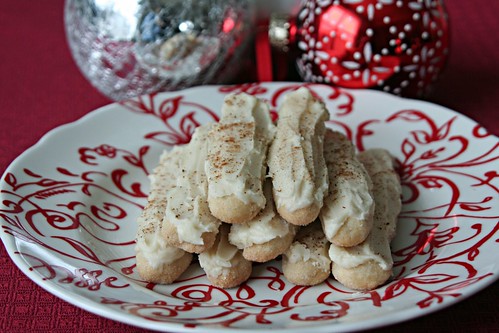
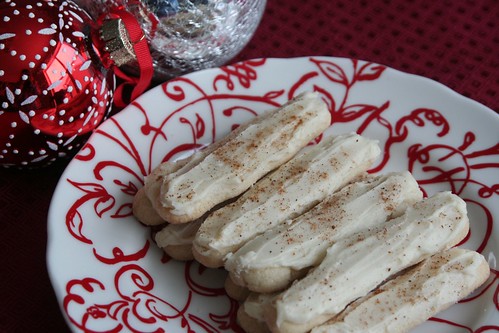
This wonderful cookie, humble in appearance, is a delight to the senses, rich with flavors of nutmeg and rum enveloping your taste buds in every bite.  Once formed, these cookies are rolled in sugar and baked just until a slightest hint of golden brown appears at the edges.  When cooled, they are frosted with a rich, rum flavored, powdered sugar frosting.  A dusting of nutmeg is the only adornment needed to make them complete.

These cookies make a delightful addition to any holiday cookie platter.

Nutmeg Sticks

Ingredients

1 cup unsweetened butter

2 teaspoon vanilla

2 teaspoon rum extract

¾ cup sugar

1 egg

3 cups flour

1 teaspoon nutmeg

¼ teaspoon salt

Frosting

1/3 cup unsweetened butter

1 teaspoon vanilla

2 teaspoons rum extract

2 cups powdered sugar

2 tablespoons heavy cream

  1. Preheat oven to 350.
  2. Cream together butter, vanilla, and rum extract
  3. Add sugar and egg.  Mix.
  4. Add flour, nutmeg, and salt.  Mix until well combined.
  5. Roll dough into sticks approx. 3” long and ½” diameter.
  6. Roll in granulated sugar and place on ungreased cookie sheet.
  7. Bake at 350 degrees for 12-15 min.  Watch carefully; bake only until a touch of brown appears on edges.
  8. Cool and then frost.
  9. Sprinkle tops with ground nutmeg.

Makes about 4 ½ dozen cookies

Enjoy!

3Nutmeg stick

Thanks Chris Ann and Kristin for inviting me to the table today.  Warm and Happy Holiday wishes to all!!

******

Thank you to Kristen, from High Heels and a Hammer for sharing your Holiday Nutmeg Stick Cookie recipe with us at our table!

button-cookie-exchangeaboutme-1

Share and Enjoy:
  • Facebook
  • TwitThis
  • StumbleUpon
  • Technorati
  • del.icio.us
  • Digg
  • Google Bookmarks
  • LinkedIn
  • Live
  • MySpace
  • Twitter
Dec 6
Almond Triangle Cookies
Posted by ChrisAnn in Holiday Cookie Exchange, Our Guests, Recipe on Dec 6th, 2010 | Comment Bubble  6 Comments »

Today we would like to welcome Minnesota blogger, Stephanie Meyer, to our table!  Stephanie is a cook, writer, and photographer.  She writes about simple, fresh home cooking on her blog, Fresh Tart, and for Minnesota Monthly magazine’s Dara & Company blog.  We are so happy to have her share a cookie recipe today!

******

DSC_0023

First, I should confess up front – I don’t bake much.  I enjoy a good cookie as much as the next girl, but I’ve always preferred the salty over the sweet.  Add a recent gluten-intolerance diagnosis, and my plans for baking this holiday season were looking pretty Scroogie.

And then, I received this lovely invitation to participate in LoveFeast’s Holiday Cookie Exchange.  And then, I realized that this was not only an honor, but a gift of an opportunity to adapt my favorite holiday cookie recipe to be gluten-free.

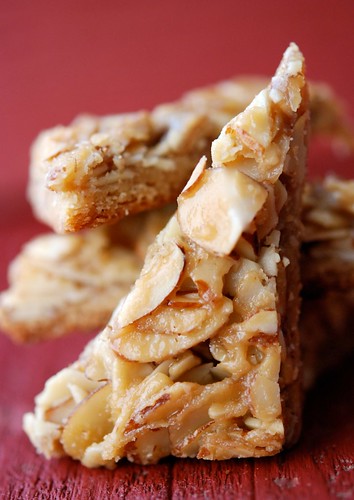
The original recipe caught my eye last year as the Minneapolis Star Tribune’s Cookie Contest Winner, submitted by Charlotte Midthun of Granite Falls.  If you love almonds and caramel and butter and Christmas, you’ll be as smitten by these decadent cookies as the Strib’s tasting panel clearly was (their verdict: “love” and “beautiful”).

DSC_0007

When substituting finely milled almond flour for wheat flour in the shortbread crust, I was thrilled to discover that the cookies’ crisp almond deliciousness not only remains, but is enhanced.  Joy!

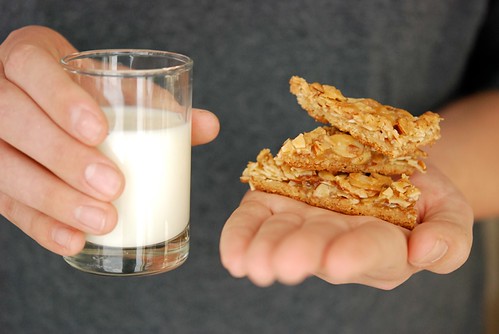
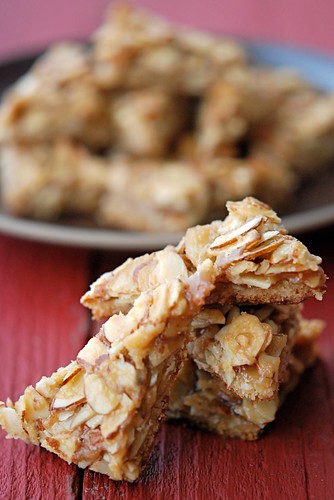
As a gift to the baker, these are bar cookies, which Minnesotans know are the most magical (and easy!) of all.  Other than allowing time for the shortbread crust to chill before baking, they come together in minutes.  After they cool for awhile, cut them into tidy triangles, pour yourself a glass of milk, and dig in.

DSC_0007_3-1

Despite their simplicity, the triangles are elegant on a cookie plate and as I discovered last year (and after testing this version), disappear blessedly quickly.  You can focus on how nutritious almonds are to lull yourself into cookie complacency, but a cookie isn’t Christmas without a hearty dose of butter and sugar, and these are no exception.

Thank goodness!  And thank Chris Ann and Kristin for the generous and festive invitation, and for in turn inspiring me to create a new cookie tradition for myself and for my family.  I hope you all have a lovely holiday season and Happy 2011!

DSC_0005

Almond Triangles

Adapted from a recipe by Charlotte Midthun for the Star Tribune

Makes 6 dozen cookies

Note: 1) This recipe requires working ahead, 2) the cookies freeze beautifully, 3) to cut the cookies – while cookies are slightly warm, slice crosswise into 12 equal rows; working with one row at a time, start with a  diagonal cut to create the first triangle, then a straight up-and-down cut to create the next, continuing to slice each row into 6 right triangles, and 4) after slicing the cookies, allow them to cool completely before storing in an airtight container.

1 1/2 c. (3 sticks) butter, divided

1 1/2 c. packed brown sugar, divided

1 egg, lightly beaten

3/4 tsp. almond extract

1/2 tsp. salt

2 1/2 c. blanched almond flour (choose a finely milled variety from this excellent list at Elana’s Pantry)

1/4 c. granulated sugar

1/4 c. heavy cream

1 lb. sliced almonds

Carefully line a 10×15-inch jelly roll pan (or rimmed baking sheet) with aluminum foil, shiny side up.

In a large saucepan, melt 1 stick of butter.  Stir in 1/2 c. of the brown sugar and let cool to room temperature.  Whisk in egg and almond extract, then stir in salt and almond flour.  Press dough evenly into pan.  Cover with plastic wrap and freeze for at least 30 minutes.  (Can be prepared one day ahead.)

When ready to bake, preheat oven to 350 degrees F.  Using a fork, prick dough in 20-24 places all across dough and bake for 10 minutes.  Remove from oven and set pan on a wire rack to cool.

In a large saucepan over medium heat, combine remaining brown sugar, remaining 1 c. (2 sticks) butter, and granulated sugar and cook, stirring occasionally, until sugar dissolves.  Increase heat to medium-high, bring mixture to a boil, and cook for 3 minutes without stirring.

Remove from heat and stir in cream.  Stir in almonds.  Spread almond mixture evenly over crust, all the way to the edges.  Return pan to oven and bake until bubbling, about 15 minutes.  Remove from oven and transfer pan to wire rack to cool.  While bars are still slightly warm, cut into triangles (see above).

******

Thank you Stephanie, from Fresh Tart, for sharing your recipe at our table!

button-cookie-exchange

Share and Enjoy:
  • Facebook
  • TwitThis
  • StumbleUpon
  • Technorati
  • del.icio.us
  • Digg
  • Google Bookmarks
  • LinkedIn
  • Live
  • MySpace
  • Twitter
Dec 5

Today we invite Heidi, from Heidi’s Recipes to join us at the table!  Heidi is a talented kitchen cook who knows how to keep her family, friends and kitchen warmed with hospitality.  Through the years we’ve enjoyed everything from iced tea to sugar cookies at her real life table!  Today we are so glad to have her and Aunt Ethel join us at our “virtual” table! ~Chris Ann & Kristin
******

Although I have no idea who Ethel is, I do know that her sugar cookie recipe is a part of the family.  In December of 1982 when my mother announced that she refused to bake any cookies that required rolling and cutting, and when my father simultaneously begged for sugar cookies just like his mother used to make, I took on the challenge.  At the awkward, yet determined age of 13, I searched through all of my mother’s cookbooks until I found a recipe for sugar cookies that my father deemed similar to what he ate as a child.  I then entered the kitchen alone and attempted to make Ethel’s Sugar Cookies.  This was my first independent cooking experience and it was a success!

During the last 28 years I have attempted a few other sugar cookie doughs, but have always returned to Ethel’s.   The recipe is from the 1977 cookbook Betty Crocker’s Cooky Book and shares a page with instructions for Mary’s Sugar Cookies, but sorry Mary, Ethel is far superior.  With the exception of 2001 when I had recently given birth to my third child, I have made Ethel’s Sugar Cookies every Christmas since 1982.  I have also used this recipe to turn these cookies into shamrocks, Easter eggs, rubber duckies, poke balls, and the state of Texas.  I even made my dad a batch of heart-shaped sugar cookies with red sprinkles and delivered them to the hospital right before his open-heart surgery.

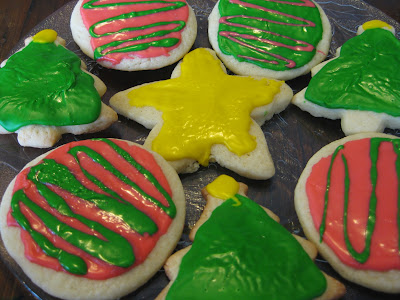
The beauty of Ethel’s Sugar Cookies is that the cookies are thick and cakey with just the right amount of sweetness and a hint of vanilla.  The recipe uses both butter and shortening which creates a soft yet sturdy dough that rolls easily with a wooden rolling pin on a board that has been dusted with a combination of flour and confectioner’s sugar.  The cookies can either be topped with sprinkles prior to baking or iced with Easy Cream Icing after they have been cooked and cooled.

Needless to say, my mother passed on her rolling pin and her copy of Betty Crocker’s Cooky Book to me when I got married.  The cookbook is now battered and yellowed and easily falls open to page 18 of the section on rolled cookies.  At some point I penned a star next to Ethel’s Sugar Cookies recipe, less I become confused and make the mistake of baking Mary’s Sugar Cookies.  I also penciled in the measurements for making a double batch of the dough.  I have found that one batch is never enough.  I’m grateful that Ethel and her sugar cookies have joined our Christmas traditions and remain a part of our family.  My hope is that you will invite Ethel and her delicious sugar cookies into your home as well.


Ethel’s Sugar Cookies

adapted from Betty Crocker’s Cooky Book  (copyright 1977)

1/2 cup unsalted butter, softened

1/4 cup shortening

1 cup sugar

2 eggs, room temperature

1 teaspoon vanilla

2 1/2 cups all-purpose flour

1 teaspoon baking powder

1 teaspoon salt

  1. Mix butter, shortening, sugar, eggs, and vanilla thoroughly.
  2. Stir flour, baking powder, and salt together.
  3. Blend butter mixture and flour mixture.
  4. Divide dough into 2 discs.  Cover each with plastic wrap and chill for at least 1 hour or overnight.
  5. Heat oven to 400 degrees.
  6. Remove dough from refrigerator and allow to sit on the counter for 15-30 minutes, depending on the temperature of your kitchen.
  7. On a board that has been lightly floured with a mixture of flour and confectioner’s sugar, roll dough until it is 1/4 inch thick.  Cut with your favorite cooky cuter.
  8. Place on an ungreased baking sheet.  Top with colored sanding sugar, if desired.
  9. Bake 6 to 8 minutes, or until cookies are a delicate light golden color.
  10. Cool on a wire rack.  If desired, decorate with Easy Cream Icing.

Makes 3-4 dozen cookies, depending on the size of the cutter

Easy Cream Icing

1 cup sifted confectioner’s sugar

1/4 teaspoon salt

1/2 teaspoon vanilla

1-3 Tablespoons cream, milk or water

food coloring or icing tints

  1. Blend sugar, salt, and vanilla.
  2. Add liquid (cream, milk, or water) 1 tablespoon at at a time until icing reaches a spreadable consistency.
  3. Add food coloring.
  4. Spread on cookies with an off-set spatula.

Makes icing for 3 to 5 dozen cookies, depending on size.

******

Thank you Heidi, from Heidi’s Recipes, for sharing your recipe at our table!

button-cookie-exchange

Share and Enjoy:
  • Facebook
  • TwitThis
  • StumbleUpon
  • Technorati
  • del.icio.us
  • Digg
  • Google Bookmarks
  • LinkedIn
  • Live
  • MySpace
  • Twitter
Dec 4
Russian Tea Cake Cookies
Posted by ChrisAnn in Holiday Cookie Exchange, Our Guests, Recipe on Dec 4th, 2010 | Comment Bubble  4 Comments »

Today we welcome Rachael, all the way from Japan, to our table!  She shares her story today of being across the globe from family and how the memory of hot chocolate and Russian Tea Cake Cookies keep her memories close to home.  We are so happy to have her with us at our table as she shares a recipe, her love of food and a story from her view from her Tokoyo Terrace. ~Chris Ann & Kristin

******

Russian Tea Cookies

Spending this time of year a world away from my family can be difficult. Memories flood through
my head without warning and often times leave me feeling drained and empty. I don’t think I’m
the only one who experiences this sensation. Just tonight I was walking through the streets of
our neighborhood in Tokyo with our dog, Callie. As she paused on random corners and sniffed
at the ground, introducing herself to dogs she would probably never meet face-to-face, I found
myself staring at old street signs that I couldn’t read. Later, I found myself in front of a local
graveyard which sits just next to a shinto shrine. I made my way through the nonsensical blocks
without street names and eventually stood at the door of our apartment building, suddenly
overcome with the memory of our old apartment in St. Paul, MN. Yes, memories of home hit you
like a ton of bricks when you least expect it.
Another bunch of memories that slap me in the face like a cold Minnesota winter wind on
occasion have to do with time spent in my parents’ kitchen. These memories are not made up
of times in my 20’s. No, they are made up of a much simpler time when my dad actually used
to flood the back yard to make a skating rink (yes, you can do things like that in Minnesota). In
the sub-zero temperatures, my younger sister and I needed some sort of outlet for our energy.
An ice-skating rink was the perfect solution! We would spend an hour or so outside, gliding
not-so-gracefully on the homemade ice until we couldn’t feel our faces and the snot froze in
our nostrils. Gross, I know. We would come in the back door, leaving a trail of mittens, hats,
scarves, boots and snow pants, to find that mom had made hot chocolate and cookies. I will
never forget how wonderful hot chocolate and homemade cookies tasted on afternoons like
that. Nothing else was able to warm a person, body and soul, like that combination.
Today, when I dig through my memory files and see the platter of cookies my mom had
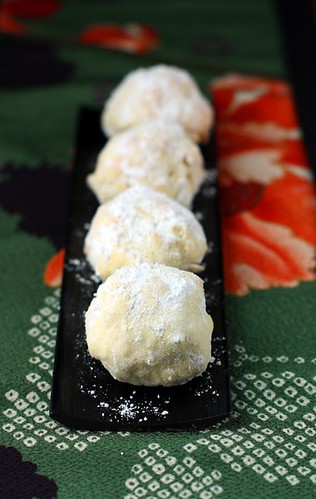
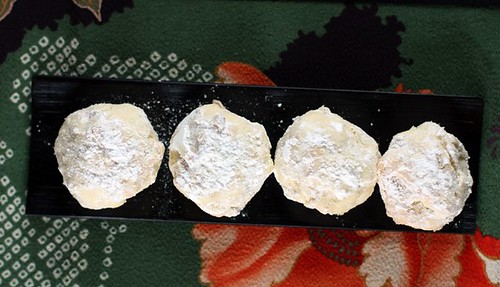
displayed during the holidays, I picture the Russian tea cake cookies. Like tiny snow balls piled
on a glass platter, these cookies are gorgeous to look at and make for a delicate alternative
to the typical gingerbread cookie. You just can’t eat one of these tasty, crumbly things without
feeling the warm embrace of the holiday season. And now that I’m all grown up, I can drink
things like this hot chocolate with peppermint schnapps with my cookies.
So, with the memory of ice-skating and hot chocolate in mind, I leave you with the recipe for
one of my favorite holiday cookies. My mom always substituted the vanilla extract with almond
extract and used sliced almonds in the dough. So delicious! I hope you enjoy the holiday
season, no matter where you are or what holiday you celebrate.

Sending love and joy from Tokyo Terrace in Japan.
-Rachael
Russian Tea Cake Cookies

Russian Tea Cake Cookies ~Adapted from Betty Crocker

1 cup butter or margarine, softened
½ cup powdered sugar
1 teaspoon almond extract
2 ⅓ cups all-purpose flour
¾ cups sliced almonds
¼ teaspoon salt
1-2 cups powdered sugar for rolling
1. Heat oven to 400ºF.
2. Mix butter, 1/2 cup powdered sugar and the almond extract in a large bowl. Stir in flour,
amonds and salt until the dough comes together.
3. Gently roll dough into 1-inch balls. Place them on an ungreased cookie sheet with about
an inch of space.
4. Bake 10 to 12 minutes. The cookies should not be brown on the top, so keep an eye on
them to make sure they don’t overcook. Cool the cookies for about 5 minutes on a wire
rack.
5. Roll warm cookies in powdered sugar; cool on wire rack. Roll in powdered sugar again.

******

Thank you Rachael, from Tokoyo Terrace, for sharing your recipe at our table!

button-cookie-exchange

Share and Enjoy:
  • Facebook
  • TwitThis
  • StumbleUpon
  • Technorati
  • del.icio.us
  • Digg
  • Google Bookmarks
  • LinkedIn
  • Live
  • MySpace
  • Twitter

« Previous Entries