Jun 14
How To Remove Water Stains from Your Table
Posted by Kristin in Projects on Jun 14th, 2011 | Comment Bubble  3 Comments »

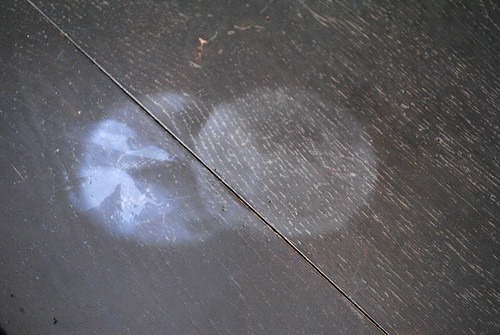
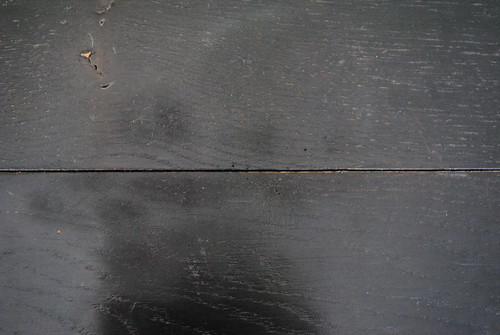
We had a gathering of friends for dinner.  Devon made delicious tomato soup.  But, when everyone left, there were about 6 of these water stains left behind.

April 11 001

One of my friends recommended baking soda and vinegar, but that didn’t work.  So, I googled and saw that some people recommended removing the stains with a hot iron.  I was a little freaked, but I couldn’t leave these on my table.

It took a few tries to get the “iron out the water stain” method to work, but here’s what worked for me.

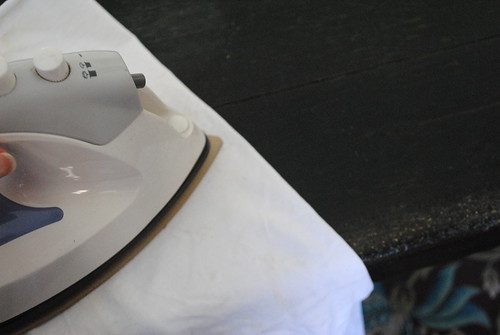
*Take a thin (I used an old t-shirt) cloth, fold it over (so there are two layers) and place it over the stain.

how to remove water stains

*Put the iron on high and gently rub the cloth starting at the outside of the stain and working your way to the inside.

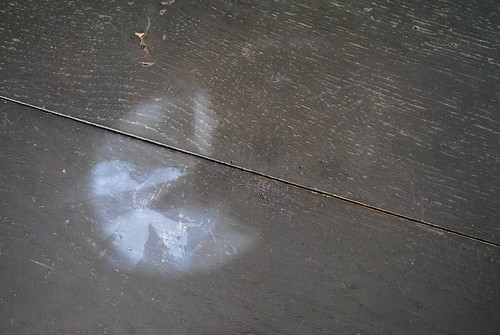
how to remove water stains

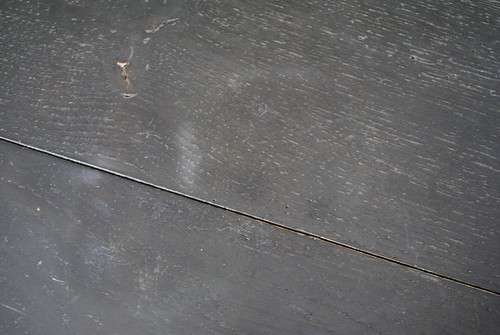
For the stubborn stains, it took a bit more patience and ironing, but it worked.

how to remove water stains

how to remove water stains

What helpful “entertaining tips” have worked for you?  We’d love to hear.

Share and Enjoy:
  • Facebook
  • TwitThis
  • StumbleUpon
  • Technorati
  • del.icio.us
  • Digg
  • Google Bookmarks
  • LinkedIn
  • Live
  • MySpace
  • Twitter
Jun 8
Taking Your Work Outside
Posted by ChrisAnn in Decor, Decorating, Love, Projects, Tablescape on Jun 8th, 2011 | Comment Bubble  6 Comments »

Many of you have heard the expression in decorating, “bring the outside in” to breath life into your home’s rooms.  Well, recently I tried the reverse, bring the inside out.

The other day (before our recent historical Minneapolis heatwave) the day was mildly warm and sunny.  The kind of day where summer greets you with possibilities.  The flowers in my garden were just starting to show their potential.  The lilacs were wafting lovely scents in the air.  This was no day to be working inside.

Much of what I have to do is centered around my computer and my phone.  Sometimes I forget that doesn’t mean I’m stuck inside on a beautiful day.  For a refreshing change of scenery I took whatever I needed, which wasn’t much outside to a “office space” I created in my garden.

Having everything handy was essential to making my space comfortable.  I brought a refreshing drink, a small vase of flowers, my computer, phone and my notebooks.  A clear plastic tumbler with a few polished glass rocks leftover from a table centerpiece project became a holder of pens, pencils, and highlighters.


My new “office space” refreshed me and dare I say, made me happy.  And, sometimes that is all you need to put a little “whistle” in your work.

“When you change your point of view, your views bring about a change in you.”  ~George Alexiou

We’d love to hear your comment ~ What have you done lately to “refresh” your working space?

Share and Enjoy:
  • Facebook
  • TwitThis
  • StumbleUpon
  • Technorati
  • del.icio.us
  • Digg
  • Google Bookmarks
  • LinkedIn
  • Live
  • MySpace
  • Twitter
Mar 25
Fancy Friday~Favorite Projects
Posted by Kristin in Fancy Friday, Projects on Mar 25th, 2011 | Comment Bubble  1 Comment »

The snow is melted (in some parts) and the crocuses are peeking their heads.  What does that mean? Time to get inspired to create!  We wanted to share a few of our favorite projects right now.

Always on the hunt for a new wreath to grace our doors, this project from Beautiful Nest would be delicious with a rose or yellow velvet ribbon for the Spring.  It’s all about texture.

We love these burlap rosettes from FabuLESSly Crafty.  Anything burlap makes our hearts sing.

Since we have a thing for chalkboards…and great architecture, this took our breath away!  Perfect compromise if you have a builder for a husband. Functionality and art!  Thank you House of Chic and Penoche.

This next project made us smile, because Table Scraps Diner made these decorative finals…

Out of this…

Over at Our Humble Abowed, this project has our wheels turning for an outdoor rug to spruce up our porches this spring.  You’ll have to check back to see what we do!

What are some of your favorite projects right now?


Share and Enjoy:
  • Facebook
  • TwitThis
  • StumbleUpon
  • Technorati
  • del.icio.us
  • Digg
  • Google Bookmarks
  • LinkedIn
  • Live
  • MySpace
  • Twitter
Mar 20
Canning Jar Gardens For Spring
Posted by ChrisAnn in Celebrations, Projects on Mar 20th, 2011 | Comment Bubble  13 Comments »

Happy first day of Spring!!  Minnesota has kept its tradition of being snowy and frozen again this year.  And, I am writing this post now from 35,000 feet in the air on my way to Cancun.  After a long day of flight delays and potential missed connections somehow we are on our way!  Somehow our 6 coach tickets were magically upgraded to 6 tickets in 1st class on a direct flight instead of a lay over in Detroit.  So, as far as I’m concerned Spring is starting out on the right foot!

Last week while there were still sufficiently sturdy snowbanks in my yard, I decided to start gardening…gardening in a jar!  Canning Jar Gardens for spring are an inspiring idea for tablescaping, spring decoration and reminding you that the real gardening season is on its way!

Initially the inspiration for this DIY project came from Anthropologie.  They always have uniquely crafted displays.  Just one trip there and my mind is was transported from the gray tundra to the possibility of color and in this case, spring.

Another trip to a local Twin Cities gardening center, Bachmans’ helped me collect all the pieces I knew I needed, vintage canning jars, potting soil and the plant called Angel Tears.

Angel Tears plants love light and humidity so a canning jar is actually a great place to transplant them.  I also gathered up some wire from a local craft store for some canning jar accessorizing.

For four canning jars I bought just 2 small plants, filled the jars with potting soil and stuck the divided plants on top.

They are a fun alternative to wheat grass planting popular for this time of year.

The copper wire I twisted into a shape of a flower and wound it around the jar.

While flowers in my yard are a tad far off…copper wire flowers on my table make me hopeful spring has come!

This DIY project was inexpensive and quick and is a great way to tablescape for spring!

Hope you are inspired to plant your own canning jar garden.  If you try it, send us a email or post a link to our facebook page!

http://www.facebook.com/lovefeasttable ~Join us her for more conversation around our table!

Share and Enjoy:
  • Facebook
  • TwitThis
  • StumbleUpon
  • Technorati
  • del.icio.us
  • Digg
  • Google Bookmarks
  • LinkedIn
  • Live
  • MySpace
  • Twitter
Jan 25

Several weeks ago I went on a business trip with my husband Todd to Cancun, Mexico.  We flew in a day early, along with a team of people from the publishing company he works for to visit a squatter village and giveaway books to the children who live there.

*****

The day after arriving in our hotel and getting settled, we loaded up in vans and headed through Cancun and then to the outskirts of Cancun to the area where squatter villages have sprung up.  We traveled down a bumpy dusty road that eventually lead to the Children’s Home & Community Center.

Already since we had last visited in October more squatter houses had sprung up and walls around the Children’s Home had risen higher.

After we arrived we unloaded the books that had been sent from Capstone to be given away.

Before we began we had the honor of hearing the story and being introduced to the people whose vision created the possibility of this place.  We heard the story of how the partnership and friendship of Mike and Terrill with local churches created a vision of hope for the surrounding community.  And then along with help from mission organizations and private donations this place was built from the cleared ground up, brick by brick over the last ten years.

Then we gathered books in totes and walked down the road and into the community of the squatter villages with interpreters to give books to any children and families that we found along our way.

With our bags loaded with books and small candy we walked out to find some children to give the books to and to invite people to join us at 1pm for lunch back at the Center.

Children and sometimes parents came out of their home as we called out a greeting.  We smiled, attempted to say some small words in Spanish.  It was a beautiful day to be outside.  It was a beautiful day.

Something to hold on to and always remember.

Share and Enjoy:
  • Facebook
  • TwitThis
  • StumbleUpon
  • Technorati
  • del.icio.us
  • Digg
  • Google Bookmarks
  • LinkedIn
  • Live
  • MySpace
  • Twitter
Dec 21
Gift Wrapping & Organizing Tips
Posted by ChrisAnn in Projects on Dec 21st, 2010 | Comment Bubble  7 Comments »

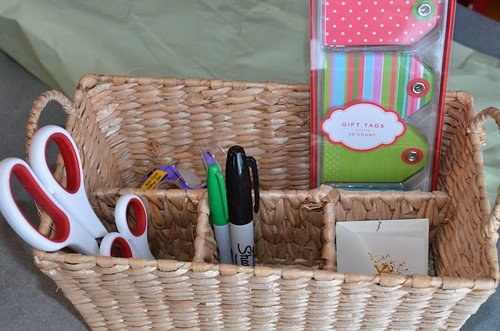
DSC_0736

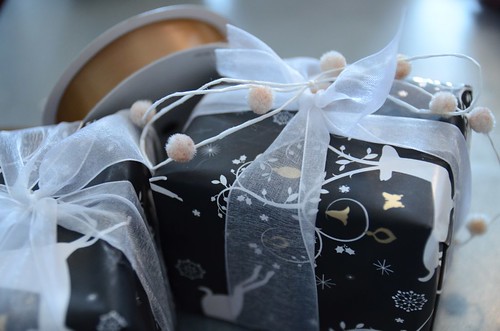
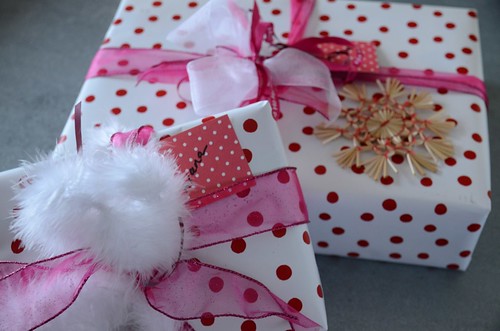
Gift wrapping is one of my favorite things to do.  I love the creative process of selecting ribbons, bows and wrap.  I love preparing my gift for presentation and thinking of the anticipation the look of it will bring.

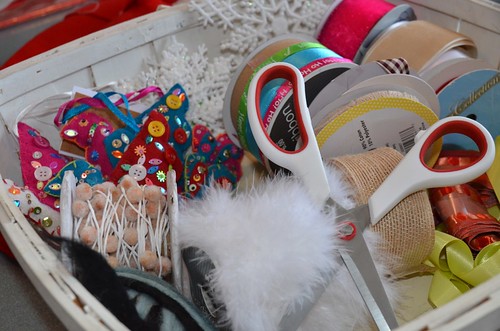
DSC_0743

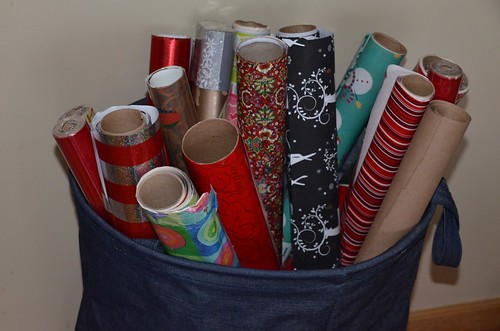
The chaos I create when creating or particularly when gift wrapping…well let’s just say, this is an area that I have worked hard on to change.   This year I found buckets, baskets and totes to calm my creative chaos.  Because you see I have a history…

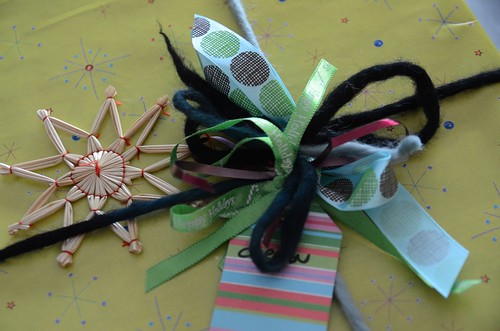
DSC_0691

One of Kristin and my favorite old stories is around the theme of gift wrapping.  One year, way back when we lived in Maryland together.  Kristin and her husband Devon came to our rescue.  Well, lot’s of times they came to our rescue, near-burnt roasts have been saved, houses been cleaned, grills warmed, drinks mixed, babies bathed, and near dead-dog tragedies been amended.  But, this time it was around gift wrapping.  And, dinner.  You see Todd and I had to pack up to go to drive to Minnesota as we did many years before we finally moved here.  It was very late at night.  Kristin called over to see how we were doing.  Perhaps it was the edge in my voice.  Perhaps it was the manic laughter when I stammered, “still wrapping!”

Wrapping~it can be part of the gift giving piece that sneaks up on you.  You may get the gift but forget the time it takes for presentation or not have all the right stuff gathered and handy.

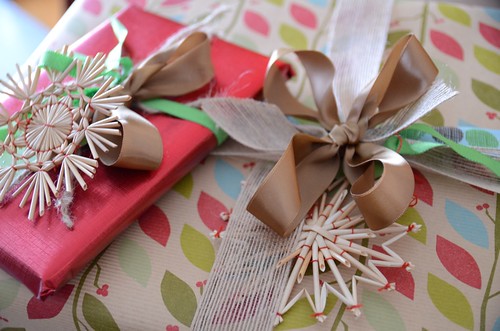
DSC_0695

So, back to my story and the particular year Kristin found me way behind schedule, still wrapping, in need of laundry to be done, suitcases to be packed.  And~oh, we hadn’t eaten dinner.  But, I can tell you for sure.  Gifts were being wrapped pretty-style!  Because I’m stubborn about it.  Because I care.  Because I like it.  But, let’s just say in the process more than a few bobbles of ribbon had unwound, snippets of scraps had been flung and creative clutter had collected.

DSC_0693

Later and by the time Kristin found me up in the spare room…ribbon and paper had actually covered every inch of the room and had literally found it’s way to unravel down the hallway and stairway to another floor.  I was “creating” in a design disaster.  I had not noticed until the moment her silhouette appeared in the doorway of the room and she gasped, “oh my gosh!” and started laughing.  And, then finally looked away from the gift I had been wrapping and surveyed my surroundings.  I was nearly buried.  But, as a true best friend.  Kristin didn’t judge, rather she inquired, “where exactly were you sitting?” as she crawled in to take over.

And, that is not all.  While my husband Todd and I worked to pack it all up.  Devon came with hot leftover dinner from a catering job.  So, we were wrapped and packed.  Then, while our little ones slept upstairs and Kristin and Devon’s were watched at home by a grand-mom, we four sat at our dining room table and had dinner.  The chaos and the clamoring to get ready stopped and we savored a moment at the table.  Four friends enjoying a real Christmas gift, being there for the little things and the big, delving in and helping and stopping to savor life’s “real” moments.  It was a Christmas-time meal I will never forget.

DSC_0747

My tips on wrapping are this:

1.  Set up a gift wrapping station.  Maybe a small table off to the side or in the basement that has all the stuff you need including a trash can, packing and scotch tape and scissors.

2. Gather pretty wrap, tissue paper, bubbles wraps, packing material, boxes of all styles.

3. Gather inspiring ribbons, yarn, twine, ornaments of all colors and textures to add embellishment to your gift wrap.  Don’t be afraid to do something that doesn’t “match” perfectly.  Sometimes there is more beauty and whimsy in the imperfect and colorful.

4.  Have gift tags, markers and pens ready to add the name tag to your gift.

5.  Enjoy a creative moment with yourself!!

6.  Worst case scenario, call a friend for help!

DSC_0741

For more great gift wrapping ideas I found, Have And Hold Design’s Friday Wrap series very inspiring!  Check out: Holiday Gift Wrapping Tips, Re-used Paper and Icy Winter Streamers.

Do you have any idea, tips or inspiration to share?

Share and Enjoy:
  • Facebook
  • TwitThis
  • StumbleUpon
  • Technorati
  • del.icio.us
  • Digg
  • Google Bookmarks
  • LinkedIn
  • Live
  • MySpace
  • Twitter
Nov 11

DSC_0136

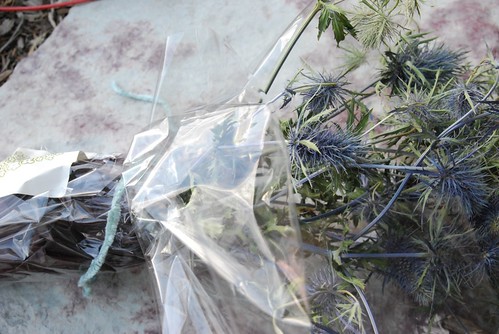
Yes, it’s true, I have always been a sucker for yummy textures and pretty scraps.  Burlap, fuzzy cords, and thick beautifully died yarn make my heart sing.  I’m not a seamstress.  I’m a gatherer.  I have fabric, yarn, bits and scraps waiting to be transformed.

DSC_0147

And, purple thistle.  Does this make you think about a Thanksgiving mantel?  Well, not right off the bat.  But, I think that decoration is most interesting when it’s unusual.

DSC_0146

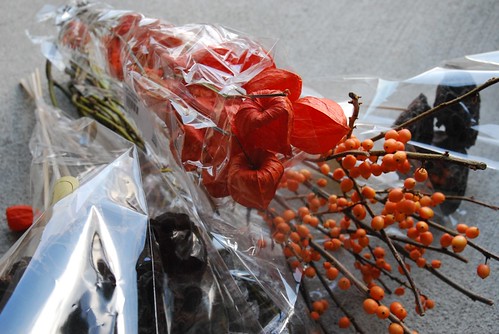
Here’s a more traditional gathering of browns and oranges.  The Chinese Lanterns remind me of my Grandma Bessie’s garden.  She always had those and for years I’ve been meaning to add them to my yard.

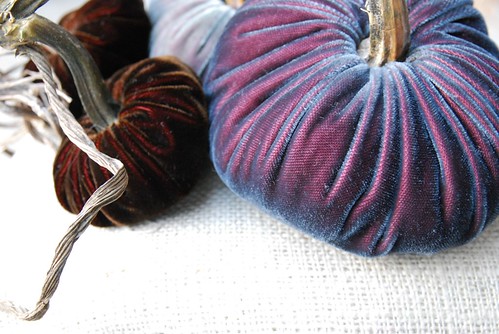
And, for the centerpiece of my mantel these charming velvet pumpkins!!  They have real stems attached and I loved the iridescent color.  They were a splurge but I’m hoping to use them year after year.  They make me happy.

DSC_0140

Texture, colors, and pattern.  These are three ingredients to a beautiful mantel.  Stay tuned.  I’ll be working on it this weekend.  What are you doing for Thanksgiving decorating?

Share and Enjoy:
  • Facebook
  • TwitThis
  • StumbleUpon
  • Technorati
  • del.icio.us
  • Digg
  • Google Bookmarks
  • LinkedIn
  • Live
  • MySpace
  • Twitter
Oct 10

DSC_0151

We know that if you like to savor a nice glass of wine like we do then you easily may be inspired to save your old wine corks.  One way to savor your memories is remembering the time you shared a glass of vino together with someone, by saving your wine cork.  Piled together they say time was treasured when you joined someone at the table to savor a beautiful moment.

There are lots of fun ways to show off your wine corks.  Kristin filled her hurricane with corks to surrounded her candles on her birthday table.  You can see more of her table-scaping on this post:  LoveFeast Birthday Celebration Yes It Continues

Belissimo

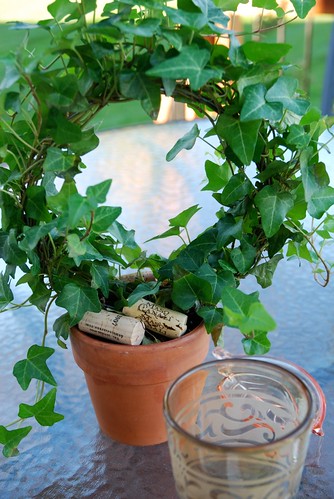
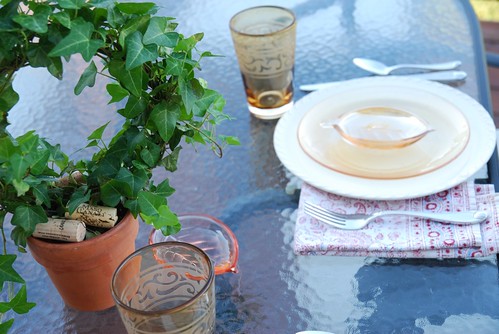
This summer I simply took a few corks to cover the soil in a pot of ivy.  It made a nice centerpiece on an outdoor table.  Later, it sat at my kitchen sink…a great way to savor a memory and a lingering reminder of an evening spent with friends!

DSC_0150

Here are some other places to get leftover wine cork inspiration!

Design Sponge DIY Project:  Bottle Stopper Menagerie and DIY Project:  Abigail’s Cork Trivet And Coaster Set

belle maison DIY Cork Crafts For Winos

Weddingbee Love: Cork Place Card Holders

Craftynest Wine Cork Bath Mat

High/Low Food/Drink What To Do With Used Wine Corks (And A Trip Down Memory Lane)

Simply Em Project Wednesday: “Cork” Boards

Unplug Your Kids Thankful Wine Cork Necklaces

And if you have time…you can ponder:  Dr. Vino Wine Talk That Goes Down Easy~Cork Dork:  Ten Cool Things To Do With Leftover Wine Corks

And, remember the Fancy Friday Art Car?  Visit Jan D. Elftmann CorkTruck for fun!

Do you have any projects that you have done with wine corks?  Leave your comments and inspiration here!

31 Days to Savor a Beautiful Life

Share and Enjoy:
  • Facebook
  • TwitThis
  • StumbleUpon
  • Technorati
  • del.icio.us
  • Digg
  • Google Bookmarks
  • LinkedIn
  • Live
  • MySpace
  • Twitter
Oct 7

This year I have the easiest trick to bring your summer planters from summer to fall for our 31 Days To Savor series.

DSC_0111

Every year I take a sunny fall day and shift my porch from summer to fall.  It is a day I savor to be outside and to be creative.

DSCN1338

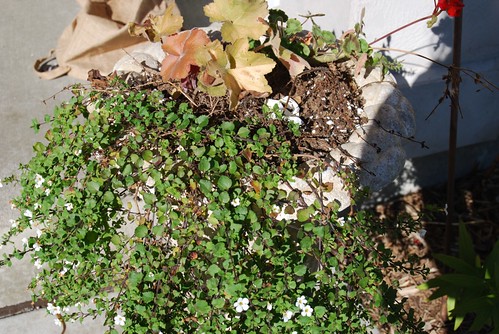
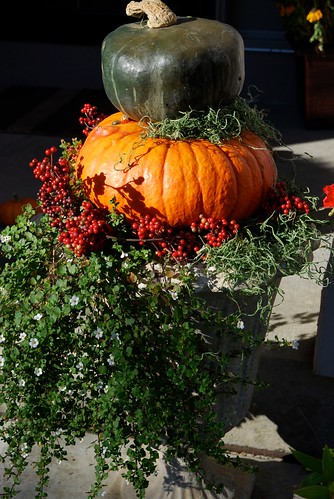
Here is what I did this year to my porch planters.   At the end of the summer season I am sorry to say this is what my planters were a little sad and thirsty!  Since my plants were looking so tired, I didn’t waste my time or create a mess by pulling the plants out.  I just used them as is and embraced what color and texture the left over plants gave me.

DSC_0093

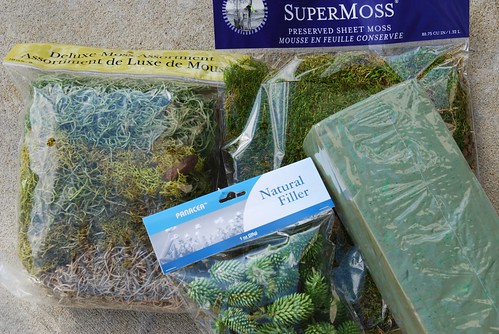
First, I gathered up some different types of moss and fillers.  I like a little for leftovers to add to plants and containers through out the year too.

DSC_0142

Then, I gathered some pumpkins, gourds, berry stems and decorative corn from the garden market.

DSC_0094

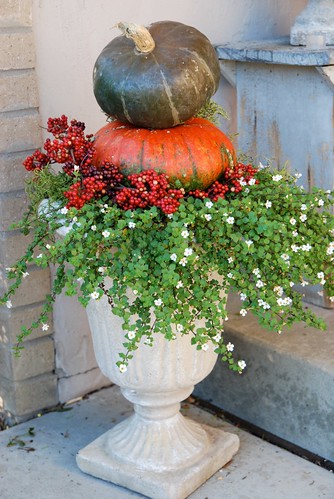
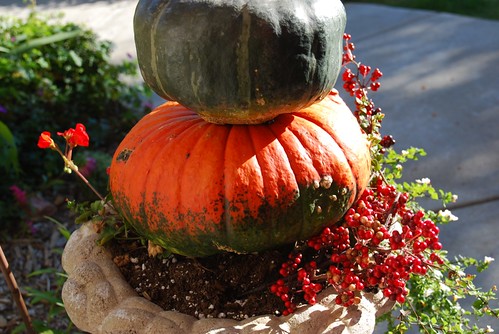
Then, I found some pumpkins that stacked nicely on each other.  I surrounded them with stems of berries.  I like to use real berries, but this year I found these fake that I think still worked well.

DSC_0106

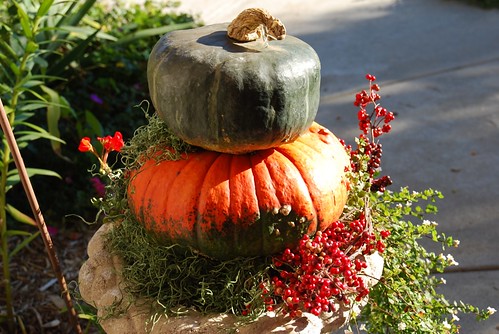
Then, I filled in the empty spaces and dirt with moss.  I also put some moss in between the wiggly spaces around the pumpkins, both to help balance them as well as for the visual effect.

DSC_0113

DSC_0116

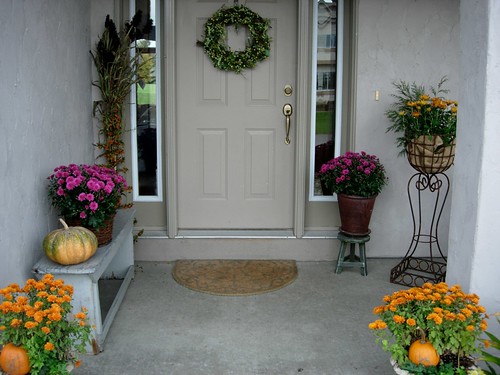
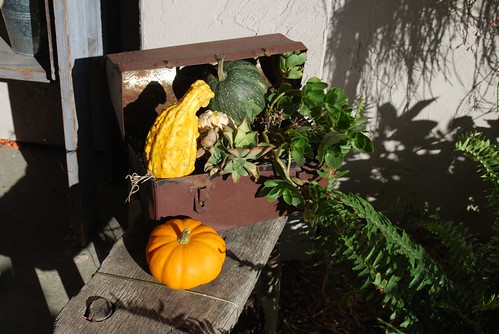
With my leftover pumpkins and gourds I decorated my porch bench.

DSC_0122

And, I plopped some into various planters and a potted lunch box of summer succulents.

DSC_0105

DSC_0119

Now, it looks a little bit more fall festive when you come to my front porch.

DSC_0123

What are you doing to Savor A Beautiful Life?  Share your ideas by commenting or link up your ideas over here at 31 Days To Savor A Beautiful Life!

31 Days to Savor a Beautiful Life

Share and Enjoy:
  • Facebook
  • TwitThis
  • StumbleUpon
  • Technorati
  • del.icio.us
  • Digg
  • Google Bookmarks
  • LinkedIn
  • Live
  • MySpace
  • Twitter