May 6
Fancy Friday ~ Graduation Parties
Posted by ChrisAnn in Celebrations, Fancy Friday on May 6th, 2011 | Comment Bubble  1 Comment »

Graduation is coming just around the corner.  For many it is a time of planning, preparation and party throwing.  Last year I seem to remember both Sandy ~ The Reluctant Entertainer and Kristen ~ High Heels And A Hammer were hosting graduation celebrations.  Kristin and I have a year or two before we throw graduation party celebrations.  Just last summer we hosted a party for 16 year old boys.  But, we are happy to gather any tips and ideas for those that have gone before us.

Last May, Kristen ~ High Heels And A Hammer asked me to help decorate for her daughters graduation party.  I was thrilled to help!  And, thrilled my garden was in full spring bloom!


Now, what you may not know, is that Kristen and I have been friends for years.  Our husbands were high school and college friends and Kristin and I were college roommates.  We were both in each others’ weddings and have seen our families grow from babyhood and now the beginning of adulthood.  I’m not going to do the math for you, because I don’t want to blow our cover!  See look!

Mom and daughter on the celebration day~ beautiful!

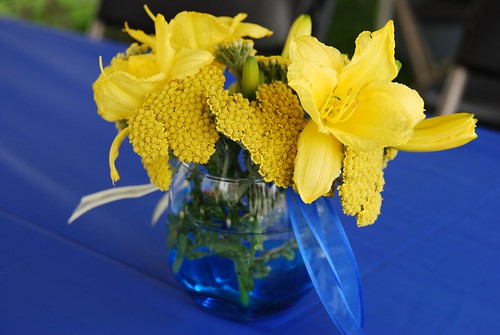
For the graduation centerpiece we wanted to keep a couple of things in mind ~ beauty, simplicity, sturdiness in the wind (since this was going to be an outdoor event) price and school colors.

So, instead of buying or renting small vases.  I realized I had these inexpensive wine glass tumblers.  Several years ago I purchased  about 20 of these tumblers for a couple of bucks a piece at Pier One.  They have come in handy for so many events and have been used for desserts, drink and now vases.

Then, I added blue polished glass from my local craft store.  This was to both weight down the tumblers and add a little bit of color.  I added water of course to keep the flowers from wilting.

The school colors were blue and gold.  I cut wired ribbon to hang off the side of each vase.  I folded the cut ribbon and then bent it over the edge.  I didn’t use any adhesive because I didn’t want any tape or glue to show and it stayed just fine.  The ribbon over the edge was a little extra touch that gave a finished effect.

Then, I added only yellow flowers of different shapes and sizes to the vase for a monochromatic arrangement.

The finished centerpiece was simple, sturdy and beautiful and let the most important thing at the table hold the attention ~ friends and family who came to spend time together and celebrate!

Tips for graduation party centerpieces:

1.  Ask a friend with a blooming garden to help.

2.  Choose simple weighted low vases or glasses.

3.  Use garden flowers for a personal touch and to keep expenses low.

4.  Choose a monochromatic colors that highlight school colors or theme.

5.  Add ribbon or simple detail for a finished effect.

Do you have any tips and stories to share for graduation celebrations?  We’d love to have you link up your ideas or share it as a comment with us at our table!

Share and Enjoy:
  • Facebook
  • TwitThis
  • StumbleUpon
  • Technorati
  • del.icio.us
  • Digg
  • Google Bookmarks
  • LinkedIn
  • Live
  • MySpace
  • Twitter
Apr 22

Easter is a wonderful celebration.  We always look forward to a relaxed day of gathering for a lovely meal around the table, Easter egg hunts and family time.  This year, I feel ahead of the game.  My Easter table has been set for a couple of days.  Once I set it to prepare for this post, I thought, why not leave it up?

Spring has not completely sprung here in Minnesota, in fact, we had snow just earlier in the week.  I didn’t want my table to be overly flowery or springy.  It wouldn’t fit in with the not yet green grass.  But, I want my table to be pretty and hopeful for the change of season to come and for the celebration of this time.  I also wanted my table to be special but not too formal.  My inspiration for my table this year came from a couple of places:  the restaurant ABC Kitchen in NYC, natural colors of wood, metal and burlap, vintage plates, my spring Canning Jar Garden project and flowers.

Last August when we attended BlogHer, we had a wonderful time at the table at the London with Laura and Linda and at ABC Kitchen for lunch.  We were all inspired by the blend of modern and vintage place-settings.  I knew I would be saving that vibe for the perfect time.  So, I’ve been on the outlook for the right vintage plates.  I have Kristin’s china of course, but, it’s boxed up ready for her to take back.  Then, I found these.


My Spring Canning Jar Garden project was a perfect natural centerpiece.  I placed them in an old sterling dish I have.  I used natural color burlap fabric for a table runner.

Flowers, some wooden eggs, candles and glasses add to the mix.


How to tips for setting a vintage inspired Easter Table.

l.  Layer a mix of textures, shiny, tarnished, burlap, wood, linen, china, glass all mixed together.

2.  Add low fresh plants, flowers or wheat grass.

3.  Candles, less for an afternoon meal.

4.  Use real napkins, why not?  Your family is worth it.

5.  Layer the plates and mix the styles.  I mixed white modern-shaped plates with the vintage ones.

6.  Add some whimsical, but not silly, tablescaping items for a festive and sophisticated table.  This year I added an cement antique garden bunny and some wooden eggs from the local craft store.

7.  Set your table early so you can enjoy the creative process.

8.  Savor you day and the memories you make around your beautiful table.

What’s inspiring you around your Easter Table?  We’d love it if you’d link up you favorite recipes, stories, tablescaping and Easter celebration ideas at our table!
Share and Enjoy:
  • Facebook
  • TwitThis
  • StumbleUpon
  • Technorati
  • del.icio.us
  • Digg
  • Google Bookmarks
  • LinkedIn
  • Live
  • MySpace
  • Twitter
Mar 23
Tablescaping for a Skater Brother
Posted by Kristin in Celebrations, LoveBomb on Mar 23rd, 2011 | Comment Bubble  9 Comments »

DSC_0134_01

Last fall we took a him in.  He’s a good kid who had too many curve balls thrown his way.  He needed a break.  We hoped our home would be the break he needed.  Our kids quickly opened up their hearts and rooms to him and let him in.  Little Man calls him his brother.  Drama Boy calls him, “His brother from another mother.”

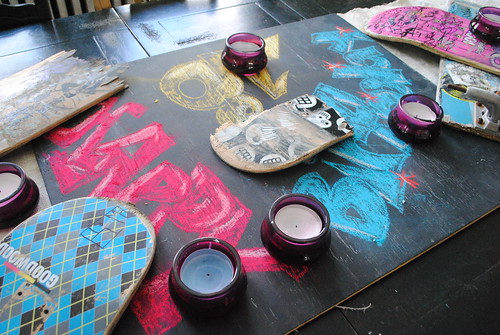
Recently he turned 18.  We helped throw a party for him.  Wanting to honor his passions without belittling him with youthful decorations, I came up with this.

DSC_0121_01

DSC_0123_01 DSC_0131_01

Throughout last year, when we LoveBombed him and his friends at the skatepark, I collected the broken decks.  I have stacks of them under my porch.  We turned some into tables.  But, I have many more ideas in mind…now all I need is a little time.

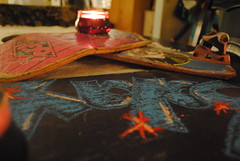
For his party, I put a piece of chalkboard painted plywood on the center of my table.  In graffiti style, I wrote Happy 18th Birthday.  I just layered broken skateboard decks and put purple votives on top and around them.

DSC_0172_01

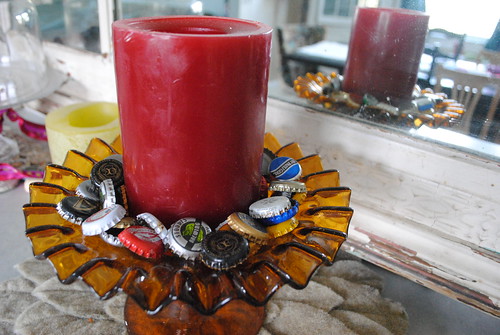
Keeping with an urban theme, I pulled out bottle caps we had and put them around a candle.

DSC_0174_01

Sometimes with tablescaping, less is more.  I wanted to show him we cared about what he cared about, without going overboard and trying too hard.  I wanted the evening to be edited and yet thoughtful.

He requested steak and shrimp.  So, we fired up the grill…

DSC_0154_01 DSC_0157_01

sauteed shrimp with beer and Old Bay…and enjoyed the evening with his family and friends.

DSC_0158_01

Who would’ve thought we’d still be LoveBomb-ing these boys in our own home…welcoming them completely into our lives.  Happy Birthday Brother.

Share and Enjoy:
  • Facebook
  • TwitThis
  • StumbleUpon
  • Technorati
  • del.icio.us
  • Digg
  • Google Bookmarks
  • LinkedIn
  • Live
  • MySpace
  • Twitter
Mar 20
Canning Jar Gardens For Spring
Posted by ChrisAnn in Celebrations on Mar 20th, 2011 | Comment Bubble  14 Comments »

Happy first day of Spring!!  Minnesota has kept its tradition of being snowy and frozen again this year.  And, I am writing this post now from 35,000 feet in the air on my way to Cancun.  After a long day of flight delays and potential missed connections somehow we are on our way!  Somehow our 6 coach tickets were magically upgraded to 6 tickets in 1st class on a direct flight instead of a lay over in Detroit.  So, as far as I’m concerned Spring is starting out on the right foot!

Last week while there were still sufficiently sturdy snowbanks in my yard, I decided to start gardening…gardening in a jar!  Canning Jar Gardens for spring are an inspiring idea for tablescaping, spring decoration and reminding you that the real gardening season is on its way!

Initially the inspiration for this DIY project came from Anthropologie.  They always have uniquely crafted displays.  Just one trip there and my mind is was transported from the gray tundra to the possibility of color and in this case, spring.

Another trip to a local Twin Cities gardening center, Bachmans’ helped me collect all the pieces I knew I needed, vintage canning jars, potting soil and the plant called Angel Tears.

Angel Tears plants love light and humidity so a canning jar is actually a great place to transplant them.  I also gathered up some wire from a local craft store for some canning jar accessorizing.

For four canning jars I bought just 2 small plants, filled the jars with potting soil and stuck the divided plants on top.

They are a fun alternative to wheat grass planting popular for this time of year.

The copper wire I twisted into a shape of a flower and wound it around the jar.

While flowers in my yard are a tad far off…copper wire flowers on my table make me hopeful spring has come!

This DIY project was inexpensive and quick and is a great way to tablescape for spring!

Hope you are inspired to plant your own canning jar garden.  If you try it, send us a email or post a link to our facebook page!

http://www.facebook.com/lovefeasttable ~Join us her for more conversation around our table!
Share and Enjoy:
  • Facebook
  • TwitThis
  • StumbleUpon
  • Technorati
  • del.icio.us
  • Digg
  • Google Bookmarks
  • LinkedIn
  • Live
  • MySpace
  • Twitter
Mar 17
An Irish Blessing to You, Our Friend
Posted by Kristin in Celebrations on Mar 17th, 2011 | Comment Bubble  1 Comment »

Dear Friend,

Here’s a little Irish Blessing for you today!  *raises glass*

May the rains sweep gentle across your fields,
May the sun warm the land,
May every good seed you have planted bear fruit,
And late summer find you standing in fields of plenty.

Go n-eírí an bóthar leat.

Kristin & Chris Ann


Share and Enjoy:
  • Facebook
  • TwitThis
  • StumbleUpon
  • Technorati
  • del.icio.us
  • Digg
  • Google Bookmarks
  • LinkedIn
  • Live
  • MySpace
  • Twitter
Mar 11

Today we are celebrating all things green, edible, beautiful, fancy, lucky and Irish.  We’d love to hear your story and share our inspiration.  If you are a blogger and have a post related to all things St. Patrick, please pull up a chair and join us by linking up at the bottom of this post.

Here’s a little of our inspiration for St. Patrick’s Day.

Kristin’s visit to Ireland ~

shores of ireland

and her wee little leprechaun.

reds

Beautiful green avocados~

Avocado Pound Cake~

Irish Soda Bread~

Pull up a chair and join us!!  What are you feeling fancy about?  How do you celebrate, what story can you share, what do you have that’s green, or delicious or beautiful…or Irish?


Share and Enjoy:
  • Facebook
  • TwitThis
  • StumbleUpon
  • Technorati
  • del.icio.us
  • Digg
  • Google Bookmarks
  • LinkedIn
  • Live
  • MySpace
  • Twitter
Feb 14
Happy Valentine’s Day
Posted by ChrisAnn in Celebrations, Our Journey, Recipes on Feb 14th, 2011 | Comment Bubble  2 Comments »

We hope this day finds you happy!!  Kristin and I have a bit on our plate this morning.  Kristin is at a homeschooling co-op and I have a team of carpet layers pounding carpet into every level of the house.  Right now my living room office and dining rooms are crammed into the kitchen.  I’m surrounded by my chaos and my sofas, chairs, cabinets, and accessories.  I can’t complain much though.  Because this is by choice not by flood.   So, Kristin and I are going to have depend on you all for creative inspiration today.  We hope that on the below link you share your recipes and decorations and stories of Valentine’s with us.

Here are some LoveFeast Table stories, recipes & Valentine’s Day inspiration previously posted~

I Fell In Love In Colorado ~ Super Hero Love ~ LoveBomb-ing Boys @Ridge

LoveFeast Chocolate Espresso Cookies ~ Pig Cake & Shebang Cheesecake ~ Feel This Red Velvet Cake

Share and Enjoy:
  • Facebook
  • TwitThis
  • StumbleUpon
  • Technorati
  • del.icio.us
  • Digg
  • Google Bookmarks
  • LinkedIn
  • Live
  • MySpace
  • Twitter
Feb 7
Colorful Cupcakes & Birthday Wishes
Posted by ChrisAnn in Celebrations, Our Journey on Feb 7th, 2011 | Comment Bubble  4 Comments »

Could you join me for~


Birthday wishes for a delicious year heaped with colorful adventures, sweet surprises & happiness!!

Happy Birthday Kristin ~ have a great day!!

*****

Kristin’s Birthday Celebrations last year~ Happy Birthday Kristin, 2010, LoveFeast Birthday Celebration, Birthday Week Part 2, 2010, Birthday Week Part 1, 2010

Cupcakes from the Golden West Cafe for BlogLove™ “Takes Flight”.   Our history~ Where It All Began…Golden West Cafe

Share and Enjoy:
  • Facebook
  • TwitThis
  • StumbleUpon
  • Technorati
  • del.icio.us
  • Digg
  • Google Bookmarks
  • LinkedIn
  • Live
  • MySpace
  • Twitter
Jan 6
Lemon Mousse Recipe Rings in 2011!!!
Posted by Kristin in Celebrations on Jan 6th, 2011 | Comment Bubble  2 Comments »

DSC_0028

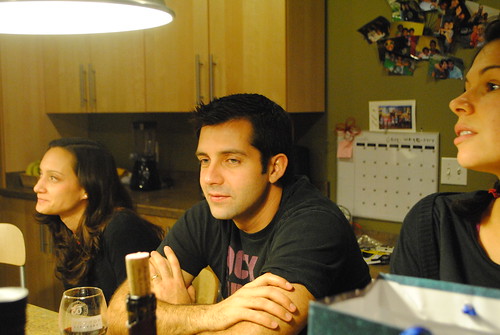
This New Year’s Eve, we were invited to spend it with our friends Amanda and Noe.  They are back from Africa and wanted to get together!  The arrangement was, Devon cooks and they buy the food!  We were joined by two other friends, Kat and artist husband Matt!  It was shaping up to be a yummy and fun night!

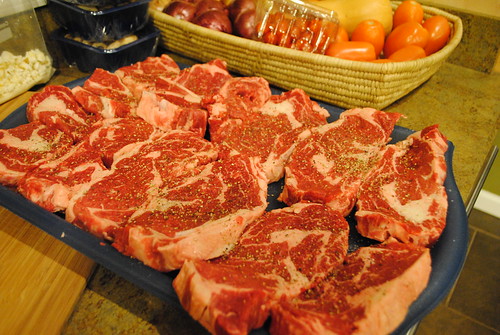
With a little brainstorming we created a menu with steak as the star (per the guy’s request!)

DSC_0029

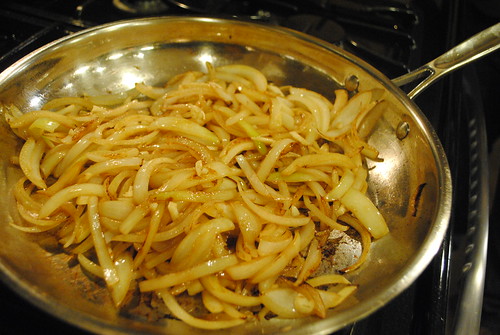
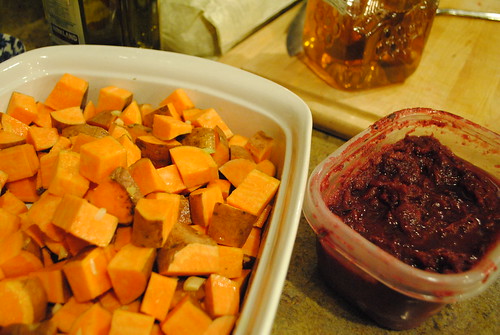
The night was started off with Devon’s Caesar Salad. The entree was grilled rib eye steaks topped with sauteed mushrooms and onions and roasted sweet potatoes with caramelized onions and cranberry sauce.

DSC_0026

DSC_0027

Amanda requested something lemony for dessert so I decided on Lemon Mousse!  I’ve made this Lemon Mousse before!  It is rich and tangy and decadent and well, the perfect way to ring in the New Year!!!

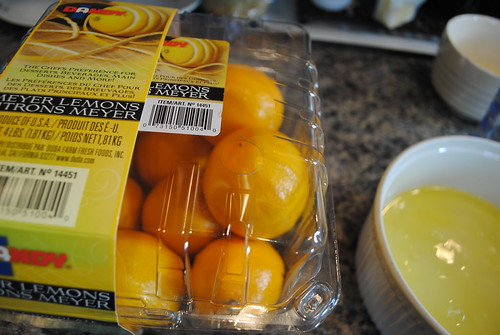
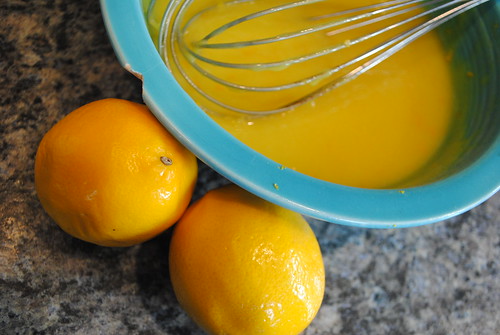
Typically my grocery store doesn’t carry Meyer Lemons, but for the holidays I found these beauties!

Lemon curd recipe

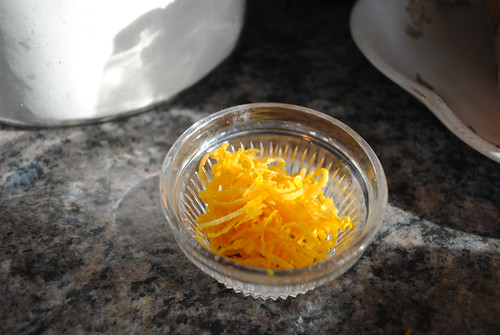
Zest one lemon.

Lemon curd recipe

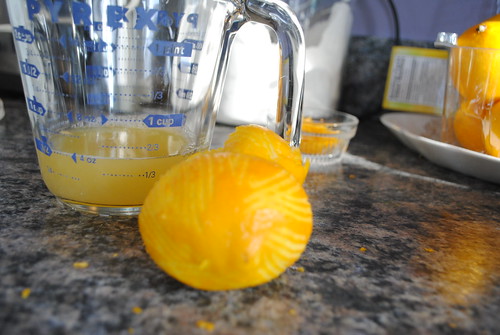
Juice approximately two lemons to yield 1/2 Cup of lemon juice.  I love this electric citrus juicer.  I picked it up years ago at a flea market for $2.00.  I’m not a huge kitchen gadget fan, but this machine has come in handy over and over!

Lemon curd recipe

Lemon curd recipe

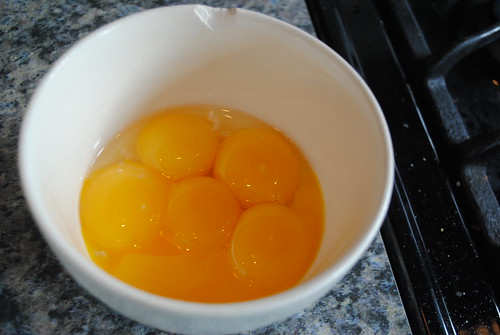
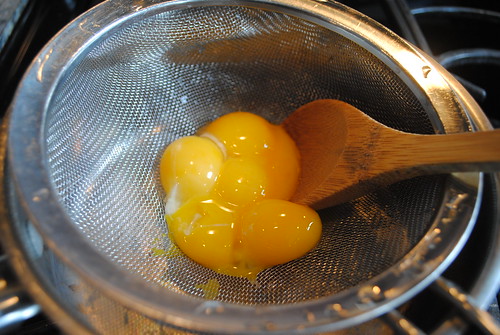
Then take 6 egg yolks and strain them through a fine sieve.

Lemon curd recipe

Lemon curd recipe

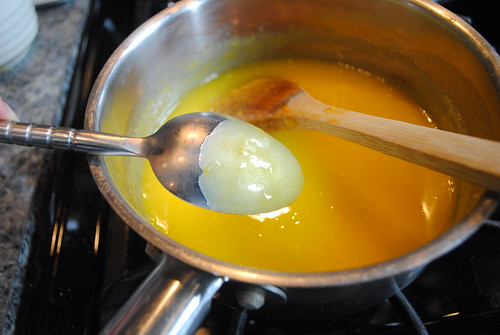
Combine the egg yolks with 1 Cup of sugar, lemon juice and lemon zest in a non reactive pan and cook stirring constantly for 10-12 minutes until the mixture coats the back of a spoon.

Lemon curd recipe

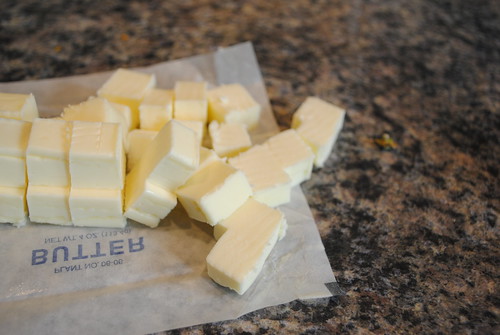
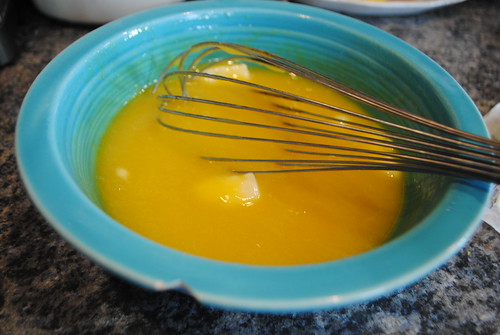
Remove from heat and whisk mixture to cool it slightly.  Then stir in 1 stick of butter that has been cut into small pieces.  Drop the pieces in one at a time, until fully incorporated.

Lemon curd recipe

Lemon curd recipe

Put into a clean container and refrigerate until chilled.  Take a quart of heavy cream and put into a kitchen aid mixer with a whisk attachment.  Whisk on medium until cream is thick with soft peaks.  Add 1 tsp. of vanilla and 1 Cup of confectioner’s sugar and mix until combined.  Put the heavy cream into a large mixing bowl and then gently fold in the lemon curd until mixed.  We served the mousse with fresh berries.

I apologize I don’t have pictures of the final steps.  At that point, out New Year’s festivities were under way and I wanted to enjoy the moment without my camera!

DSC_0036

But, I promise, this dessert will help you celebrate just about anything!

Lemon curd recipe

Happy 2011!!!

Share and Enjoy:
  • Facebook
  • TwitThis
  • StumbleUpon
  • Technorati
  • del.icio.us
  • Digg
  • Google Bookmarks
  • LinkedIn
  • Live
  • MySpace
  • Twitter
Dec 23
Milk Punch Recipe
Posted by ChrisAnn in Celebrations on Dec 23rd, 2010 | Comment Bubble  3 Comments »

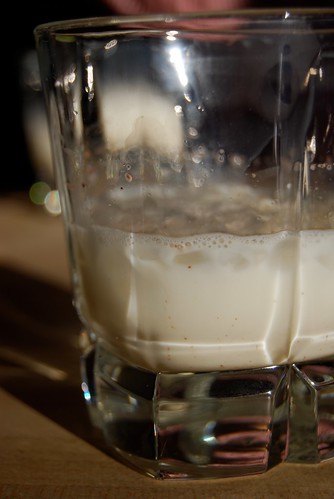
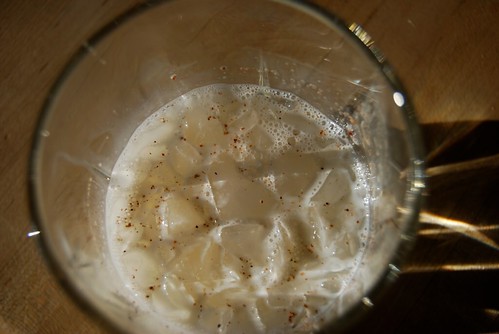
Milk Punch Christmas morning is a tradition my sister-n-law’s family savored back in the day when my sister-n-law, Kim was growing up.  Apparently the recipe and tradition comes with…more stories and memories than can be caught up with.  It’s a now one of our generations favorites along with the Holiday Sangria Kim and I discovered one year.  It’s simple yet, smooth and pleasing Christmas morning.   But, let me just say this…it’s not the milk you put out with cookies for Santa.

dec2008b-035

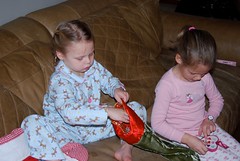
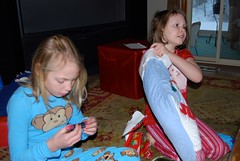
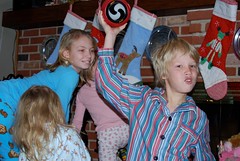
Something for the adults to enjoy while the kids are doing this~

dec2008b-032dec2008b-013dec2008b-008dec2008b-012

Grandma’s Milk Punch Recipe

1 serving~

2oz. Brandy

1oz. Creme de Cocoa

3 oz. Milk

1/2 tsp. Brown Sugar

1 dash bitters-optional

Dust with Nutmeg

dec2008b-034

Share and Enjoy:
  • Facebook
  • TwitThis
  • StumbleUpon
  • Technorati
  • del.icio.us
  • Digg
  • Google Bookmarks
  • LinkedIn
  • Live
  • MySpace
  • Twitter

« Previous Entries