Apr 25
Nick Malgieri’s Cookbook Bake!
Posted by Kristin in Boulangerie, Events on Apr 25th, 2011 | Comment Bubble  4 Comments »

DSC_0115_01

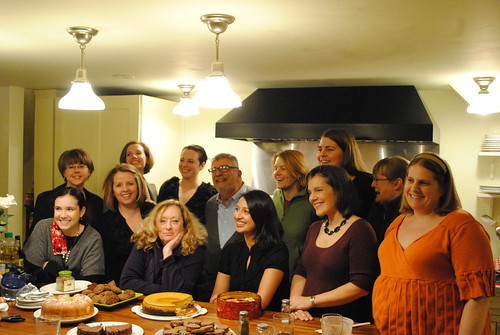
Not too long ago, Devon and I attended a Baltimore food blogger’s get together hosted by Dara at Dining Dish, in Julie from Kitchenography‘s home.

DSC_0094_01

The event was held in honor of Nick Malegieri and was an introduction to his new book Bake!.

DSC_0110_01

Nick is the former Executive Pastry Chef at Window’s on the World.  His credentials and awards speak volumes of his talent and commitment to the art of baking.

This event was wonderful, in that it was casual and informal.

DSC_0104_01

(My kind of event!) We gathered and mingled.

DSC_0098_01

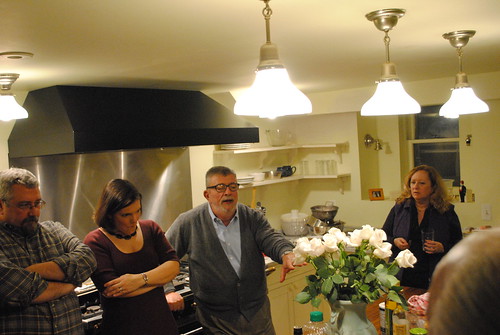
Then Dara introduced Nick.  He shared some of his passions, a bit of his story and then opened up the floor for questions.  He fielded questions about his opinion of baking bloggers and super expensive cookbooks, to what inspired him to start baking and how to get published.  He was gracious and humble.  He was a wealth of information and listening to him, you realized this is a man who understands baking inside and out.

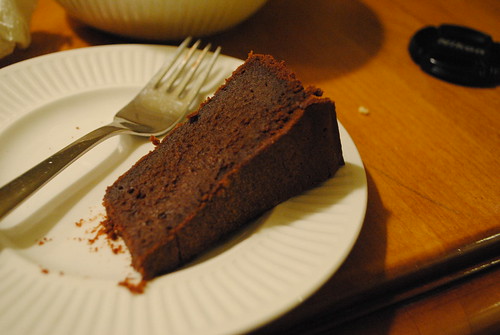
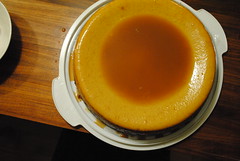
Nick then introduced two items that he made for the evening.  One was this,

DSC_0103_01

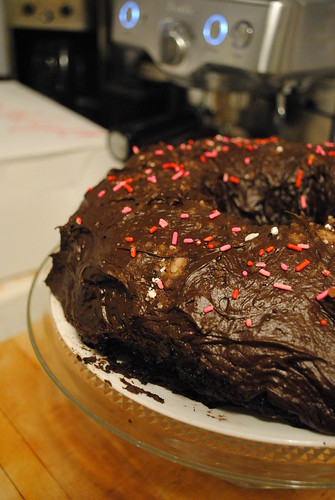
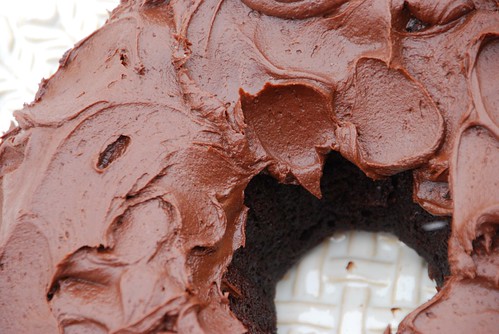
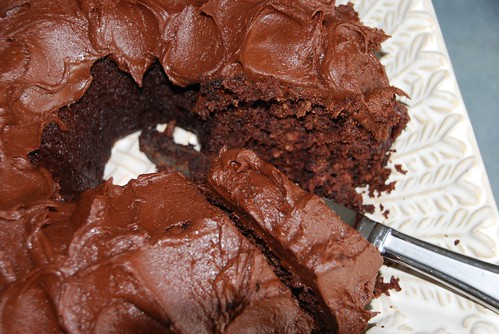
Chocolate Bourbon Cake.  Seriously…can you go wrong with this?

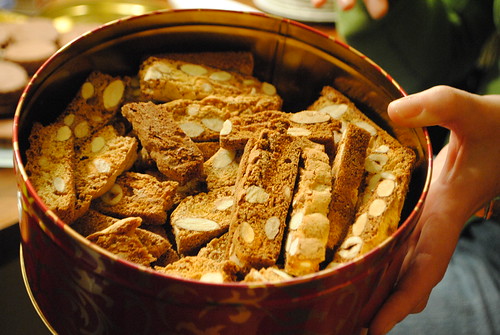
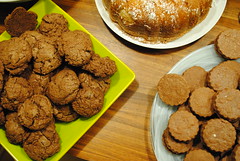
The surprising item for me were these little babies.

DSC_0106_01

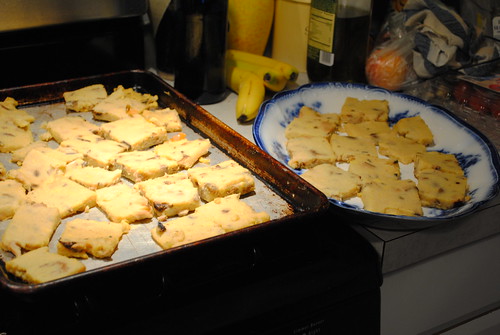
They look unassuming and non-descript…but, let me tell you, when Nick followed up the event with a letter and the recipe for these Tozzetti: Roman Anise, Almond and Hazelnut Biscotti, I was over the moon with joy.  I couldn’t stop eating these.  Julie filled a bag for us to take home at the end of the night.  Let me just say, I couldn’t wait to wake up the next morning and have these with my coffee.  I’m thinking I need to go buy a new cookie jar, to keep it full of these.  They need to be a staple in my home.

Nick shared the recipes with us and not wanting to keep for myself, something so divine, I want to share them with you.  I promise you, neither of these recipes will disappoint.  Neither will Nick Malgieri’s cookbook Bake! We picked one up for our son.  (He wants to own a bakery when he gets older.)  He has already made Kyra’s Hot Milk Sponge Cake recipe that is found in the book and it was delish.
DSC_0092_01 DSC_0091_01 DSC_0090_01
I’m so grateful to have found such a wonderful and talented group of friends through blogging.  Thank you for sharing your own wonderful dishes with us that night.  Also, Dara and Julie, thank you for hosting such an inspiring night and Nick, for sharing with us your talents and recipes.

TOZZETTI:  ROMAN ANISE, ALMOND, AND HAZELNUT BISCOTTI

Unlike most biscotti that are formed into narrow loaves before baking, tozzetti are spread in a pan.  After the initial baking, they are cut into narrow strips and dried in the oven until shatteringly crisp.


Makes about 80 thin biscotti


2 cups all-purpose flour (spoon flour into dry-measure cup and level off)

2 teaspoons baking powder

1 1/2 cups whole blanched almonds, lightly toasted

1 cup whole blanched hazelnuts, lightly toasted

3 large eggs

1 1/3 cups sugar

2 tablespoons Sambuca liqueur

2 teaspoons vanilla extract

1 tablespoon aniseed, crushed

One 9 x 13- x 2-inch pan, buttered and lined with buttered foil

1.  Set a rack in the middle level of the oven and preheat to 350 degrees.

2.  Stir the flour and baking powder together, then stir in the almonds and hazelnuts and set aside.

3. In a large mixing bowl, whisk the eggs, then whisk in the sugar, continuing to whisk for a minute until somewhat  lightened.  Whisk in the liqueur, vanilla, and aniseed.  Use a large rubber spatula to stir in the flour and nut mixture.

4. Scrape the mixture into the prepared pan and smooth the top. Bake until just firm, about 20-25 minutes.  Cool in the pan on a rack.

5. When completely cool, slide the slab of baked dough to a cutting board.  Use a sharp serrated knife to cut into three 3-inch wide bars, then cut across them to make 1/2-inch thick biscotti.  Arrange the cut biscotti on 2 paper-lined pans.

6. Dry the biscotti until very crisp but still light in color at 325 degrees for about 20 minutes.  Cool and store in a tin.

Copyright © Nick Malgieri 2011, All Rights Reserved


CHOCOLATE BOURBON CAKE

The sweet, mellow flavor of Bourbon has a great affinity for chocolate.  Serve this unadorned cake with a little unsweetened whipped cream.


Makes one 8-inch cake, 8 to 10 servings


2 sticks (8 ounces) unsalted butter, cut into 12 pieces

8 ounces bittersweet chocolate (70%), cut into 1/4-inch pieces

1/2 cup granulated sugar

1/2 cup all-purpose flour (spoon flour into dry-measure cup and level off)

Pinch of salt

5 large eggs

3 tablespoons best-quality Bourbon

1/2 cup dark brown sugar, firmly packed


One 8-inch round 2-inch deep pan, buttered, bottom lined with a disk of buttered parchment


1.  Set a rack in the upper third of the oven and preheat to 350 degrees.

2.  Melt butter in a saucepan over medium heat, allowing it to sizzle and get really hot.  Remove from heat, add chocolate and whisk smooth.

3.  In a bowl, whisk the granulated sugar, flour, and salt together; add all the eggs and Bourbon.  Whisk together smoothly

4.  Stir the brown sugar into the butter and chocolate mixture and stir into the batter.

5.  Pour the batter into the prepared pan and smooth the top.  Bake the cake until the center is still soft, but no longer liquid, 25 to 35 minutes.

6.   Cool the cake on a rack.

7.   To serve the cake, invert to a platter and remove the pan and paper.  Cover loosely with plastic wrap if not serving immediately.

Copyright © Nick Malgieri 2011, All Rights Reserved

Share and Enjoy:
  • Facebook
  • TwitThis
  • StumbleUpon
  • Technorati
  • del.icio.us
  • Digg
  • Google Bookmarks
  • LinkedIn
  • Live
  • MySpace
  • Twitter
Dec 13

We have had an amazing Cookie Exchange!  We are so honored to have so many talented guests, from all over the world, pull up a chair at our Table and share their favorite cookie recipes!  Not only has there been a variety of recipes, but also a beautiful array of stories, memories and feelings about what the holidays hold for each of our guests.  We want to thank them all for taking the time to share with us!  And, we can’t wait to make these recipes for our families!

In the midst of our virtual Cookie Exchange, I was invited to an “in real life” Cookie Exchange with a number of local Baltimore/DC bloggers!

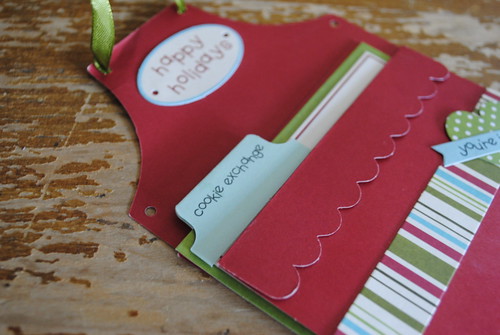
Cookie exchange

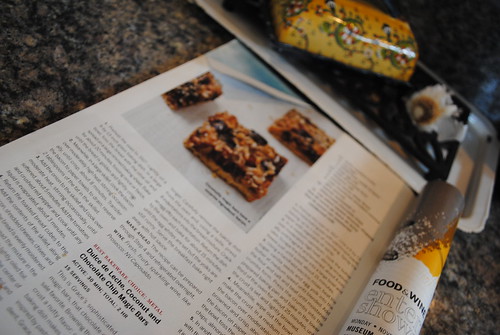
Immediately my brain began going over every cookie recipe I’d ever made, hoping to find just the right one!  I was coming up short.  I knew there would be plenty of sugar cookies and variations of chocolate chip cookies…I wanted something unique!  Then I came across this recipe in Food and Wine’s November 2010 magazine.

dulce de leche magic bars

Stop my beating heart!!!  Chocolate, bacon, coconut, almonds, dulce de leche!!! What more could you ask for in a cookie?

This recipe seemed pretty doable.  It seemed straight forward until I realized my local grocery store doesn’t carry dulce de leche.  So, as I’m standing there in the refrigerated isle,  I pulled out my phone (I love modern technology!) and googled dulce de leche recipes.  At the top of the screen was Alton Brown’s recipe.  Being as we are huge fans of Alton Brown, I quickly scrolled the recipe and gathered the necessary ingredients.

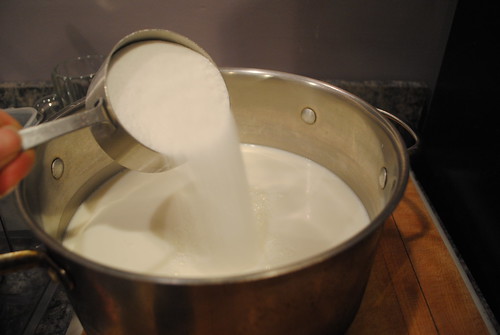
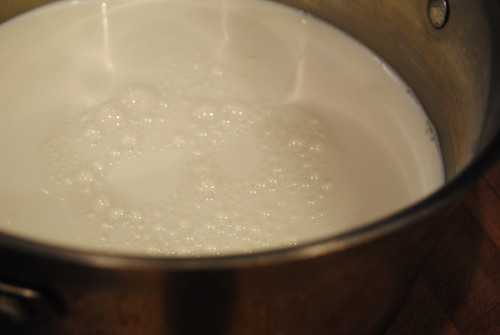
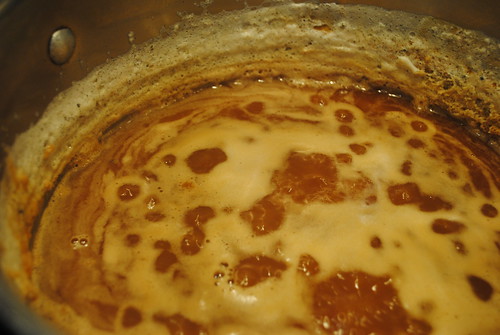
Friday night I started to prep for my now-more-difficult, cookie recipe!  I began by bringing the milk and sugar to a boil.

sugar

simmering milk

Making dulce de leche is not hard, but it takes some time and, can I just say, it’s soooo worth it!  I even added a bit to the kids steamers for a dulce de leche steamer.  Delish!!  (But, if you can find it jarred, you can save time skipping this step.)

It cooked for almost 3 hours and turned into a yummy caramel color and consistency.

dulce le leche

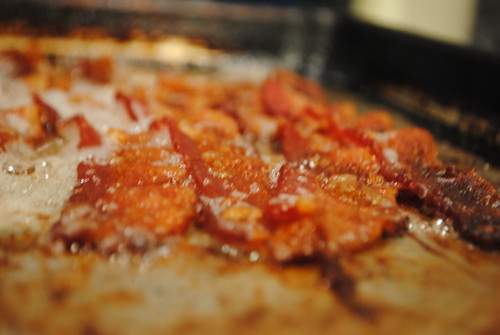
Meanwhile, I baked the bacon.  (Yes, baked…a secret I learned from my husband’s time in commercial kitchens.  It’s less messy and so much easier than frying up in a pan!)

greasy bacon

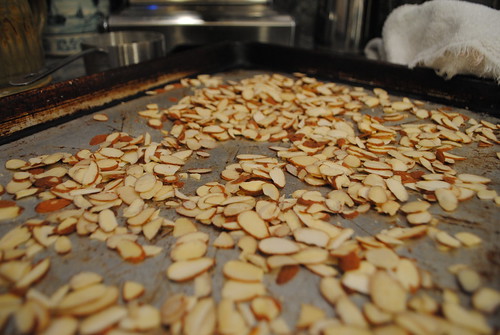
The sliced almonds were also roasted in the oven.  (You can buy them pre- roasted and salted and save a step here too.)

roasted almonds

After the bacon, dulce de leche and almonds were done, I put them in the fridge overnight.

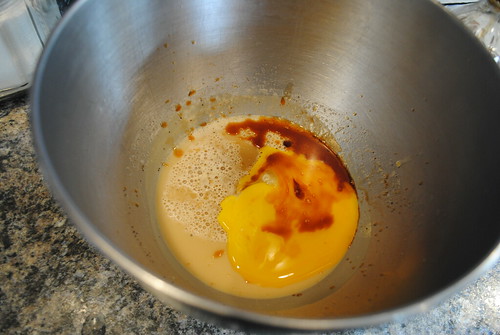
The next morning I brewed an Americano and got busy finishing these babies!  After setting the oven to 350 F, I put the butter into the pan to melt and brown.  Browned butter is called beurre noisette.  It’s a french technique that adds a delicious nutty flavor to the butter.  I will say, it pays to buy good butter for this step!  Once the butter is brown, you have to freeze it.  This takes about 15 minutes.  I froze it in my Kitchen Aid mixer bowl.

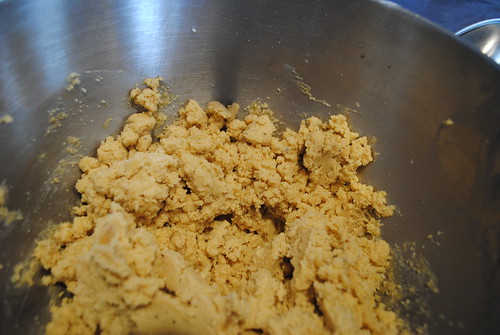
After it’s frozen, add the sugar, vanilla seeds, (you can substitute a tsp. of vanilla for the beans) egg yolk and mix.

DSC_0127

Make sure you scrape the sides of the bowl a couple of times to get all the butter.  Mix until moist crumbs form.

DSC_0128

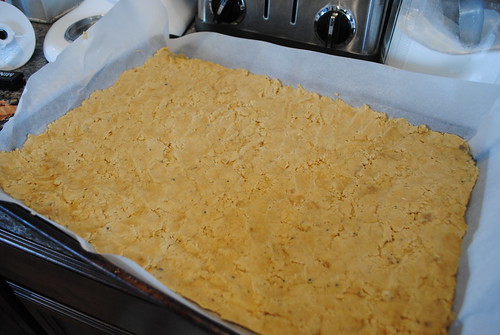
Then press the mixture into a pre-prepared pan.  (Just so you know, I doubled this recipe, that’s why my pan is so large.)  Bake the crust for 20-25 minutes until set and golden brown.

cookie bar

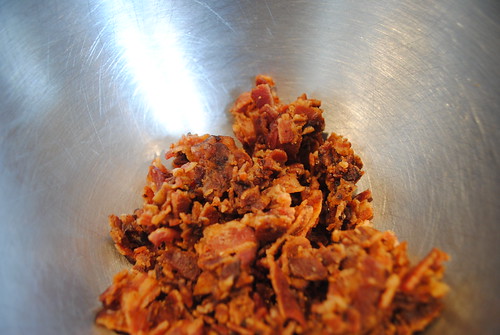
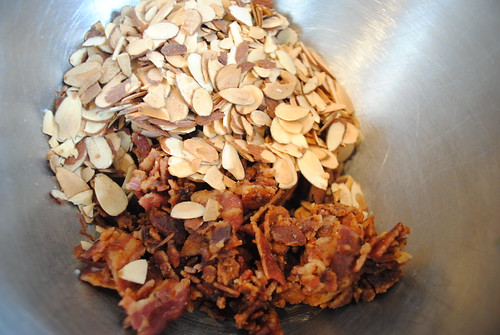
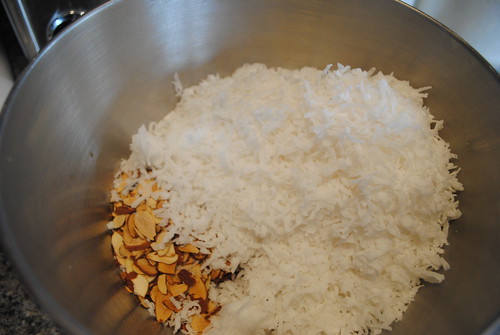
While the crust is baking, mix the crumbled bacon, chocolate chips, coconut and roasted almonds in a bowl.

bacon

bacon and nuts

coconut

coconut, chocolate, nut, bacon mix

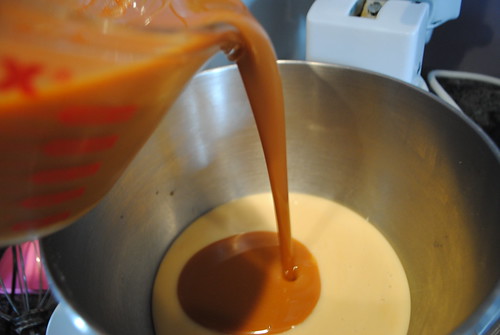
Set aside.  Then pour the dulce de leche in with the sweetened condensed milk and mix.

Dulce le leche

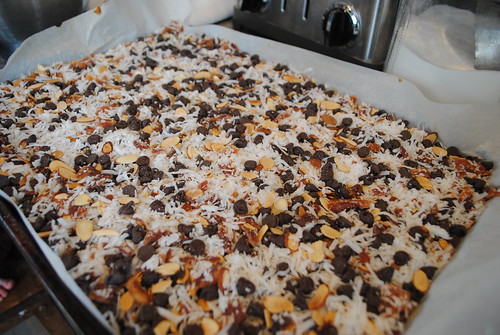
After the crust is done, pour 2/3 of the dulce de leche mix onto the crust, then sprinkle the bacon mix right onto the dulce de leche and press it gently into the caramel.

Bacon, chocolate, coconut magic bars

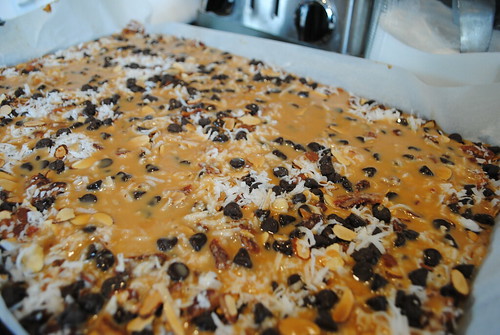
Then pour the rest of the dulce de leche onto the mix.

Bacon, chocolate, coconut magic bars

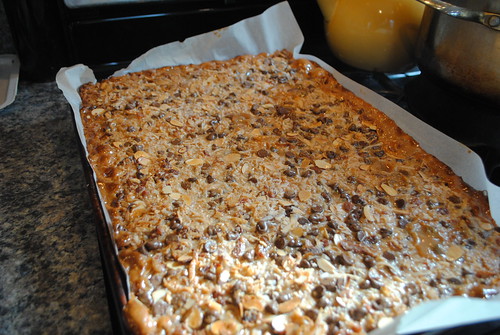
Bake these bars for 35-40 minutes.

Bacon, chocolate, coconut magic bars

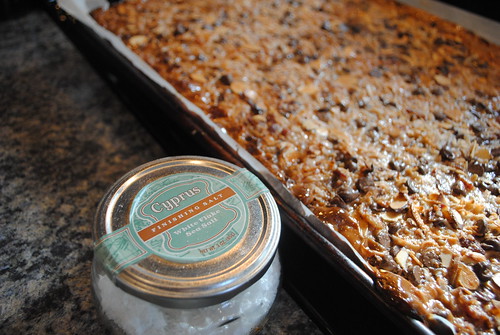
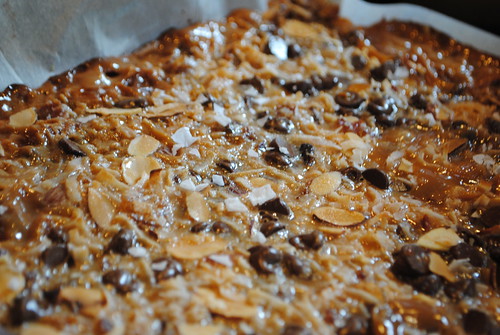
Just for a little extra something special, I sprinkled a little bit of flake salt over the top!

Bacon, chocolate, coconut magic bars

Bacon, chocolate, coconut magic bars

After these cookies cool,  cut them into squares or triangles.

I packed mine up and got ready to go to Chicken Nuggets of Wisdom‘s Cookie Exchange!

Dulce de Leche Recipe borrowed from Alton Brown

Ingredients

  • 1 quart whole milk
  • 12 ounces sugar, approximately 1 1/2 cups
  • 1 vanilla bean, split and seeds scraped
  • 1/2 teaspoon baking soda

Combine the milk, sugar, vanilla bean and seeds in a large, 4-quart saucepan and place over medium heat. Bring to a simmer, stirring occasionally, until the sugar has dissolved. Once the sugar has dissolved, add the baking soda and stir to combine. Reduce the heat to low and cook uncovered at a bare simmer. Stir occasionally, but do not re-incorporate the foam that appears on the top of the mixture. Continue to cook for 1 hour. Remove the vanilla bean after 1 hour and continue to cook until the mixture is a dark caramel color and has reduced to about 1 cup, approximately 1 1/2 to 2 hours. Strain the mixture through a fine mesh strainer. Store in the refrigerator in a sealed container for up to a month.

Dulce de Leche, Bacon, Coconut and Chocolate Chip Magic Bars borrowed from Grace Parisi compliments of Food and Wine

Ingredients

  1. 1 1/2 sticks unsalted butter
  2. 1/4 cup sugar
  3. 1 vanilla bean, seeds scraped
  4. 1 large egg yolk
  5. 1 1/2 cups all-purpose flour
  6. 1/2 teaspoon salt
  7. 4 ounces bacon, finely diced
  8. 3 cups sweetened shredded coconut (6 1/2 ounces)
  9. 12 ounces semisweet or bittersweet chocolate chips
  10. 1/2 cup salted roasted almonds, chopped
  11. One 16-ounce jar dulce de leche
  12. One 14-ounce can sweetened condensed milk

Directions

  1. Preheat the oven to 350°. Line a 9-by-13-inch metal baking pan with parchment paper, leaving up to 1 inch of overhang. Spray the paper with vegetable oil spray.
  2. In a medium saucepan, cook the butter over moderately high heat, stirring occasionally, until fragrant and browned, about 4 minutes. Scrape the butter into a large bowl and freeze just until solid, about 15 minutes.
  3. Using a handheld electric mixer, beat the sugar, vanilla seeds and egg yolk into the butter at medium speed until blended. Add the flour and salt and beat until moistened crumbs form. Press the crumbs into the prepared baking pan and bake in the lower third of the oven for about 25 minutes, until the crust is set and lightly browned.
  4. Meanwhile, wipe out the bowl used to make the crust. In a medium skillet, cook the bacon over moderately high heat until browned and crisp, about 5 minutes. Drain the bacon on paper towels and let cool. In the bowl, toss the coconut with the chocolate chips, almonds and bacon.
  5. In another bowl, whisk the dulce de leche with the condensed milk; pour two-thirds of it in the crust. Lightly press the coconut-bacon mixture over the dulce de leche. Drizzle the remaining dulce de leche mixture on top.
  6. Bake the bars for 35 to 40 minutes, until lightly browned on top. Transfer the pan to a rack and let the bars cool to room temperature, then refrigerate until firm, about 1 hour. Carefully remove the bars from the pan and peel off the paper. Cut into bars and serve.

Make Ahead

The bars can be stored in an airtight container for up to 3 days or refrigerated for up to 1 week.

Share and Enjoy:
  • Facebook
  • TwitThis
  • StumbleUpon
  • Technorati
  • del.icio.us
  • Digg
  • Google Bookmarks
  • LinkedIn
  • Live
  • MySpace
  • Twitter
Mar 3

WorthyYes, I have to admit here, that I did indeed, celebrate my birthday for two weeks!  But, please, don’t see me as indulgent, just doing what a girl needs to do to survive!  You see, Chris Ann and I have been joking that we have somehow switched places this winter.  Usually, in February, Chris Ann is in full hibernation mode.  Between the cold, snow and husband traveling, the winter blues catch up with her! Every year, my perky self, calls to make sure she hasn’t totally holed herself in.  I send her funny books and even recommend tanning as a way to cope!  This year, she was proactive!  She planned a sunny vaca and an inspiring trip to Blissdom.  Where was I?  I was in Baltimore.  This year was like no other.  I didn’t see it coming.  First the clouds enveloped the sky, then the grey descended and snow (after snow, after blizzardy snow), blanketed my city.  My husband was not here on my birthday, both computers crashed, my car went up (twice!), I ran into a parked car (the lady was not nice), my son broke his elbow bone the week of baseball travel team tryouts, a dear friend died (unexpectedly), I pulled a muscle…anyway, you get the picture.  Before I knew it, I was in a very bleak place.  I don’t like this place and it’s not a familiar one for me.  So, I clawed and scratched to grab a hold of a happy place!  Yes, part of that was a birthday that never ended!!

Originally this little soiree was meant to happen on Valentine’s weekend.  But, because of the snow, and lack of parking on our street, we rescheduled for the third weekend in February.  Devon was inspired and created a menu that (he hoped) would bring me back to our trip through Italy!  At first, I was finding it hard to drum up the creative juices to decorate and tablescape (something I normally do with gusto and passion!)  In fact, the day before the party, I was crying on Devon’s shoulder, heaving, “I just want white flowers.” ( Can I just stop here for a sec and tell you how awesome my husband is.  Not only did he get me white flowers, he bought all the white flowers, roses, tulips, hydrangeas, antique roses…he could find!)

Savoring Italy

The morning of the party, I was still at a bit of a loss.  My big ideas, were really out of reach!  My “fun design” ideas, totally out of grasp.  I decided to go with simple (hopefully) elegance.  White.  Simple.  I had lots of things in white.  So, I ran around my house and gathered the elements and textures that I thought would work together!  Devon put a glass of wine in my hand around noon.  I began to touch a bit of my decorating mojo.  Somehow, it came together.  And honestly, it was beautiful!

Our Table 2

Two foot pillar candles from my basement created snow lanterns that I dug in the snow.

Candles in the snow

Then, I chalked a greeting to our guests.

Dio Ti Benedica

Strung some lights on my fireplace…

Fire place

Proceeded to “scape” my table…

Window flowers

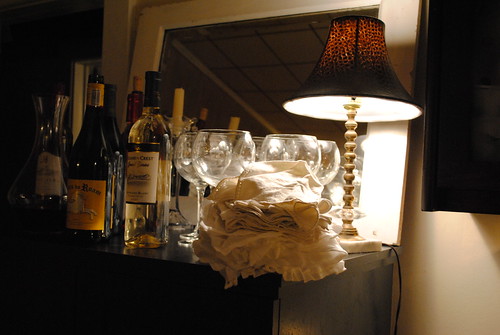
Piled high the antique linen napkins…

wine and glasses

The room took on a glow and it was bellissimo!

Belissimo 2

Guests arrived with wine and began to enjoy juicy olives.

talking

Olives and wine

Devon chopped and tossed!

Cucumber Radish Wheatberry Salad

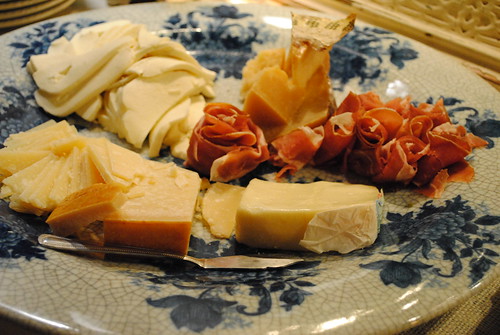
There was the first course…our lamb plate loaded with meats and cheeses from Mastellone’s.

Tray from Mastelones

There was mushroom polenta that he topped with white bean ragu.

Mushroom Polenta

Homemade pasta stuffed with roasted butternut squash.

Devon making ravioli

Filling raviolis

Devon even recreated a salad we had in Panzano, Italy…mushrooms, pears and gruyere.

Mushrooms, pear and gruyere

There was Bistecca alla pizzaiola (ribeye stewed with all kinds of goodies!)

Ribeye

My beautiful sister, surprised me by making and actually bringing to me, (ah hem, Chris Ann) Baked’s, Root Beer Bundt Cake!  Oh my!  It was delicious!

Sister and cake

Rootbeer cake

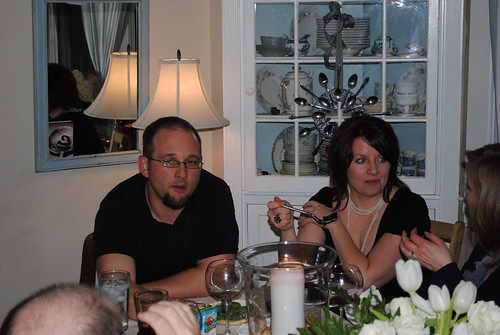
We sat around the table and talked the night away! There were old friends, new friends and family there. I sat at the table that night and realized it had worked!

Devon and Kristin

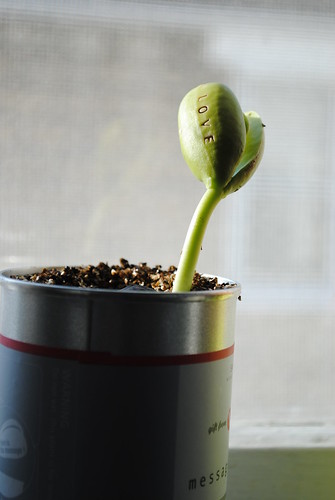
Being surrounded with friends, good food and great conversations, I was slowly emerging out of my wintery soil!  Love and hope were sprouting again! (And, yes, this is the end of my birthday celebration!)

DSC_0075


Share and Enjoy:
  • Facebook
  • TwitThis
  • StumbleUpon
  • Technorati
  • del.icio.us
  • Digg
  • Google Bookmarks
  • LinkedIn
  • Live
  • MySpace
  • Twitter
Feb 25
Ooey, Gooey Cinnamon Roll Recipe
Posted by Kristin in Boulangerie on Feb 25th, 2010 | Comment Bubble  18 Comments »

one outta place

Things were a bit tight for our family this past Christmas.  I know we weren’t the only ones pinching pennies to try and give our kids a Christmas.  We were honest with the kids.  ”Don’t be disappointed if your pile under the tree is small this year.”  We are small business owners.  We own a home remodeling company and with the recession, not a lot of people were doing home beautification projects.  But, our kids were so understanding and gracious.  They said, “It’s okay.  We understand.  You don’t have to do much, BUT…it won’t be Christmas if we don’t have homemade cinnamon buns!”

Every Christmas, for at least the past 10 years, I have made homemade, ooey, gooey, cream cheese slathered, cinnamon buns.  There was even a year we were in Baguio, Philippines for Christmas.  The kitchen we were using had a tiny oven.  I emailed my mother in law back home for the recipe and I made those cinnamon buns for my family and the other 30 people that were with us for Christmas.  I even left the recipe behind for friends to continue the tradition.

Usually, these bad boys are reserved for Christmas.  But, I have to admit, with all the snow…all the days in doors…and then, all my boys who shoveled and shoveled and shoveled…I wanted to make something that would put a smile on some faces.  My daughter had her bff over and the two girls got to work!

They added the yeast to the warm milk.

They added the flour and formed the dough into a ball.

cb dough 2

They put it in a “warming oven” to proof.  (Warming oven: turn oven on 250 degrees for five minutes.  Then turn it off.  It’s a great environment to proof dough.)

proofing in oven

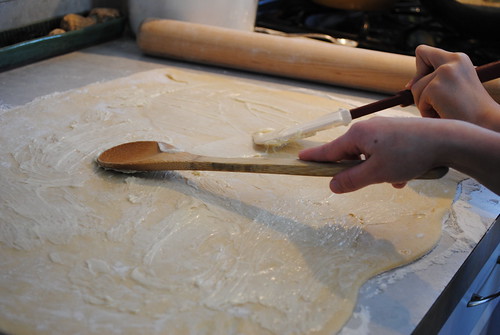
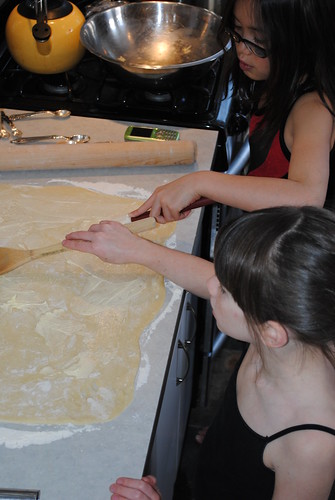
They rolled out the dough and spread the softened butter on the dough.

butter on dough

cb spreding but

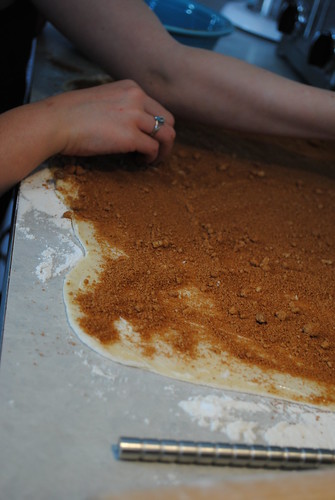
They sprinkled cinnamon sugar.

girls baking

cinn sugar

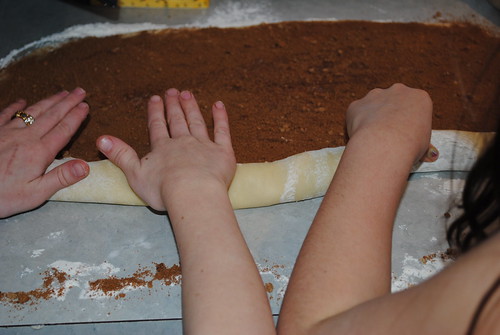
They rolled it into a long log.

rolling rolls

roll

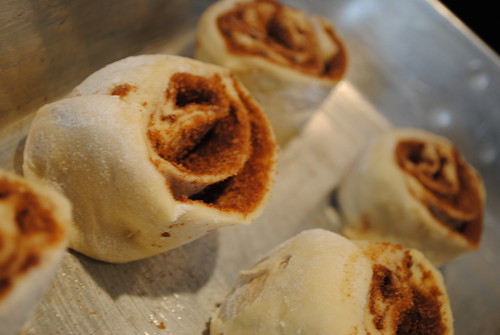
They sliced the log into buns (Ok, I did this part.)

cb slices

They proofed again and headed into the oven.

rolls proof

cb rolls

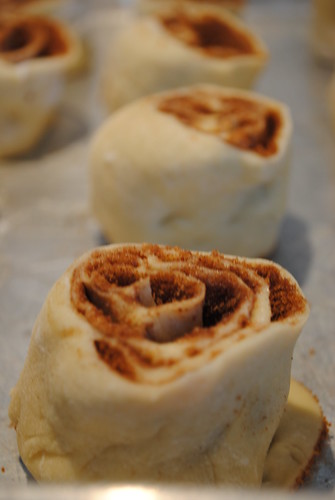
Seriously, this is what came out!

cinn buns 2

cbuns

Can you taste it?  Can you smell it?  Yup!  It’s Christmas in your mouth…good anytime of year!

Cinnamon Bun Recipe

Rolls:

1 package of active dry yeast

1 C. warm milk (105-110 degrees)

1/2 granulated sugar

1/3 C. butter, melted

1 tsp. salt

2 eggs

4 C all purpose flour

Filling:

1 C. packed brown sugar

2 1/2 Tbls. cinnamon

1/3 C. butter, melted

Icing:

8 Tbls. butter, softened

1 1/2 C. powdered sugar

1/4 C. cream cheese

1/2 tsp. vanilla extract

1/8 tsp. salt

Rolls: Dissolve the yeast in the warm milk in a large bowl.  Mix together the sugar, butter, salt and eggs.  Add flour and mix well.  Knead the dough into a large ball, using your hands dusted lightly with flour.  Put in a bowl, cover and let rise in a warm place for about 1 hour or until the dough is doubled in size.

Roll the doughout on a lilghtly floured surface.  Roll the dough flat until it is approximately 21 in. long and 16 in. wide.  It should be about 1/4 inch thick.

Preheat oven to 400 degrees F.

Filling: Combine the brown sugar and cinnamon in a bowl.  Spread the softened butter evenly over the surface of the dough and then sprinkle the cinnamon and sugar evenly over the surface.  Make sure you spread it all the way to the ends.

Working carefully from the top (the 21 inch side), roll the dough down to the bottom edge.

Cut the rolled dough into 12 slices and placein a lightly greased baking pan.  Let the rolls rise again until double in size (about 30 min).  Bake for 10-15 minutes or until lightly brown on top.

Icing: While the rolls are baking, combine all icing ingredients.  Beat well in an electric mixer until light and fluffy.

When the rolls come out of the oven, coat each, generously with icing.

Note: I will make these Christmas Eve.  After I have sliced the rolls and put them in a pan, I cover them and put them in the fridge.  Christmas morning, I pull them out first thing.  They have to come to room temperature than rise until doubled in bulk.  It can take about 2-3 hours.  But, then after all the gifts are opened, I pop them in the oven and we have them for breakfast!

(this recipe was given to me by my mother in law…it’s not original, but I’m not sure where she got the recipe.)

Share and Enjoy:
  • Facebook
  • TwitThis
  • StumbleUpon
  • Technorati
  • del.icio.us
  • Digg
  • Google Bookmarks
  • LinkedIn
  • Live
  • MySpace
  • Twitter
Feb 23
Almond Triangle Recipe
Posted by ChrisAnn in Boulangerie on Feb 23rd, 2010 | Comment Bubble  7 Comments »

DSC_0097

This Almond Triangle recipe is the Holiday Cookie Contest winner from the 2009 Taste Section of the Minneapolis Star Tribune.  The contest winner, Charlotte Midthun, first found the recipe from a 15 year old First for Women magazine.  December’s not so far away and these cookies are the best!  They are not so sweet that you feel guilty…I think the nuts add a little protein right?  They are the perfect treat for a mid-blogging snack.

DSC_0066

You do have to have a 10X15 inch rimmed cookie sheet or jelly roll pan.   Also, make in advanced…they tasted better the next day, some things just do.

Almond Triangles

Ingredients:

2 Cups (4 sticks) Unsalted Butter, at room temperature, divided

3/4 Cup granulated Sugar, divided

1 Egg

3/4 Tsp. Almond Extract

1/2 Tsp. Salt

2 3/4 Cup Flour

1 Cup packed Brown Sugar

1/3 Cup Honey

1/4 Cup Heavy Cream, at room temperature

1 lb. (about 5 1/4 Cups) Sliced Almonds

Directions:

Carefully line the cookie sheet or pan with aluminum foil, shiny side up.  (OK, stop right there.  Personally, I didn’t like this plan.  I did it according to the directions, but the aluminum foil did annoyingly stick to the cookie.  Could I have used parchment, or spray instead?  Let me know what you think.)

To make the dough:

Mix, on medium speed, 1 cup butter (2 sticks), until creamy, about 1 minute.  Then, gradually add 1/2 cup sugar and beat about 2 minutes until light and fluffy.  Add the egg, almond extract, and salt, and beat until combined.  Reduce speed of mixer to low and add flour and mix until incorporated.

Press the dough evenly into pan and push dough up the sides.  Cover with plastic wrap and refrigerate 30 minutes.

Preheat oven o 375 degrees.  Prick dough in about 24 places with a fork and bake for 10 minutes.  Then, remove from oven and transfer to cooling rack.

To make the topping:

Combine brown sugar, honey, and remaining 1 cup (2 sticks) of butter and the remaining 1/4 cup sugar into a saucepan over medium heat and cook, stirring occasionally, until the sugar dissolves.  Then increase heat to medium-high, and bring the mixture to a boil and cook for 3 minutes without stirring.  Remove from heat and stir in cream.  Stir in almonds.

Then, spread almond mixture evenly over crust.  Return the pan to oven and bake until bubbling, about 14 minutes.  Remove from oven and transfer pan to a wire rack to cool.  While bars are still slightly warm, cut into triangles.

DSC_0100

Now, don’t worry…unlike the previous Oh Henry Bars, and because you use a 10X15 pan, there will be plenty to share!  I think Oh Henry Bars and Almond Triangles would be great served together actually… sort of a yin and yang for bar cookies.

So, come on now…will you share a favorite bar cookie recipe with us?  One that tastes like  a contest winner, is a family secret, or good enough to make you not want to share?  If you have one email us at [email protected]….if not, please add your comment anyway!

Share and Enjoy:
  • Facebook
  • TwitThis
  • StumbleUpon
  • Technorati
  • del.icio.us
  • Digg
  • Google Bookmarks
  • LinkedIn
  • Live
  • MySpace
  • Twitter
Feb 15
Birthday Week, Part 1
Posted by Kristin in Boulangerie, Celebrations on Feb 15th, 2010 | Comment Bubble  15 Comments »

February 2010 snow 024

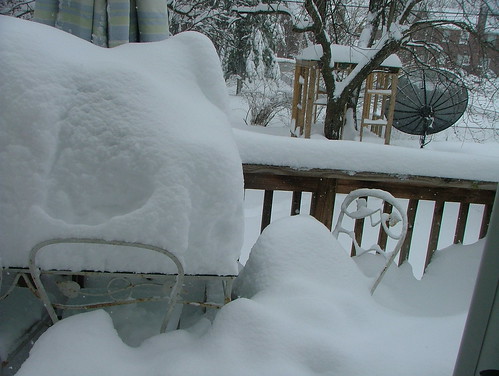
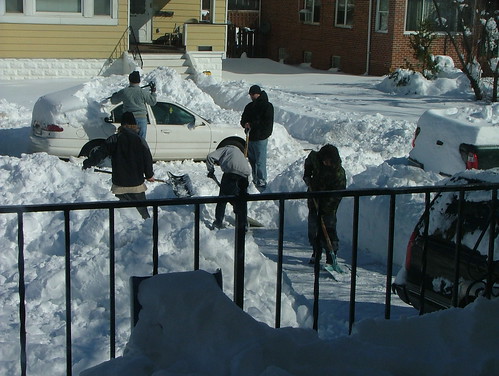
Today I have to confess, I have milked this birthday year like no other!  You see, the weekend of birthday brought many gifts!  It started with 36+ inches of snow.

February 2010 snow 040

February 2010 snow 049

My husband got stuck in TX because the airlines were shut down.  My bff was representing LoveFeast at Blissdom in TN.  My boys wanted no part in shoveling (truth, unless they were getting paid!) Those were the gifts that were hard to open on my birthday.  There were a few that brought a smile to my face!  Chris Ann, anticipating I was going to have a little bit of a let down on my actual birthday, shipped out a loaded package of goodies for me, early.  I debated on waiting, but in Kristin fashion, I decided to declare it a birthday week and proceeded to start the festivities three days early (my husband was already out of town)!!  I’m so glad I did!  Here’s a glimpse of what I scored!

February 2010 snow 026

February 2010 snow 035

February 2010 snow 034

February 2010 snow 036

Then in order to shovel a walkway and my driveway, I bribed some local neighborhood boys with a little xbox live time and food.  It worked!

February 2010 snow 006

For myself I made a pot of French onion soup!  (I did share with Drama Boy and Drummer!)

French Onion Soup

caramelized onions

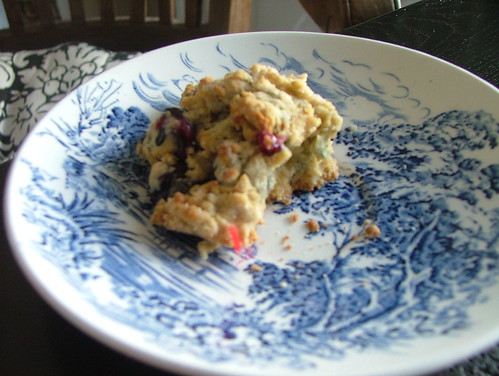
There was one gift though, that I received the morning of my birthday, that was more valuable than the rest!  I woke up, stumbled into my kitchen, only to be greeted by my two older boys, Drama Boy and Drummer, busy making blueberry scones (from scratch) and pulling shots of espresso for my Americano!
February 2010 snow 002

Can I just tell you, my momma heart was bursting!  The scones were flaky and the Americano, perfect!  (These boys will make great husbands!)  Drummer made me a birthday banner!  I asked him why it said 29?  He said, “Because mom, last year you were 28!”

Read the rest of this entry »

Share and Enjoy:
  • Facebook
  • TwitThis
  • StumbleUpon
  • Technorati
  • del.icio.us
  • Digg
  • Google Bookmarks
  • LinkedIn
  • Live
  • MySpace
  • Twitter
Feb 7
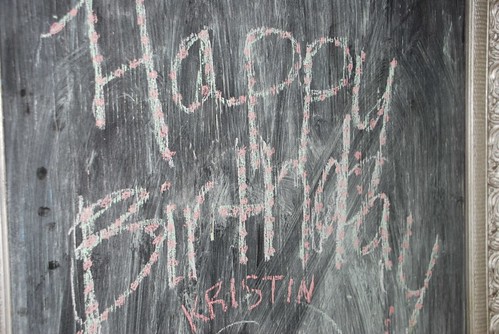
Happy Birthday Kristin!!
Posted by ChrisAnn in Boulangerie, Celebrations on Feb 7th, 2010 | Comment Bubble  18 Comments »

DSC_0021

It’s time for someone to blow out the candles and celebrate, Kristin!!! Happy Birthday!  In honor of your special day I baked you a cake, just like when you baked me a cake for my birthday.

DSC_0095

Dear friend, I just want to say that I hope your weekend was good even with your hubs out of town attending a conference and me being at Blissdom without you.  I know it didn’t help to have the “sickies” lurking about your brood either.  Just know that I’ve been celebrating your birthday (with out you) all week!  First by sampling your birthday package filled with Chocolate Espresso Cookies tucked inside and then with this cake!  Your birthday week has been delicious!  And, not to add insult to injury…let me just say that the cake I baked you was tha’ bomb!!

DSC_0107

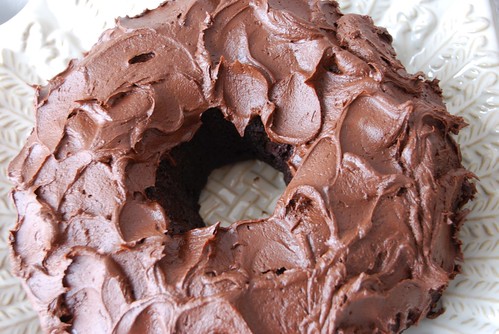
THIS CAKE IS TO DIE FOR!!  Root Beer Bundt Cake from Baked New Frontiers in Baking.

For the Bundt Cake:

2 Cups Root Beer (not diet)

1 Cup Dark Unsweetened Cocoa Powder

1/2 Cup (1 stick) Unsalted Butter, cut into 1″ pieces

1 1/4 Cups Granulated Sugar

1/2 Cup firmly packed Dark Brown Sugar

2 Cups all-purpose Flour

1 1/4 Tsps. Baking Soda

1 Tsp. Salt

2 large Eggs

Preheat oven to 325 degrees.  Spray the inside of a 10″ bundt pan with nonstick cooking spray with flour.

In a saucepan, heat the root beer, cocoa powder, and butter over medium heat, until butter melts.  Then, add sugars and whisk to dissolve.  Remove from heat to cool.

Then, whisk the flour, baking soda, and salt together in a bowl.

In another small bowl, whisk the eggs until just beaten and then whisk them into the cooled cocoa mixture until combined.  Then, gently fold the flour mixture into the cocoa mixture.  The batter will be slightly lumpy.  Pour into bundt pan and bake for about 40 minutes, rotating one time half way.  Stick a small sharp knife in and if it comes out clean, voila! your done.  Let cool completely.  Gently loosen sides and remove cake from pan.

It looked so good that I had to make sure!

DSC_0011

This piece was in honor of your birthday!

DSC_0009

FOR THE OUT OF YOUR MIND DELISH Root Beer Fudge FROSTING!!

2 Ounces Dark Chocolate (60% cacao)

1/2 Cup (1 stick) Unsalted Butter, softened

1 Tsp. Salt

1/4 Cup Root Beer

2/3 Cup Dark Unsweetened Cocoa Powder

2 1/2 Cups Confectioners’ Sugar

Put all the ingredients into a food processor.  Pulse  in short bursts until frosting is shiny and smooth.

This will create nearly instant happiness.

DSC_0026

And, I can indeed tell you that it was good, very very good and worthy of your birthday.

DSC_0097

This I know, cause I’ve tried it and tasted.

DSC_0094

Best wishes for a lovely day and a wonderful week…and I’ll let you in on a little secret.  I don’t think it will be very long until you get to try it yourself!

DSC_0009

Share and Enjoy:
  • Facebook
  • TwitThis
  • StumbleUpon
  • Technorati
  • del.icio.us
  • Digg
  • Google Bookmarks
  • LinkedIn
  • Live
  • MySpace
  • Twitter
Jan 11
Kristin and Julia…(not quite the same ring)
Posted by Kristin in Boulangerie on Jan 11th, 2010 | Comment Bubble  16 Comments »

nectarine gallette 3

I finally broke down and rented the movie Julie and Julia.  Why did I wait so long?  I think I have a bit of non-conformist in me.  When the movie first came out, as a blogger, I was “supposed” to see it!  Everyone was!  It was being twittered and facebooked!  It was content for many food bloggers!  I have to admit, I’ve visited the Julie vs. Julia project, never to really be sucked in.  I think it’s a lack of eye candy, of which I’m a huge fan of! But, I can appreciate her respect of Julia Child.

Baking With Julia

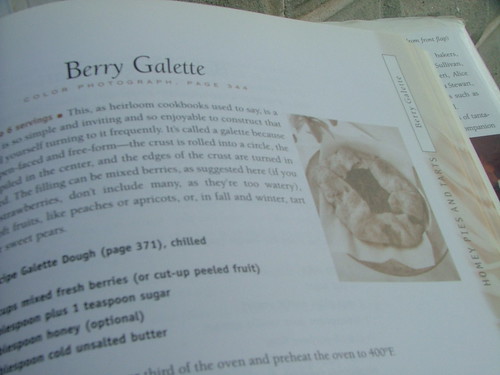
Years ago, my grandmother gave me the Baking with Julia Child , written by Dorie Greenspan.  Talk about eye candy!  Did you know in France, when one goes “window shopping” they say  Lécher les Vitrines. Translated, this means to “lick the window”.  Julia Child’s cookbook makes you want to do just that…”lick the page”!!!

I have been inspired to make a number of these page displayed beauties!  I’ve made the baby gingerbread cakes, the rustic potato loaves and pita bread, but my favorite, the one that keeps me coming back, is the galette.

Berry Galette

Julia Child’s galette recipe is one you MUST add to your recipe file or book.  It is my go-to-easy-to-impress-always-delish recipe!  I have made it with fresh strawberries and mint from my garden.  I have used peaches and fresh lavender.  I have done mixed berries with a hint of cinnamon.  You could also use pear and cardamom or blueberries with fresh scraped vanilla bean.

This recipe is pretty easy and if you are intimidated by making fresh pie crust, this is a great place to start!  It reminds me of an open faced, rustic, country pie.  I usually divide the dough and make mini galettes to give each of my guests their own.  (Sharing just sets the stage for the “gimmes” to come out!)  Top with some fresh whipped cream and serve warm with a black cup of coffee!

nectarine gallette

Don’t you just want to “lick the window”?!!

Berry Galette

by Julia Child

Galette dough:

3 Tbls. sour cream (or yogurt or buttermilk)

1/3 C. ice water

1 C. all purpose flour

1/4 C. yellow cornmeal

1 tsp. sugar

1/2 tsp. salt

7 Tbls. cold unsalted butter cut into 6 to 8 pieces

(Julia gives directions to make this dough by hand, but I have to tell you, if you can make friends with your food processor, you turn out a delicious galette and perfect a pie crust!  These directions are for your food processor.)

Making dough: Stir the sour cream and 1/3 cup ice water together in a small bowl; set aside.  Put the flour, cornmeal, sugar and salt in the work bowl of the processor fitted with the metal blade; pulse to combine.  Drop the butter pieces into the bowl and pulse 8 to 10 times, or until the mixture is speckled with pieces of butter that vary in size from bread crumbs to peas.  With the machine running, add the sour cream mixture and process just until the dough forms soft, moist curds.

Chilling dough: Remove the dough from the processor, divide in half and press each half into a disk.  Wrap in plastic and chill for at least 2 hours.

Storing: The dough can be kept in the refrigerator for a day or two or it can be wrapped airtight and frozen for a month.  Thaw, still wrapped, in the refrigerator.  It is convenient to roll the dough into rounds, place parchment between each round and freeze them wrapped in plastic; this way, you’ll need only about 20 minutes to defrost a round of dough at room temperature before it can be filled, folded into a galette and baked.

(this recipe yield two 8 in. galettes)

Berry Filling

3 C. mixed fresh berries (or cut up, peeled fruit…see ideas above!)

2 Tbls. plus 2 tsp. sugar

2 Tbls. honey

2 Tbls. cold unsalted butter

Assembling Galette

Position a rack in the lower third of the oven and preheat the oven to 400 F.  Line a baking sheet with parchment paper.

Put the dough on a lightly floured work surface and roll it into an 11 in. disc about 1/8 in. thick.  Since the dough is soft, you’ll need to lift it now and then toss some more flour under it and over the top.  Roll up the dough around your rolling pin and transfer it to the prepared baking sheet.

Spread half the berries over the dough leaving a 2 to 3 in. border.  Sprinkle 1 Tbls. of sugar over the fruit and drizzle with 1 Tbls. honey.  Cut the butter in slivers and scatter half of it on top of the fruit.  Fold the uncovered border of dough up over the filling, allowing the dough to pleat as you lift it up and work your way around the galette.  (As you go around folding, it will pleat naturally…go with it!)  Dip a pastry brush in water, give the edge of the crust a light coating and then sprinkle the crust with 1 tsp. of sugar.  Now, assemble the second galette in the same manner.

Baking Galette

Bake the galette for 35 to 40 minutes or until the pastry is golden and crisp.  Transfer the baking sheet to a cooling rack and let the galette rest on the sheet for 10 minutes.  Slip a wide spatula under the galette and slide it onto the cooling rack.  Serve warm or at room temperature, cutting the tart with a pizza wheel.

This is best eaten the day it’s made!

Share and Enjoy:
  • Facebook
  • TwitThis
  • StumbleUpon
  • Technorati
  • del.icio.us
  • Digg
  • Google Bookmarks
  • LinkedIn
  • Live
  • MySpace
  • Twitter
Dec 20
Baking with Baked ’till Baked!
Posted by Kristin in Boulangerie, Celebrations on Dec 20th, 2009 | Comment Bubble  8 Comments »

black and white packages

cupcake pan

Screech!!! To a halt!  I can’t begin to tell you how grateful I am for the two feet of snow we got here in Baltimore!  I know, I know, in Minnesota, two feet is an every day occurrence!  Chris Ann was just saying the other day she was driving her daughter to soccer in the snow.  Yes, she plays outdoors no matter what the weather!  They are hard core up there!  But, here in Baltimore, a call for two inches swipes the shelves clear of toilet paper and milk. So, just imagine for a minute what it was like for us with a prediction of 24 inches!  Almost total gridlock in the parking lots!  Of course, I made a daring excursion to the grocery store right before the storm to load up on baking supplies.  Can you believe the flour shelf was empty!  I guess everyone had the same idea!  Bake for Christmas!

Baking Mess

Black bottoms

Yesterday I woke up and baked!  I baked, till I was baked and I baked baked goods from Baked! (Did you follow that?!)  I started with the dough that needed to be refrigerated.  I made Sugar Cookies from Baked, Snickerdoodles from Magnolia Bakery and then moved onto Monster Cookies from Baked.  I made homemade pie crust (my favorite recipe of all time) from Classical Home Desserts and made quiche for all my boys who had been out shoveling!  I then moved on to mini black bottoms from Magnolia Bakery...the best I have ever tasted…and Butterscotch Pecan Brownies.  Can you believe, my husband then came in and said, “Since you’re baking, I’d really like some homemade bread!”  Being totally in the groove, I kneaded a couple of loaves of Breakfast Bread from Martha Stewart’s cookbook.  I have to tell you, I was officially baked!

teacher gifts

Tin of treats

teacher packages

My kids went to work filling tins for their teacher gifts of the delicious goodies we had baked!  We slid Monster Cookies into brown paper packages and tied them with string! These are a few of my favorite things!  (sorry, couldn’t resist!)

I cleaned up my mess, my hubby poured me a glass of wine, I popped on the sofa and cracked open a book.  He made dinner…spicy, curry with cauliflower, potatoes, carrots and coconut rice.  (I love having a man who cooks!)  We ended watching a movie.

I am so grateful we got snowed in!  Being baked never felt so good!

Share and Enjoy:
  • Facebook
  • TwitThis
  • StumbleUpon
  • Technorati
  • del.icio.us
  • Digg
  • Google Bookmarks
  • LinkedIn
  • Live
  • MySpace
  • Twitter
Dec 9

july09214

Last weekend Suburbia Man and I were at the Mall of America doing some Christmas shopping.  MOA had slightly died down from the masses of people herded up at the Pioneer Woman book signing.  We had been lapping the mall and our blood sugar was dipping when we happened to pass by the Godiva store with a sign out front that said 20 percent off-it caught my eye, I love a deal….even a mini-deal! But, then the cheerful gals behind the counter beckoned me in with an offer of a cup of hot chocolate!   Let me tell you, that was one great pit stop….first of all they offered me a free cup of hot chocolate, dark hot chocolate…it was amazing.  And then, free chocolate dipped strawberries!  I’m serious!  I was like, this is the best pit stop ever!!  How does this relate to the scone picture?  Well, I think this scone recipe would be the bomb with this hot chocolate!  What?  You say your snowed in like me and can’t get yourself to the nearest Godiva store?  Well then you’re in luck, because I bought one for me, and one for one of you!  Dark chocolate.  Smooth. Creamy.  Delicious.  And, I got the tip of the day from the Godiva Girls.  Blenders.  Make the hot chocolate and then whip it around in the blender.  It goes to new heights of smoothy-ness!!  That’s a fact.

Scone Making

Which leads me to the scones.  Last summer my friend Kelli had me over for coffee and baking and she made these scones substituting in plump summer cherries and almonds.  This is her recipe using cranberries.

Cranberry, Orange & White Chocolate Scones

1/3 Cup dried Cranberries

3/4 Cup Buttermilk

2 Cups Flour

2 Tbsp. Sugar

2 Tsp. Baking Powder

1/4 Tsp. Baking Soda

1/4 Tsp. Salt

1 Tbsp. grated Orange Rind

1/3 Cup cold Butter

1/2 Cup White Chocolate Chips

Milk (to brush tops of scones)

Sugar (to sprinkle at the end)

(Another option is to substitute 1/2 Cup pitted and halved fresh cherries for the cranberries and to add 1/2 sliced almonds.)

Combine cranberries & buttermilk in a small bowl.  Set  aside.

Combine flour, sugar, baking powder, baking soda, salt and orange rind.

As you cut butter into small shaving, let it drop into flour mixture.

Use a pastry blender to work it through the dry ingredients.

Add white chocolate chips, cranberries, and buttermilk.

Turn dough out onto floured surface.

Knead & pat into a circle with 3/4 inch thickness.

Scone Making

Using a large knife, cut it like a pie-into 6 or 8 pie wedges.

Place onto a stone or lightly greased baking sheet.

Brush scones with milk and sprinkle with sugar.

Bake at 400 degrees for 18 minutes or until lightly golden.

These are Kelli’s secrets for flaky scones:

*Work quickly.

*The colder the butter the better

*Cut it in & get them into the oven fast.

(Or….try Kristin’s Cranberry Muffins!  One reader I recently bumped into tried them and loved them!)

OK, so here is the deal because I share and I’m snowed in… one of you gets to win the Godiva Dark Hot Chocolate!  Just leave a comment here with your best cabin-fever tips or what you like to add to spruce up your hot chocolate!!  This LoveFeast Table GiftAway will end Thursday at 10pm and the winner will be announced over the weekend!

Share and Enjoy:
  • Facebook
  • TwitThis
  • StumbleUpon
  • Technorati
  • del.icio.us
  • Digg
  • Google Bookmarks
  • LinkedIn
  • Live
  • MySpace
  • Twitter

« Previous Entries