Jul 7
Prairie Dogs & French Crepes
Posted by ChrisAnn in Boulangerie ya' baby!, Food Moment on Jul 7th, 2010 | Comment Bubble  4 Comments »

DSC_0427

Shooting prairie dogs and eating French Crepes for breakfast is not typically the way we roll in suburbia.  Well the French Crepes part, probably.  But shooting prairie dogs before breakfast?  Only on our Colorado vacation.

Once a year my family takes a road trip in the minivan to visit my husband’s sister and family.  We leave our home in the suburbs of Minneapolis, my husband leaves behind his corporate job and our kids their video games, soccer and friends.  As we wind down the road we let go of the city life, catch up, and eagerly anticipate a week filled with activities we only get to do in Colorado.  And, so far we have lived to tell about it!  We four-wheel, shoot guns, swim, boat, hike, picnic and take in our happy growing families.

Our first morning in Colorado started out just wonderful.  I got up early having heard the beep of the coffee pot going off.  After searching a few cupboards I found a coffee cup, poured some jo’ and found a place on the deck to sip and stare at the Grand Mesa.  Soon, the family drifted out to join me, my nephew first and then my husband, Todd, his sister Missy and her husband Tony.  We chatted, sipped our coffee and woke up.  Until, Uncle Tony spotted a prairie dog.

Game on.  Prairie dogs….they’re the demise of the garden, the grass, the rosebushes and anything else they find.   And, they dig holes in the pasture – a danger to the horses.  To top it all off, they carry the bubonic plague.

Therefore, when they popped their little faces up, our coffee mugs were set down and the gun came out.  My husband was now armed and dangerous (to prairie dogs, that is)!  We chatted, we spotted, we sipped our coffee some more and my husband took aim of the prairie dog.  Dead on, like, literally.

We had a funeral of sorts, um, we had a burying anyway.

DSC_0394

He was laid to rest in a circle of witnesses.

DSC_0396

The angels were there when he went to meet his maker.

DSC_0400

Well, there is not good segue here, but it was time for breakfast, and to celebrate my middle sons birthday, he chose roll-ups.  That’s what they call them out here on the frontier.  In suburbia, I’d say they closely relate to the French Crepe.  They’re a favorite, and we usually have them at least once while we’re out here visiting our family.

Here’s the recipe for Frontier Roll-Ups ~aka French Crepes.

Ingredients:

4 eggs
1 cup milk
1 cup flour

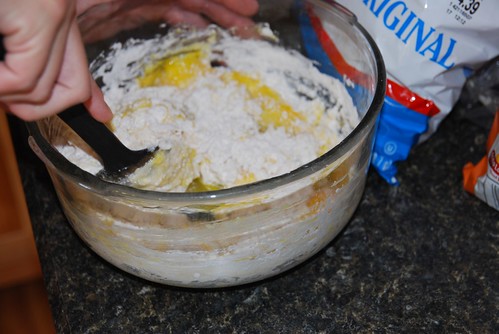
Mix eggs and flour into smooth paste.

DSC_0403

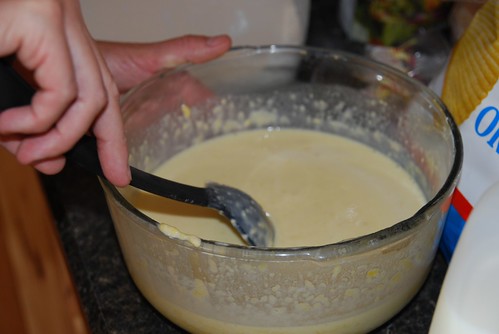
And then, stir in the milk.

DSC_0417

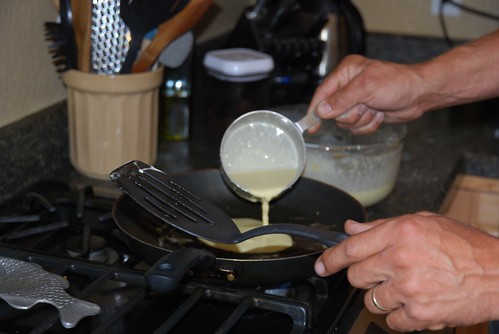
Put a little butter in a frying pan and then pour on top, like a thin pancake.

DSC_0421

They will cook fast!

DSC_0422

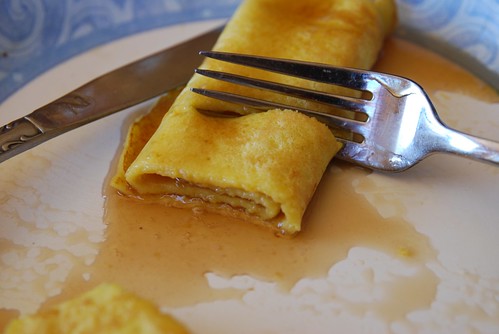
Frontier Roll-Ups….they make even the angels happy!

DSC_0426

We ate ours with bananas, butter and maple syrup.  What do you like in your crepes?

Share and Enjoy:
  • Facebook
  • TwitThis
  • StumbleUpon
  • Technorati
  • del.icio.us
  • Digg
  • Google Bookmarks
  • LinkedIn
  • Live
  • MySpace
  • Twitter
Jun 16

DSC_0247

What are they?  They’re Aebleskivers.  And, they want to be served at your next gathering!

DSC_0256

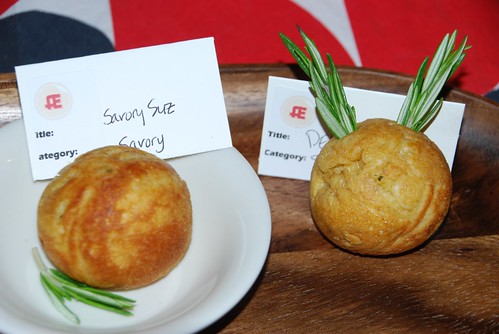
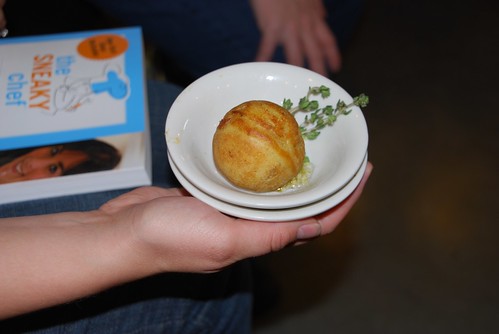
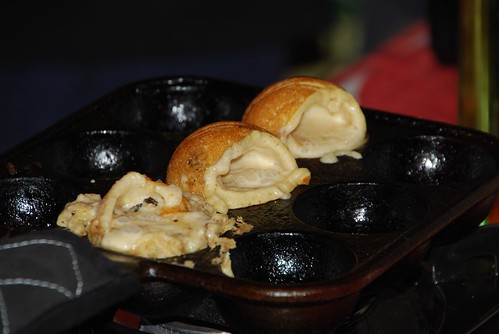
This is my Aebleskiver.  It’s not as perfect as the winning Aebleskiver.  But let me tell you it was a tummy full of “pop-cake” love!!  You see a Aebleskiver is a cross between a popover and and a pancake!  Traditionally, this Danish treat is filled with an apple slice.  We made both savory and sweet versions at the Minnesota Blog Pantry Blogging Event I attended at Local D’Lish.

The Mac Daddy of Aebleskivers, Chad Gillard aka Aebleskiver Daddy, taught a group of us bloggers how to make the Aebleskiver.  He’s a happy guy…probably because he’s eaten lots of Aebleskivers.

DSC_0224

Here is the winning Aebleskiver, made by Crystal, of Cafe Cyan.  It wins in beauty as well as taste I’m sure…although I didn’t get to try hers.  You see with Aebleskivers, as far as I can tell, there is little to no sharing…

DSC_0285

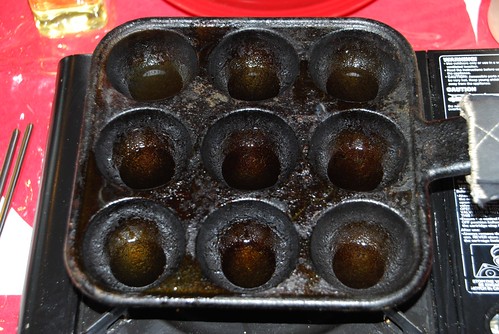
This is why the 9-Holed Cast Iron Aebleskiver Pan was invented.

DSC_0211

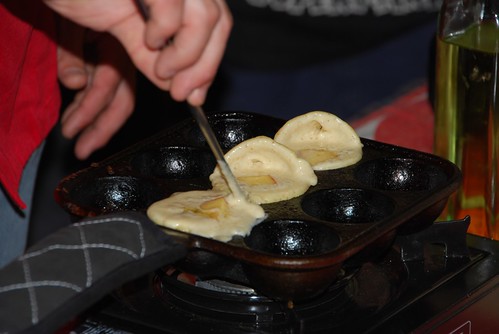
Here’s what Chad taught us.  You start with filling oil in this pan.

DSC_0234

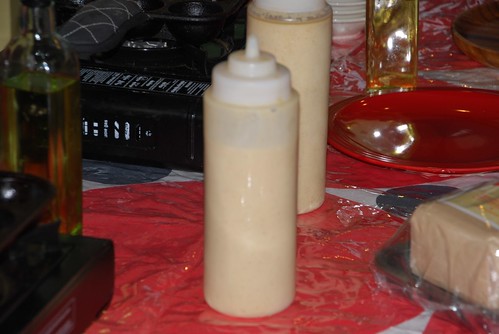
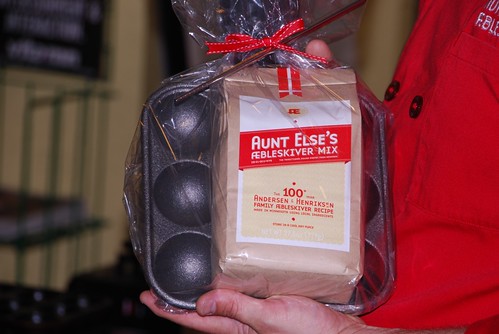
And, you fill them with the Aebleskiver dough.  You can buy the pan, the mix, the squirt bottles, and the stainless chopstick tool all online at Aunt Else’s Aebleskiver.  How smart is that?  Mix, tools, and containers on one site, “All Things Aebleskiver”!

DSC_0230

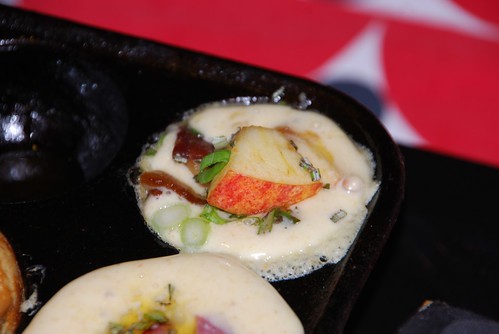
Aebleskiver dough is poured into the pan with the oil, and then the toppings are added.

DSC_0222

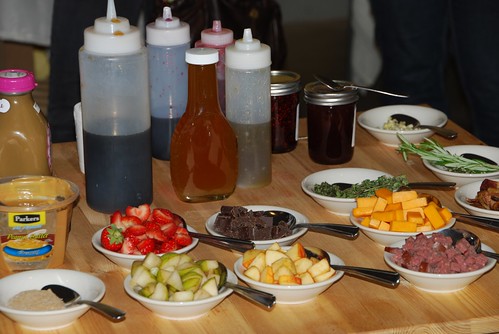
Local D’Lish put out a beautiful spread of fresh ingredients for us to choose from some savory and some sweet.  That is what is great about Aebleskivers…they could be a snack, a breakfast, hors d’oeuvres or dessert!

DSC_0243

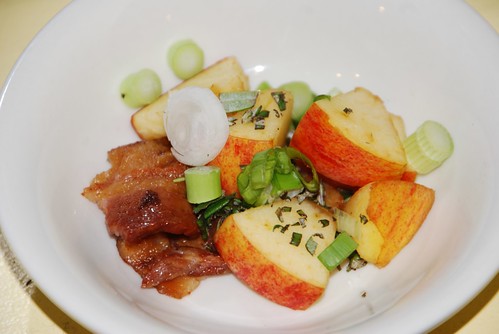
This is what I put in my savory Aebleskiver:  apple, bacon, scallions and chives, and rosemary.

DSC_0246

DSC_0233

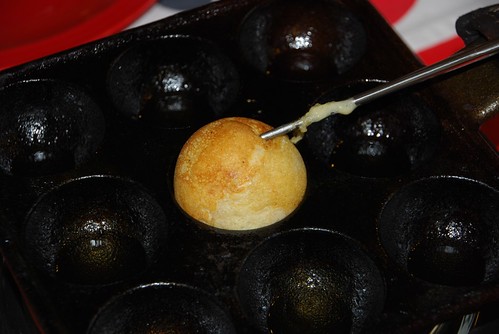
When the Aebleskivers start to bubble and cook you continue to turn them carefully with the Stainless Steel Chopstick.

DSC_0236

You would think that it would defy gravity and collapse but as the dough heats it expands and with a little faith you just keep flipping.  Until you get this:  a perfectly round Aebleskiver.

DSC_0212

That’s what Chad says anyway and he’s the Aebleskiver Daddy.  He should know.

DSC_0225

We don’t want you to miss this experience for yourself!!  So sign up to win an Aebleskiver Starter Kit by commenting here on our blog!!  There is one day left!!  Feel the Aelbeskiver love!!

We think it would make a great Father’s Day gift too!

DSC_0228

LoveFeast Table Aebelskiver GiftAway:  Three chances to enter!

*Leave a comment answering the question: Have you ever heard of an Aebleskiver before and what would you put inside yours?

*Twitter this post and let us know in the comment section below.

*Link this GiftAway in a post and let us know in the comment section below.

GiftAway will end on Wednesday at 12 midnight central time (That’s today!!).  GiftAway winner must live in the US due to shipping!!

Share and Enjoy:
  • Facebook
  • TwitThis
  • StumbleUpon
  • Technorati
  • del.icio.us
  • Digg
  • Google Bookmarks
  • LinkedIn
  • Live
  • MySpace
  • Twitter
May 4
Lemon Souffle & More
Posted by ChrisAnn in Boulangerie ya' baby!, Rambles and Rants on May 4th, 2010 | Comment Bubble  6 Comments »

Here’s the scoop on what the week hold for LoveFeast Table!  Tonight Kristin is attending a Pioneer Woman book signing in Virginia similar to the one I attended in Minnesota.  Later in the week you can catch our story on that as well as a Pioneer Woman Cookbook GiftAway!!  Then tomorrow for a change of pace we will be guest posting over at She’s Becoming Doughmesstic!  It’s going to be a little time to relax and chat in cyber/blogging world!  Friday is Fancy Friday here at LoveFeast Table.  This weeks theme is all about cake!!  We hope you get your cake story ready for it and link in on Friday.  The directions for Fancy Friday are here! FF-Badge-angle

Finally, we leave you with this post we did for last Mother’s Day~Lemon Souffle for Mother’s Day. (Which we highly recommend as a Mother’s Day dessert!)   We posted it April 29th, 2009.  You can tell that we are just getting our sea legs on the blogging boat.  We were still whining about technology and feeling a little overwhelmed!!  Also, we added one more link about the small china dishes that we recently wrote about..see if you can find it and read why Kristin’s dishes hold so many memories for us!

So here’s a “blast from the past”.  We hope you enjoy a little LoveFeast history!

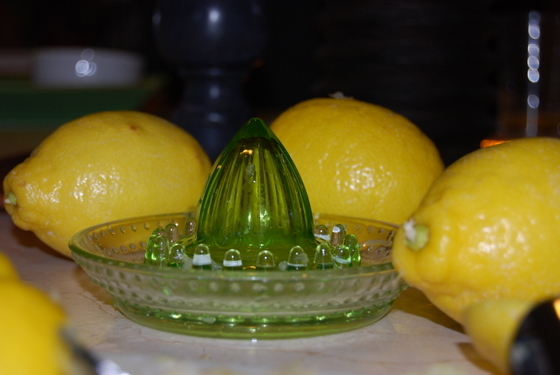
So, I just spent the morning reading about the adventures of Ree Drummond, The Pioneer Woman, her blog and her twitters, and also, I must add:  that of her bloggy friends, like Smitten Kitchen.  And, let me tell you!  These people are going to spontaneously combust with creativity and energy!  I don’t think they’re normal!  And, I say this with MUCH admiration, as well as awe.  My reasoning?  They are waking up at the crack of dawn, 5 a.m. to cook!  And, they turn out more cooking and baking in a couple days than I could hope for in a month!  PLLLEase!  I have been twittering about pie baking for at least a couple days.  And yet, still no pie!  Come on people!!  Show us some slack!!  You are raising the bar way too high for us newbie bloggers!!  I mean we are still trying to figure out our technology let alone some of us, our kitchens!!  I was up until two o’clock in the morning trying to get pictures formatted and dealing with the blog eatting monster at WordPress!  Don’t you just need to put your swollen feet up and read a magazine? (To let us catch up.) OK, whew!  Got that off my chest.  How’s a girl to blog with all that up in her head?  Anyhow, back to MY post.  It’s all about these sweet little lemon souffles!  Let me tell you the back story on these little lemons.  The first time I had this dessert was at Kristin’s, for our friend, Magy’s wedding shower.  Magy, was born and raised in Switzerland.  She can fold clothes tighter than anything you’ve ever seen.  Seriously.  It’s like magic.  Of course, there were many amazing treats to be had that afternoon…but, there was a fuss in the kitchen…excitement was building…something special was coming! Suddenly, small china plates were presented here, there and everywhere, with stout little lemons puffed with souffle!  We all dug our silver teaspoons into the lemony warm bliss.  Wonderful!  I remember feeling very unladylike after that, wondering if one more, “Oh, my goodness, that was the best dessert I have ever had!!” would get me seconds.  With obnoxious hopefulness, I eyed around for leftovers.  No such luck!  For years they remained a memory of a very special dessert.  And, quite frankly, after hearing about how tedious the scooping out of all those lemons were, I pretty much had settled with the fact that I wouldn’t be having this dessert again, anytime soon. After so long,  recently, I decided to make them for my family:  my husband, four kids, Grandma and Grandpa, and Nana.  I decided really, on a whim.  I wanted to make something special and unexpected, theatrical, and just…fun.  And, I had a bag of lemons.  And, it was the middle of winter in Minnesota (about a month ago).  And, I have a habit of wanting to pretend we are some place warmer in the winter, thus the tropical fruit desserts. So, if you want to put down something that makes you look and feel like Martha…and it should, because it’s her recipe, from The Martha Stewart Cookbook.  Here’s the secret:  they’re easy!  All you really need is time (cleaning out the lemons takes some time) and tough strong hands (we’re dealing with acid here, people).  And, of course, an audience, to appreciate your amazingly beautiful dessert.  Each lemon affords about six scoops of souffle.  It’s all about the “presentation wow factor”, because scoop-scoop, and it’s gone.  They are light and sour.  They were too sour for my daughter. Next time, I might concede to add a little more sugar, maybe two or more tablespoons, even.  Will that throw the souffle?  It’s my first souffle, so if you know, you’ll have to tell me!  Wouldn’t these be superb for Mother’s Day?  I highly recommend them, very lady like.  And, Nana liked them, too! So, here’s the scoop:  in the next week or so, I will be producing a pie.  There, I said it…I’m “intending” it, even.  So, out into the universe go! you happy pie producing vibes and bring me back some energy!  I’m telling you, if I was cloned, I’d be getting a lot more done!

Share and Enjoy:
  • Facebook
  • TwitThis
  • StumbleUpon
  • Technorati
  • del.icio.us
  • Digg
  • Google Bookmarks
  • LinkedIn
  • Live
  • MySpace
  • Twitter
Mar 30
Avocado Pound Cake Recipe Continued
Posted by ChrisAnn in Boulangerie ya' baby! on Mar 30th, 2010 | Comment Bubble  7 Comments »

DSC_0099

OK, so we left off yesterday gearing up to make Joy The Baker’s lovely Avocado Pound Cake.  All of you that did not have the proper gear had an assignment to go out and buy yourself a descent sifter-a sifter that isn’t plastic, wimpy, or has a half peeled sticker stuck on it for approximately 19 years.

DSC_0002

My basic plastic sifter model became a violent weapon with the ability to blind.  This is an example of the shrapnel leftover after the “accident”.

DSC_0062

Just to remind you…a heap of this was blasted at me.

DSC_0055

Now, protection is necessary.

DSC_0018

Now to say that it got easier after that…would be a bit of an exaggeration.  We don’t call these posts Boulangerie ya’ baby! for nothing.  I have, if nothing else, honesty.  I have no doubt you can improve upon my methods.  But, to ease your mind and bolster your confidence let me say I doubt very much that your eggs and sugar will do this like mine did.

DSC_0067

Your flour, I will assure you, will not whip all over your counter like a dust storm.

DSC_0087

Eventually you will get a nice light green batter–no doubt sooner than I.  It is only a testament to Joy’s superb recipe creation to say that even after all my accidents and catastrophes I still eventually got these two, albeit concave loaves.

DSC_0089

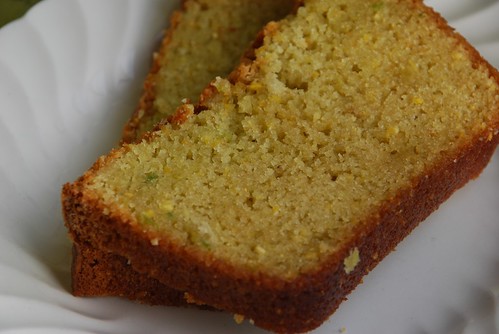
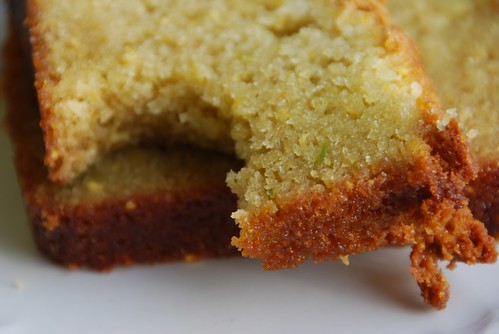
All was not lost.  They sliced up nice.  They are a lovely light green.  They sort of taste like lightly avocado flavored corn muffins.  In a good way-in an I want to eat them for breakfast, snack, and before bedtime kinda way.  So, be good to yourself.  Make these Avocado Pound Cakes from Joy The Baker.

DSC_0102

Recipe from Joy The Baker

3 cups all-purpose flour

1/2 cup yellow cornmeal

1/2 teaspoon salt

1 teaspoon baking powder

1 teaspoon baking soda

3/4 cup unsalted butter, softened

3 cups sugar

4 large eggs

2 teaspoons pure vanilla extract

3/4 cup buttermilk

flesh of 1 1/2 ripe avocados, just over a cup of avocado, mashed

Preheat oven to 350 degrees F.  Grease and flour two 9×4×3-inch loaf pans and set aside.

In a medium sized bowl, sift together flour, cornmeal, salt, baking powder and baking soda.  Set aside.

Set the four eggs out on the counter to come to room temperature while you beat the butter and sugar.

In the bowl of a stand mixer, beat butter on medium speed until softened and pliable.  Add the sugar and beat until light and fluffy, about 4 minutes.  Add the avocado and beat another minute to incorporate.  Scrape down the side of the bowl to ensure that everything is thoroughly mixed.

Add the eggs one at a time, beating 1 minute after the addition of each egg.  Beat in vanilla extract.

Reduce the mixer speed to low and add half of the flour mixture, all of the buttermilk, and then the rest of the flour mixture.  Beat just until combined.

Divide the dough between the two loaf pans and place in the oven.  Turn the oven down to 325 degrees F.  Bake for 40-45 minutes or until a skewer inserted in the center of the cakes comes out clean.  Let cool in the pan for 10 minutes, then invert onto a cooling rack to cool completely.

DSC_0101

Want some more Avocado Pound Cake inspiration?  Check this out!  Joy’s beautifully catered event The Violet Hour~ an On The Lamb Food and Beverage event.  Couldn’t you just die of party jealousy?  I wonder if I could get invited?

DSC_0061

And get yourself a decent sifter…pronto!

Share and Enjoy:
  • Facebook
  • TwitThis
  • StumbleUpon
  • Technorati
  • del.icio.us
  • Digg
  • Google Bookmarks
  • LinkedIn
  • Live
  • MySpace
  • Twitter
Mar 29

DSC_0084

There was something about this month that had me craving avocados.  I found myself coming home from yoga–peeling them open and scooping out their green goodness.  I even have proof that this was going on because I tweeted it.

“I just finished yoga and then I attacked an avocado.”

Then, later on that same day, say about 7 hours later, something of an avocado/twitter/matrix/phenomena happened and I saw this tweet:

“i made avocado pound cake… lots of amazing. http://tinyurl.com/yjf5rqx

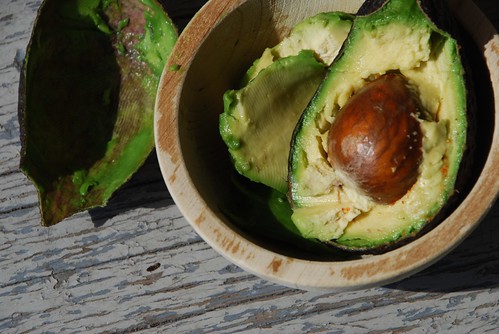
It was tweeted by Joy, of the adorable and inspiring blog Joy The Baker.  And, it contained a link to her unique lightly green pound cake.  Weird, right?  All kinds of weird “coincidences” happen like that on twitter all the time.  But, clearly this loaf was meant to be made by me.   And, thankfully I hadn’t eaten all the avocados in the house.  I had exactly one and a half left…enough to make the pound cake.  And, miracles of all miracles I even had cornmeal and buttermilk.  It was Avocado-Pound-Cake-Time…game on.

DSC_0096

Eventually I did get my little slices of green love.  But, it took some trials and I’ll be honest some safety gear to get me going in the right direction.   Heed my warning.  You could lose an eye making this loaf.  Especially if you are using a plastic sifter to sift cornmeal.

DSC_0030

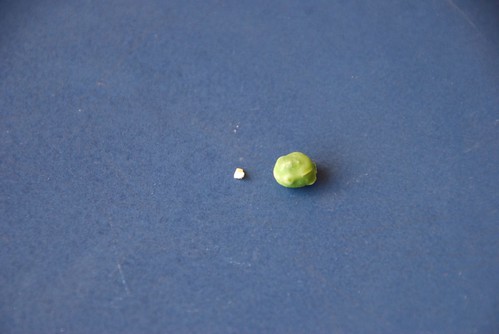
Here’s what happened.  It all started with the cornmeal.  I’ll be honest, mine seemed chunkier than normal.  And, let me just tell you right off the bat I realized that getting to a cup was going to be a little more tedious than I expected.  Teaspoon by tedious teaspoon I sifted for awhile.  Occasionally the little pathetic plastic blade would get stuck and I would jam the lever and bang it about to free up the blade again.  I’d squeeze a little harder on the handle and it would break free until finally on one good squeeze the feeble plastic blade shattered and exploded cornmeal out of the sifter.  The cornmeal flew straight out like buckshot with shocking velocity.  This, my friends, is where I was almost blinded by this near pea size cornmeal crumb below.

DSC_0110

You’d think it would be fairly easy to sift a cup of cornmeal with any ole’ sifter.  This line of thinking is  exactly where I went astray.  Like I said, word to the wise…if you own a plastic sifter.  It’s time to upgrade.

DSC_0032

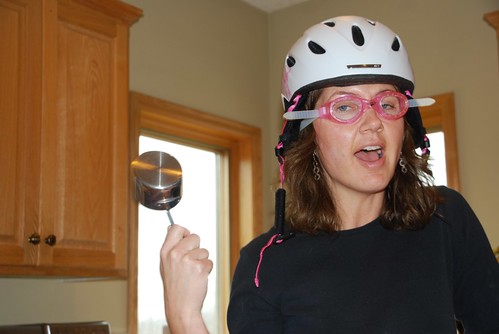
Hence, the protective eye-wear.

DSC_0017

Now go, do yourself a favor and get yourself a decent metal sifter.

DSC_0043

And, stay tuned for another bite tomorrow.

DSC_0109

‘Cause I’m not going any further ’til I take a drink ’til you gear up!

DSC_0050


Share and Enjoy:
  • Facebook
  • TwitThis
  • StumbleUpon
  • Technorati
  • del.icio.us
  • Digg
  • Google Bookmarks
  • LinkedIn
  • Live
  • MySpace
  • Twitter
Mar 15
Peanut Butter Cookie Recipe
Posted by ChrisAnn in Boulangerie ya' baby! on Mar 15th, 2010 | Comment Bubble  5 Comments »

DSC_0058

Peanut Butter Cookie Recipe from The New Basics Cookbook, by Julee Rosso & Sheila Lukins.

Ingredients:

8 tablespoons (1 stick) unsalted butter, at room temperature

1/2 cup chunky peanut butter (I used creamy…you can choose your own life path here.)

3/4 packed light brown sugar

2 tablespoons maple syrup

1 egg, lightly beaten

1 teaspoon vanilla extract

1 1/2 cups unbleached all-purpose flour

3/4 teaspoon baking soda

1/2 cup salted peanuts, coarsely chopped (Too much peanut going on here for me…this is where I diverge from the path of peanut and look for something a little bit more colorful to add to my cookies, like M&M’s.)  But feel free to make your own destiny!

DSC_0104

Preheat the oven to 375 degrees.

1.  In a mixing bowl cream butter, peanut butter, and brown sugar until light.  Then, beat in the maple syrup, egg, and vanilla.

2.  In another bowl, toss the flour with the baking soda and peanuts.  Beat this slowly into the liquid ingredients.

3.  Drop the mixture by rounded tablespoonfuls on baking sheets.  Flatten and print slightly with a fork.

4.  Bake until golden 7-8 minutes.

Makes 2 dozen cookies.

Need inspiration to take your ordinary to extraordinary?  It might be here.  Or, at any rate we can commiserate!

What do you add to jazz up your plain ole’ peanut butter cookies?

DSC_0073

Ideas…please share…..and oh yeah…do you dunk or not?

*****

Sweet Tweet Tips from Twitterville!

@IlikeitFrantic I like it Frantic “Hershey kisses”

@kellyhoosier Kelly’s Home “peanut butter chips”

@jjLassber JJ Lassberg “roll in sugar before cooking”

@QuatroMama 4Tunate “Hershey kiss on top”

@sincerenicole Owl Little Family “chocolate”

@mmarzipa Medicinal Marzipan “coconut and chocolate chips”

@oohamanda Oh Amanda “Hershey kiss on top”

@MyMan’sBelly My Man’s Belly “chopped up Reese’s cups”

@bestoffates Best Of Fates “love and joy and a small amount of awkwardness”

@wearsmanyhats She Wears Many Hats “chocolate”


*****

Share and Enjoy:
  • Facebook
  • TwitThis
  • StumbleUpon
  • Technorati
  • del.icio.us
  • Digg
  • Google Bookmarks
  • LinkedIn
  • Live
  • MySpace
  • Twitter
Mar 1
Double Delicious Bars Recipe
Posted by ChrisAnn in Boulangerie ya' baby! on Mar 1st, 2010 | Comment Bubble  15 Comments »

DSC_0134

I’m just so sorry I didn’t share.  Really.

DSC_0141

Had I known you were craving something buttery, chocolaty and warm…I would

DSC_0138

have invited you right over.

DSC_0147

Since I got this recipe from an old church cook book, I’m fairly sure my sharing side would have kicked in.

DSC_0120

Yes, I’m pretty sure I would have shared.

DSC_0142

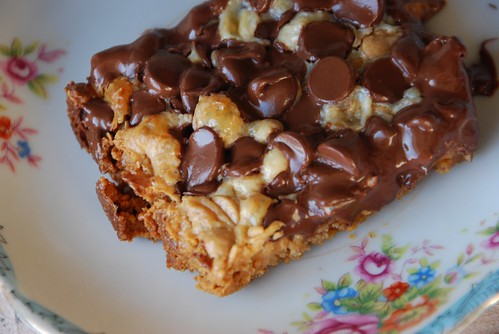
But you could whip up a batch real quick. They are Double Delicious Bars, shared by Mildred Morken many years ago in the Trinity Lutheran Church cookbook.  They are also seen at Bake or Break and most originally from the Eagle Brand Website.  But today….we’ll give Mildred the credit.

Double Delicious Bars

1/2 Cup Butter

1 1/2 Cups Graham Cracker Crumbs

14 oz. can Sweetened Condensed Milk (Eagle Brand)

12 oz. pkg. Hershey’s Semi-Sweet Chocolate Chips

1 Cup Reese’s Peanut Butter Chips (Variation: Heath Chips)

Preheat oven to 350 degrees.  Then, in a 9X13 pan,

DSC_0092

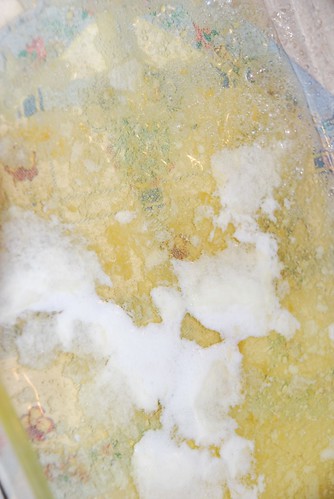
melt butter in the oven.

DSC_0097

Sprinkle cracker crumbs evenly over butter.

DSC_0100

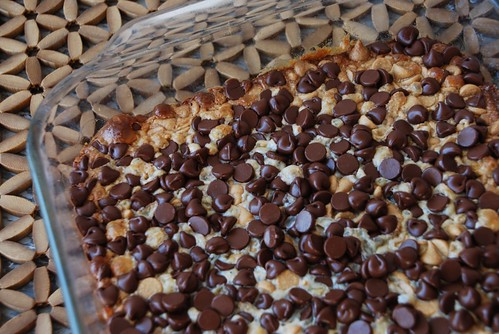
Then, evenly pour over condensed milk and top with the chips.

DSC_0116

DSC_0115

Bake 25-30 minutes until lightly browned.

DSC_0133

Cool and cut into bars.

DSC_0142

And, be nice.  Share.

**Our friend and fellow blogger Janelle from Queen of the House of Boys did just that with her own Classic Brownies……who could you be inspired to LoveBomb with some goodies?

Other nibbles of Bar and Cookie love from LoveFeast Table:

Almond Triangle Recipe

LoveFeast Espresso Cookies

Baking with Baked ’til Baked

Oh Henry Bars Recipe

Love Log at the Ladybug Luncheon

Share and Enjoy:
  • Facebook
  • TwitThis
  • StumbleUpon
  • Technorati
  • del.icio.us
  • Digg
  • Google Bookmarks
  • LinkedIn
  • Live
  • MySpace
  • Twitter
Feb 9
LoveFeast Chocolate Espresso Cookies
Posted by ChrisAnn in Boulangerie ya' baby! on Feb 9th, 2010 | Comment Bubble  1 Comment »

DSC_0033

Something came over me the other day.  I was in “project mode”…whirling around the house cleaning, cooking dinner (chicken roaster in the oven), spinning through laundry AND baking.  Yes, all that and more including laying out what I needed to pack for Blissdom.  Oh yeah, and I had ground an abundance of espresso that morning, which made me think about making something with espresso in it.  They are crumbly in texture because of the espresso but not too dry.  They sort of remind me a little of  biscotti taste and texture.  The espresso flavor is very pronounced, but in a good way if you like espresso.  If you need a little pick me up…one of these

DSC_0030

with a cappuccino will do the trick!  Maybe that’s why I got so much done!

DSC_0069

Ingredients:

1 1/2 C. Butter

3/4 C. Sugar

1 1/3 C. Flour

1 Tsp. Baking Soda

1/2 Espresso

1 Tsp. Vanilla

1 Egg

2 oz. Dark Chocolate (I used Lindt Excellence, Intense Dark, 70% cocoa)

2 oz. Hazelnuts

1/2 C white chocolate pieces (I used Whole Foods brand, 365)

Preheat oven to 350 degrees.

Mix butter and sugar until creamy in mixer.  Continue mixing and add egg and vanilla.

Add dry ingredients (flour, baking soda, espresso) and mix.

Slowly mix in hazelnuts and white chocolate.

Spoon unto greased cookie sheet and bake 10 minutes.

Like I said this treat got me a little ramped!  So then I decided to share the love.  Kristin had shared her cookie love awhile ago, with an idea that came to her from the cookbook, Baked New Frontiers In Baking.  I had some extra so I decided to pack up some sweet treats for a friend and make a special mailbox delivery with it!

DSC_0085

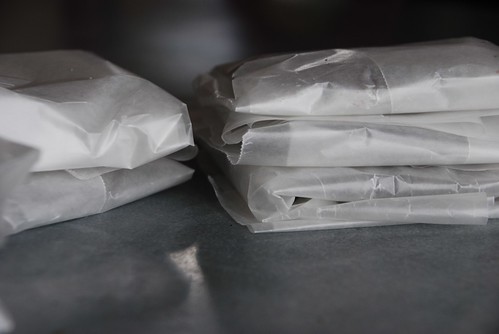
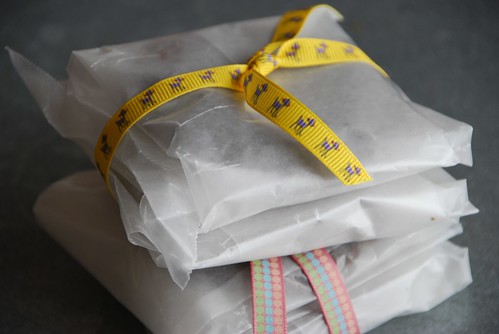
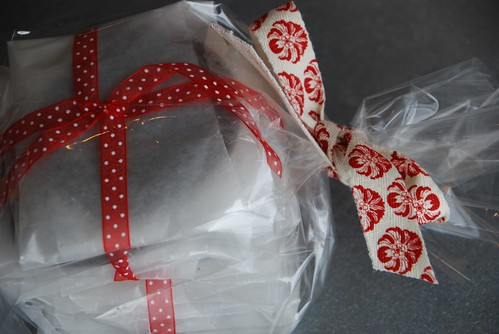
First I wrapped up each cookie in wax paper.  I wanted to keep them moist, protect them, and I just think it looks neat..like each cookie is a special gift to unwrap. Kristin wrapped up her cookies for Christmas gifts too, only she used little bags.  Great minds think alike, or at least steal good ideas from good cookbooks.    Here’s a stack for Kristin.

DSC_0045

And, here’s a stack for Kelli, a friend who shared this recipe with us.

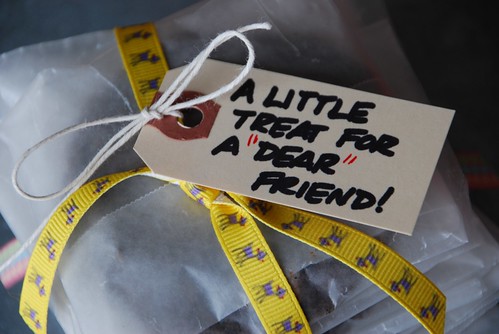
DSC_0044

For my friend Kelli I tied up the cookies with deer ribbon.  Cute right?  Get it “deer”…”dear”.

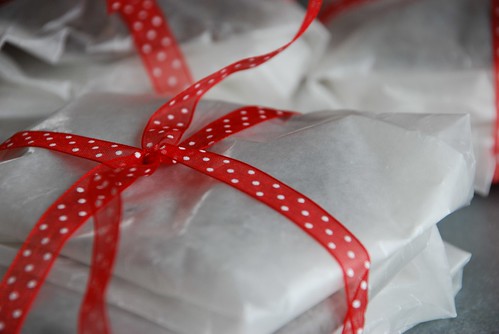
DSC_0082

Kristin got red ribbon because it’s good for birthday’s and good for Valentines Day AND I didn’t think she wanted to be reminded again for the DEER she hit, um, I mean hit her a few months ago.

DSC_0054

Now go find somebody to LoveBomb!!

DSC_0053

Or, send it as a Valentine!  Enjoy!

DSC_0063

Share and Enjoy:
  • Facebook
  • TwitThis
  • StumbleUpon
  • Technorati
  • del.icio.us
  • Digg
  • Google Bookmarks
  • LinkedIn
  • Live
  • MySpace
  • Twitter
Jan 20
Banana Cake Recipe
Posted by ChrisAnn in Boulangerie ya' baby! on Jan 20th, 2010 | Comment Bubble  3 Comments »

DSC_0063

Banana Cake  (adapted from the Chic Simple Cooking)

This cookbook is an oldie of mine.  I got it at a flea market in Maryland with Kristin and our families, when our kids were really little.  I always remember it as a  hot day, towing little ones, and Em got stung twice near her eye by a bee.  We had picnic and I think our boys got Star Wars coloring books.

Serves 16

2 Cups Sugar

1 Cup Canola or Vegetable Oil

3 Large Eggs

1 Tbsp. Vanilla Extract

4 Overripe bananas, mashed with a fork

3 Cups unbleached all-purpose flour

1 Tsp. Baking Soda

1/2 Tsp. Baking Powder

1 Tsp. Salt

1/2 Tsp. Ground Cinnamon

1/2 Tsp. Ground Nutmeg

1.  Preheat oven to 325 degrees F.  Lightly grease and flour a 10-inch Bundt pan.

2.  Beat the sugar, oil, and eggs together in a large bowl.  Add vanilla and bananas and mix until just combined.

3.  In a separate bowl, combine the remaining ingredients and add to banana mixture.

4.  Mix until just combined.  Pour into Bundt pan and cook 1 hour.

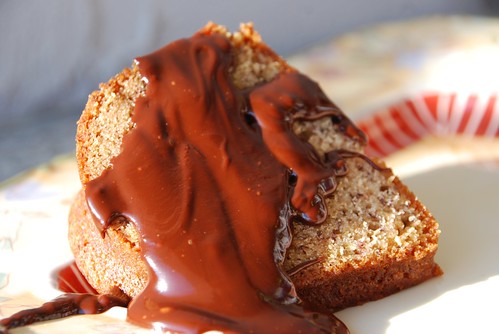
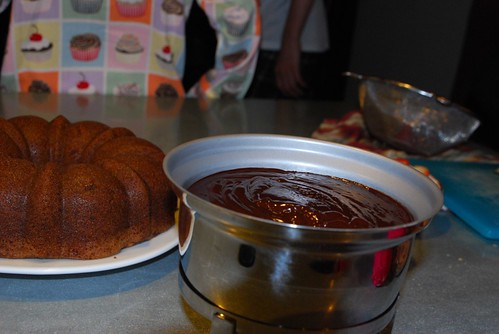
This bittersweet glaze is wonderful poured over top the warm Banana Cake.  I have made it tons of times..and of course you can always save a little for some ice cream.  But, for full disclosure….I’ll let you know the thicker sauce in the above picture is not this sauce….exactly.  It’s actually a very similar concoction my husband whipped together for our late night pajama fondue party with our kids.  We cut up the banana cake, along with some pretzels, marshmallows, Rice Krispie treats, strawberries, and oranges.

DSC_0075

Silly us, what were we thinking?…get there pj’s on, get them ready for bed and then whip out every amount of sugar possible, fill there bodies to the brim with treats and then send them to bed.  Yeah, like that works out.

DSC_0066

Chocolate Glaze  (The one that goes with the recipe – that I have actually made tons of times.)

3 ounces Semisweet Chocolate

3 Tbsp. Heavy Cream

3 Tbsp. Water

1/2 Tsp. Vanilla

1.  Melt chocolate in microwave.

2.  Stir in heavy cream, water, and vanilla into melted chocolate.

Substitute dark rum for water and vanilla if you like.

Of course, you can always just eat it like this!

DSC_0041

Share and Enjoy:
  • Facebook
  • TwitThis
  • StumbleUpon
  • Technorati
  • del.icio.us
  • Digg
  • Google Bookmarks
  • LinkedIn
  • Live
  • MySpace
  • Twitter
Nov 24
Yep Yifta Time Again
Posted by ChrisAnn in Boulangerie ya' baby!, Celebrations on Nov 24th, 2009 | Comment Bubble  11 Comments »

Yifta

Word on the street, is that some of our readers, especially those in southern Minnesota are wanting the recipe for Yifta.  Now, that’s a complicated order.  ’Cause for one thing it is a secret family recipe.  For another thing, you can only get the recipe if you join our family’s Thanksgiving table and pass the quiz of guessing what the ingredients of Yifta are.  Then, you have to promise to eat it for breakfast for the following week after you make it.

If, and only if I can trust you with at least that last item, eating it for breakfast, you are probably worthy of getting the recipe.  An added vote in your favor would be if you had say perhaps, voted for us in the Mobbies this year.  What?  You did?  Well, then, I guess I’ll give it to you.  But, first pinky swear you’ll vote again next year…..cause a little bird told us that Strawberries in Paris is going to go bizerk with campaigning over this thing next year….and well, like it’s never too early to let our readers know we are going to, like… need your votes again…..next year.  Right, Dara?

So here is the recipe.  Again, preparing this is complicated…anything could happen to botch this up.  For instance you could get the ingredients placed out of order, say like if you’re not paying attention.  Or, if you are a little messy the ingredients could smear together, creating a non-pretty-layering-effect.  Another thing that could go wrong is that you could forget to take your dish selection seriously. It is crucial- I repeat crucial- to make Yifta in a glass bowl. Using say a dark red bowl and thinking it’s going to be Christmas-y and all, but then totally wasting the layering effect, will just say that your Yifta making is amateur and of less quality than that of the glass bowl variety.  You have to know what you are doing when it comes to making Yifta.  But, since many of our readers are very loyal…and perhaps the ones requesting this recipe a little more loyal than normal..readers that voted us up to the top of the Mobbies!  What????  That was awesome and we thank you!!  Seriously…if you are going to do math all day though….don’t you like need a little artsy break to rest like the left side of your brain and all?  I would say yes.  At any rate, all you southern Minnesota math-y types or friend of math-y type people, here is the recipe you requested.  Any other readers, who happen to read this recipe, you are like sworn to secrecy AND you have to vote for us next year at the Mobbies.  Ok, pinky swear.  Ok, then, here’s the recipe.  Follow it closely and adhere to all guidelines.

YIFTA

1st Layer:  Whipped Cream (about 2 Cups)

2nd Layer:  Saltines (about 2 rolls)

3rd Layer:  Whole Berry Cranberry Sauce (about 2 cans)

Notes:  Whipped Cream cannot under any circumstances be replaced with Cool Whip.  This would compromise the integrity of this recipe.  Cool whip is cheating.  I am sure you are not or have never been a Cool Whip Cheater.  The Saltines.  I use Premium brand.  Why?  Because this dish is a premium dessert.  Cranberry Sauce.  Use only canned whole cranberry sauce.  If you try to go high end and do something ridiculous here like make homemade and/or relish-y type cranberry sauce you will totally and completely botch this up.  The recipe says Cranberry Sauce, use canned.  Don’t stray.  Stay authentic.  It will work.  Fer’ Sure.

Do you have a top secret holiday specialty?  Share yours!

Share and Enjoy:
  • Facebook
  • TwitThis
  • StumbleUpon
  • Technorati
  • del.icio.us
  • Digg
  • Google Bookmarks
  • LinkedIn
  • Live
  • MySpace
  • Twitter